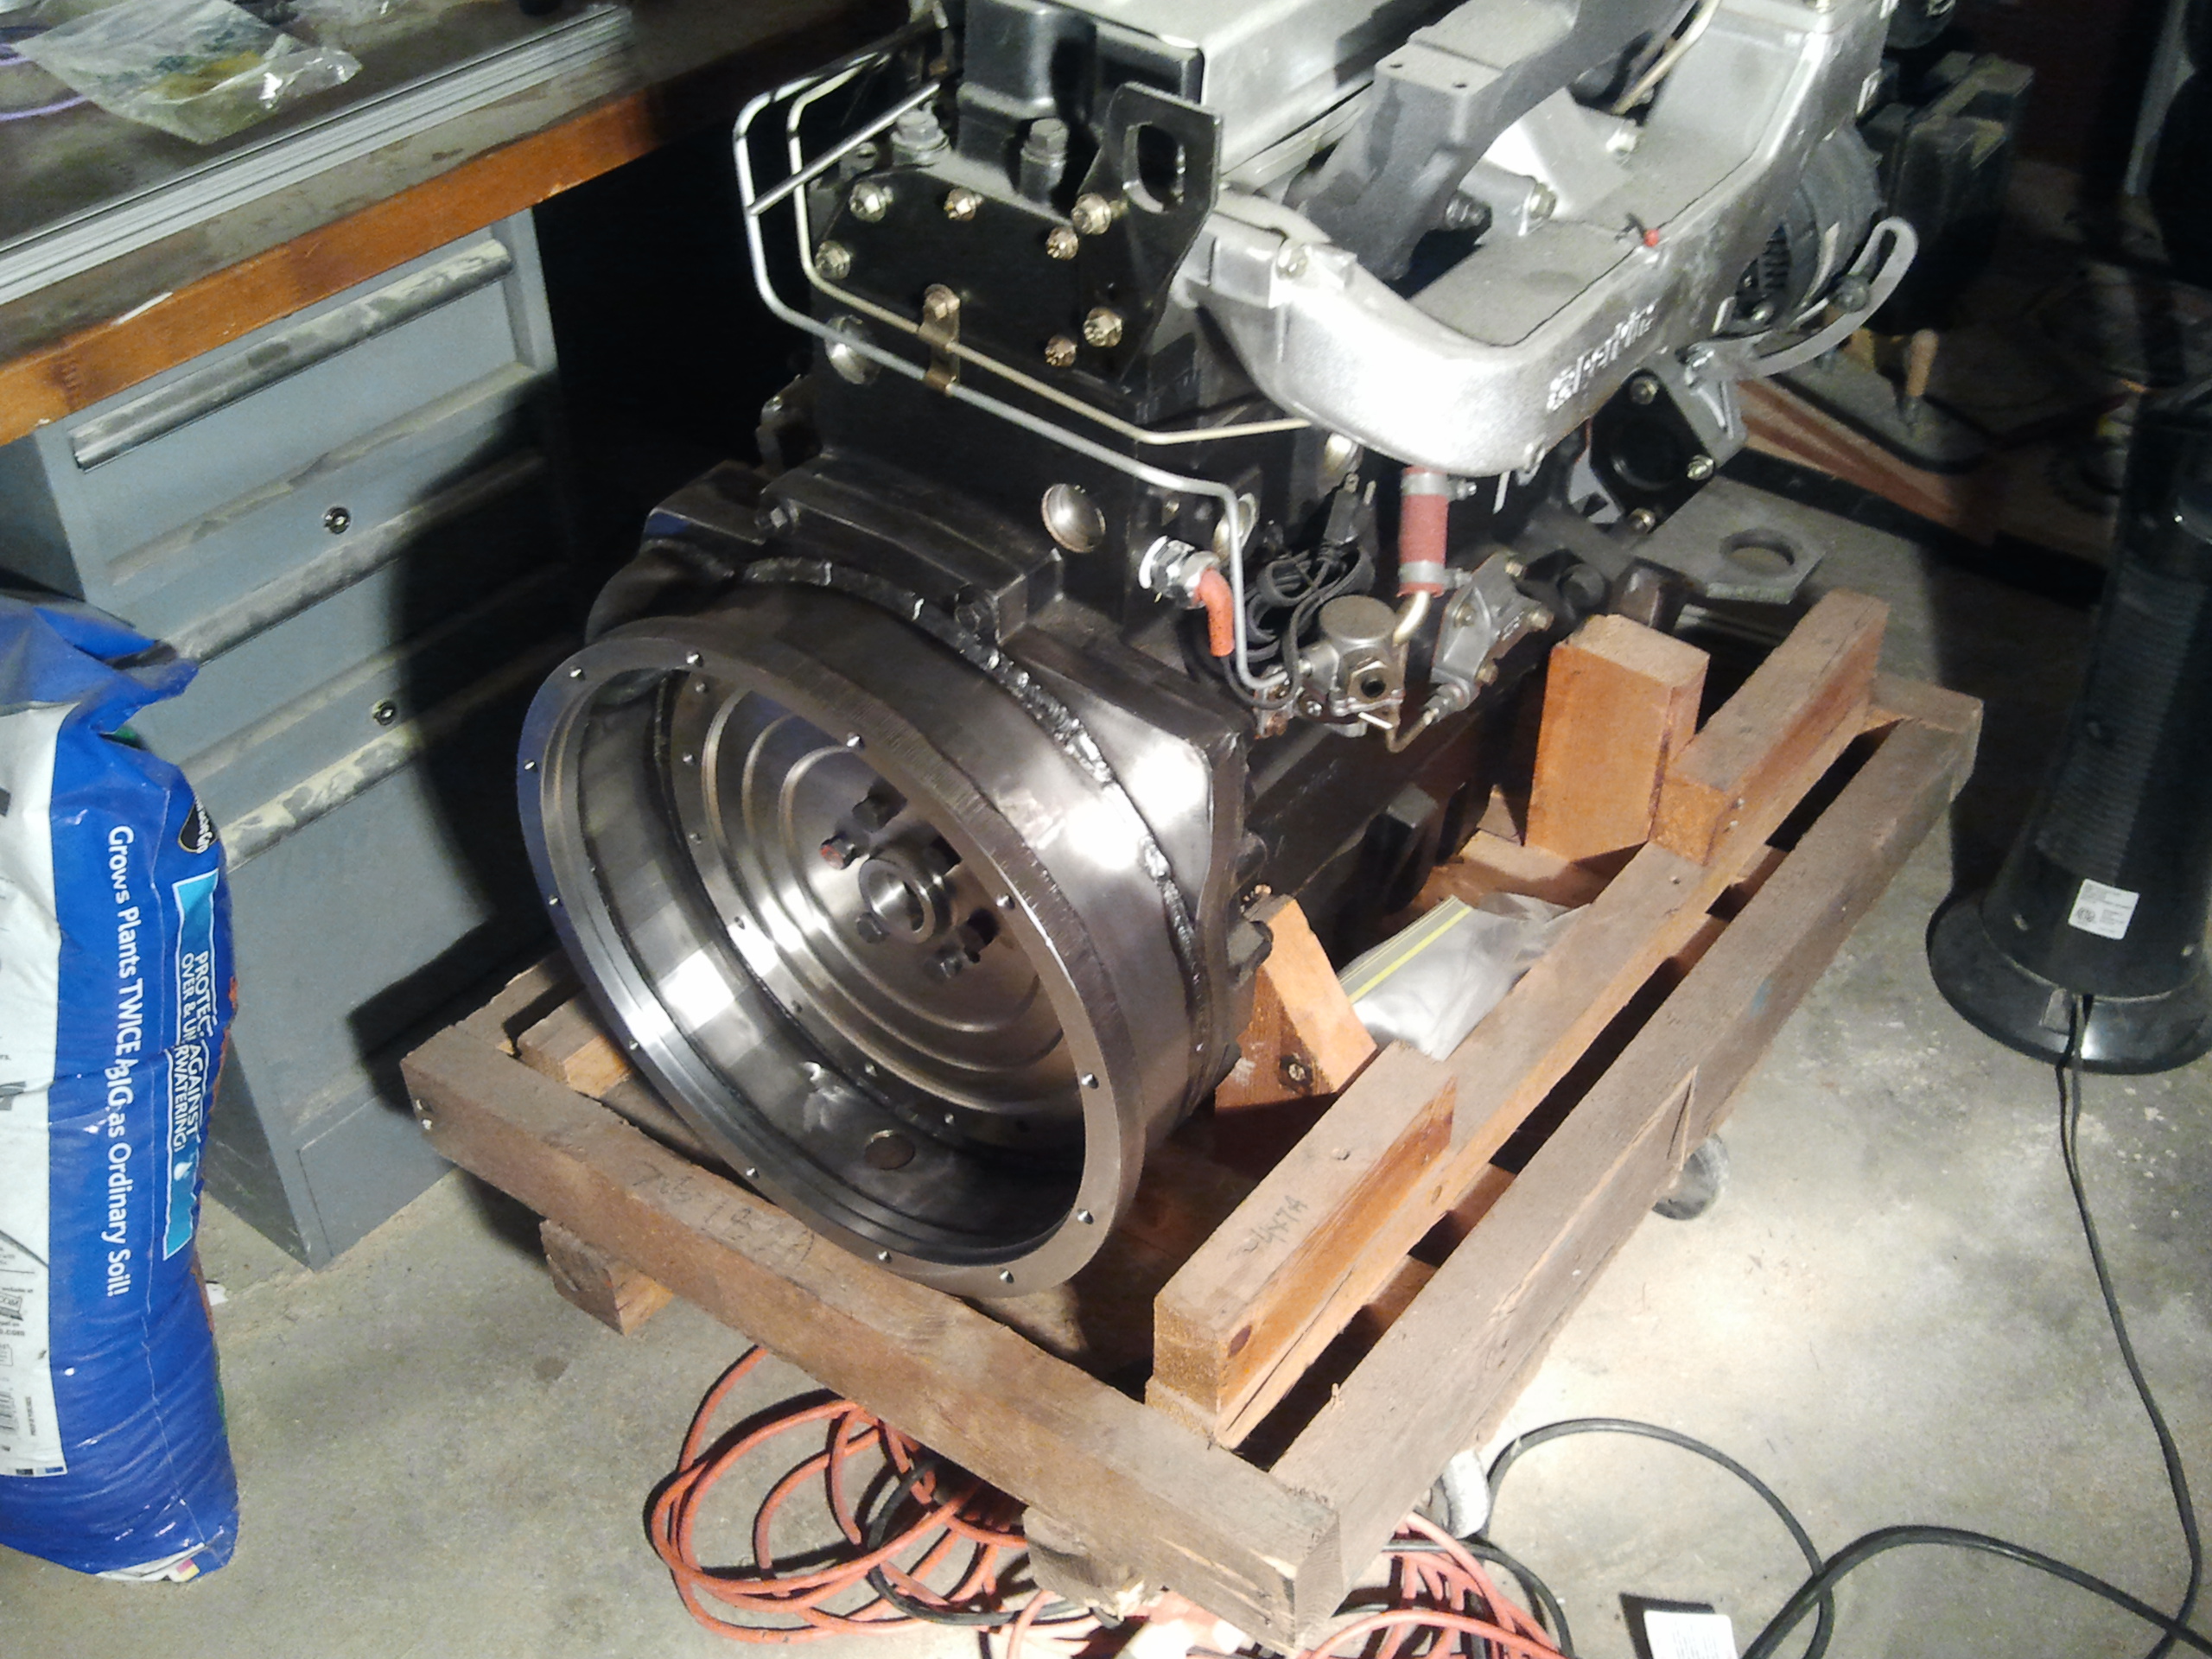
This is a brand new Perkins 1004-4T diesel engine. It was built by Perkins England in 2005 and sat in a warehouse somewhere for the last 8 years.
This 4L Perkins comes in two forms; a standard block engine like the Iveco that came out of the backhoe, and a “stress-block” where the engine is meant to be an integral part of the piece of machinery. While I was extremely lucky to find this engine for a good price, my luck didn’t hold out on the block style.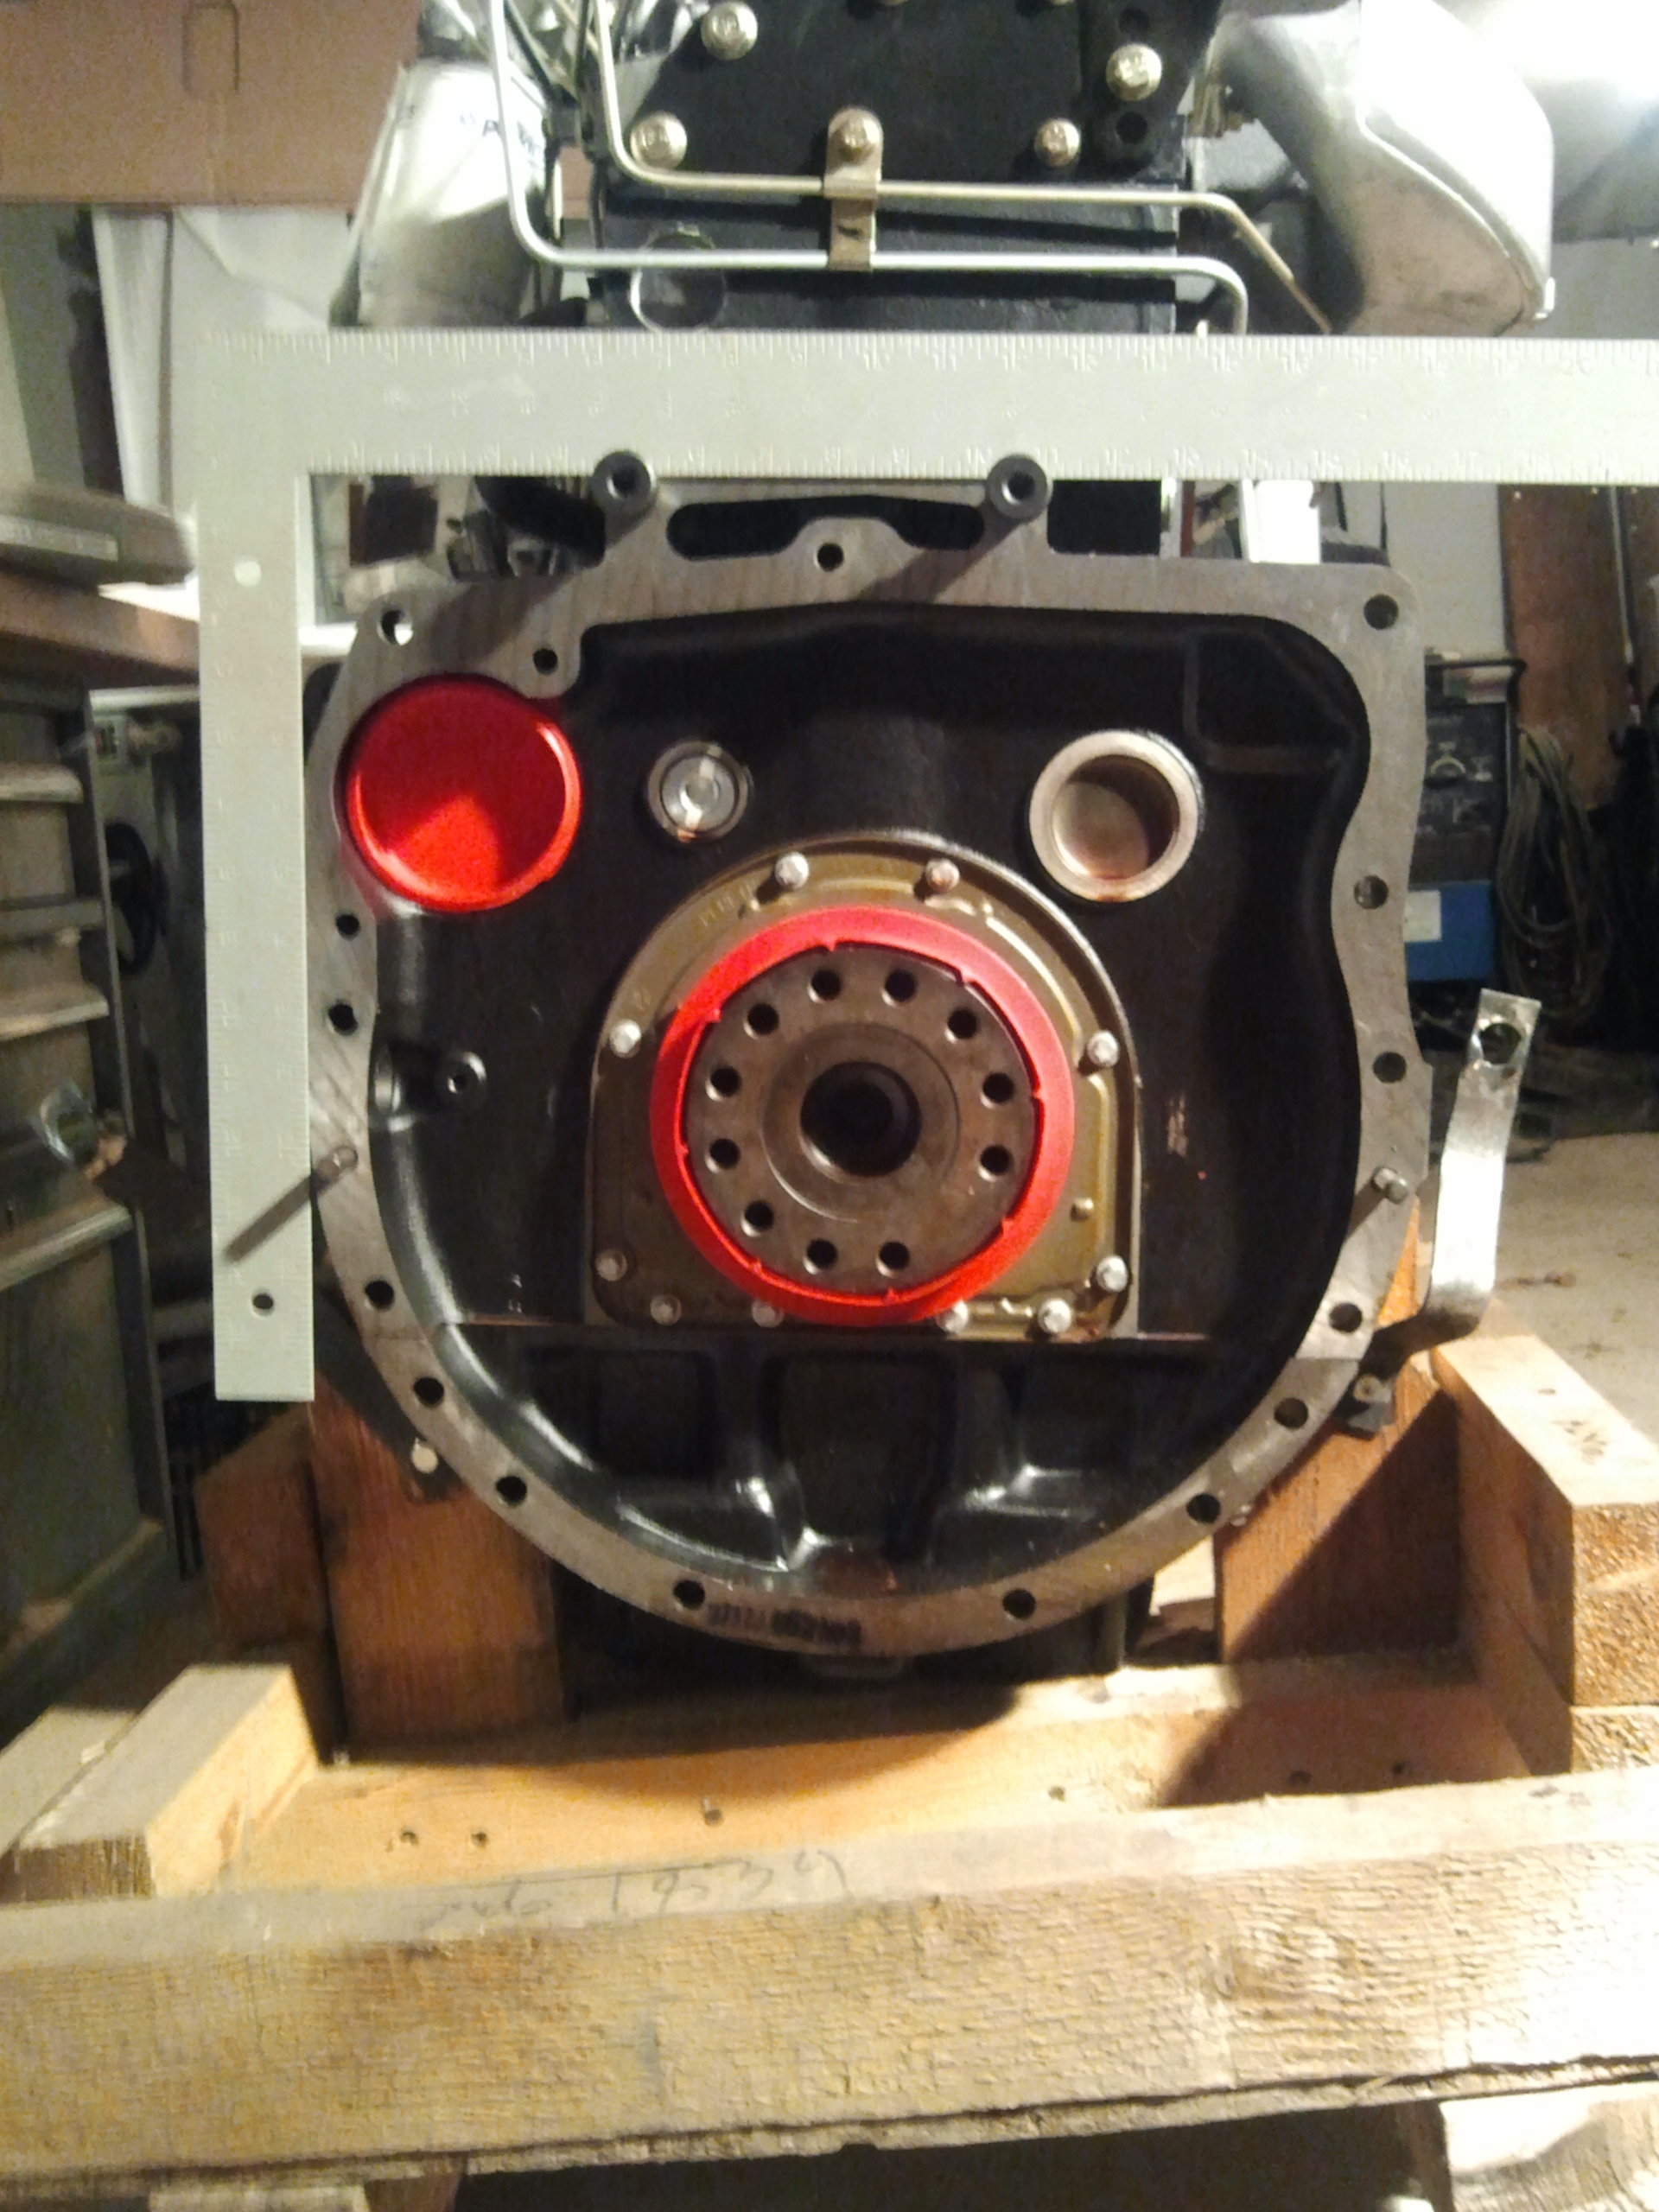
This was a stress block engine. With a stress block engine the “bellhousing” is part of the machine, and therefore industry standard bellhousings are not made for it. So my first task was to make a bellhousing. This required locating all of the holes on the engine casting relative to the crank centerline. The transmission was a standard SAE flange so its bolt pattern was readily available from published SAE specifications (SAE J617/J620). The engine bolt pattern – not so easy.
Somewhere Perkins has an Engine Completion Guide meant for OEMs incorporating Perkins powerplants into their equipment. Finding this publication or even getting anyone at Perkins to talk to me was next to impossible. After calling the eight USA Perkins distributor locations and emailing Perkins England, I was completely ignored until one technician in the Florida distributorship took pity on me and located a drawing of the 1004-40 cylinder head and block tappings and emailed it to me. Different engine, but same block casting as the 1004-4T.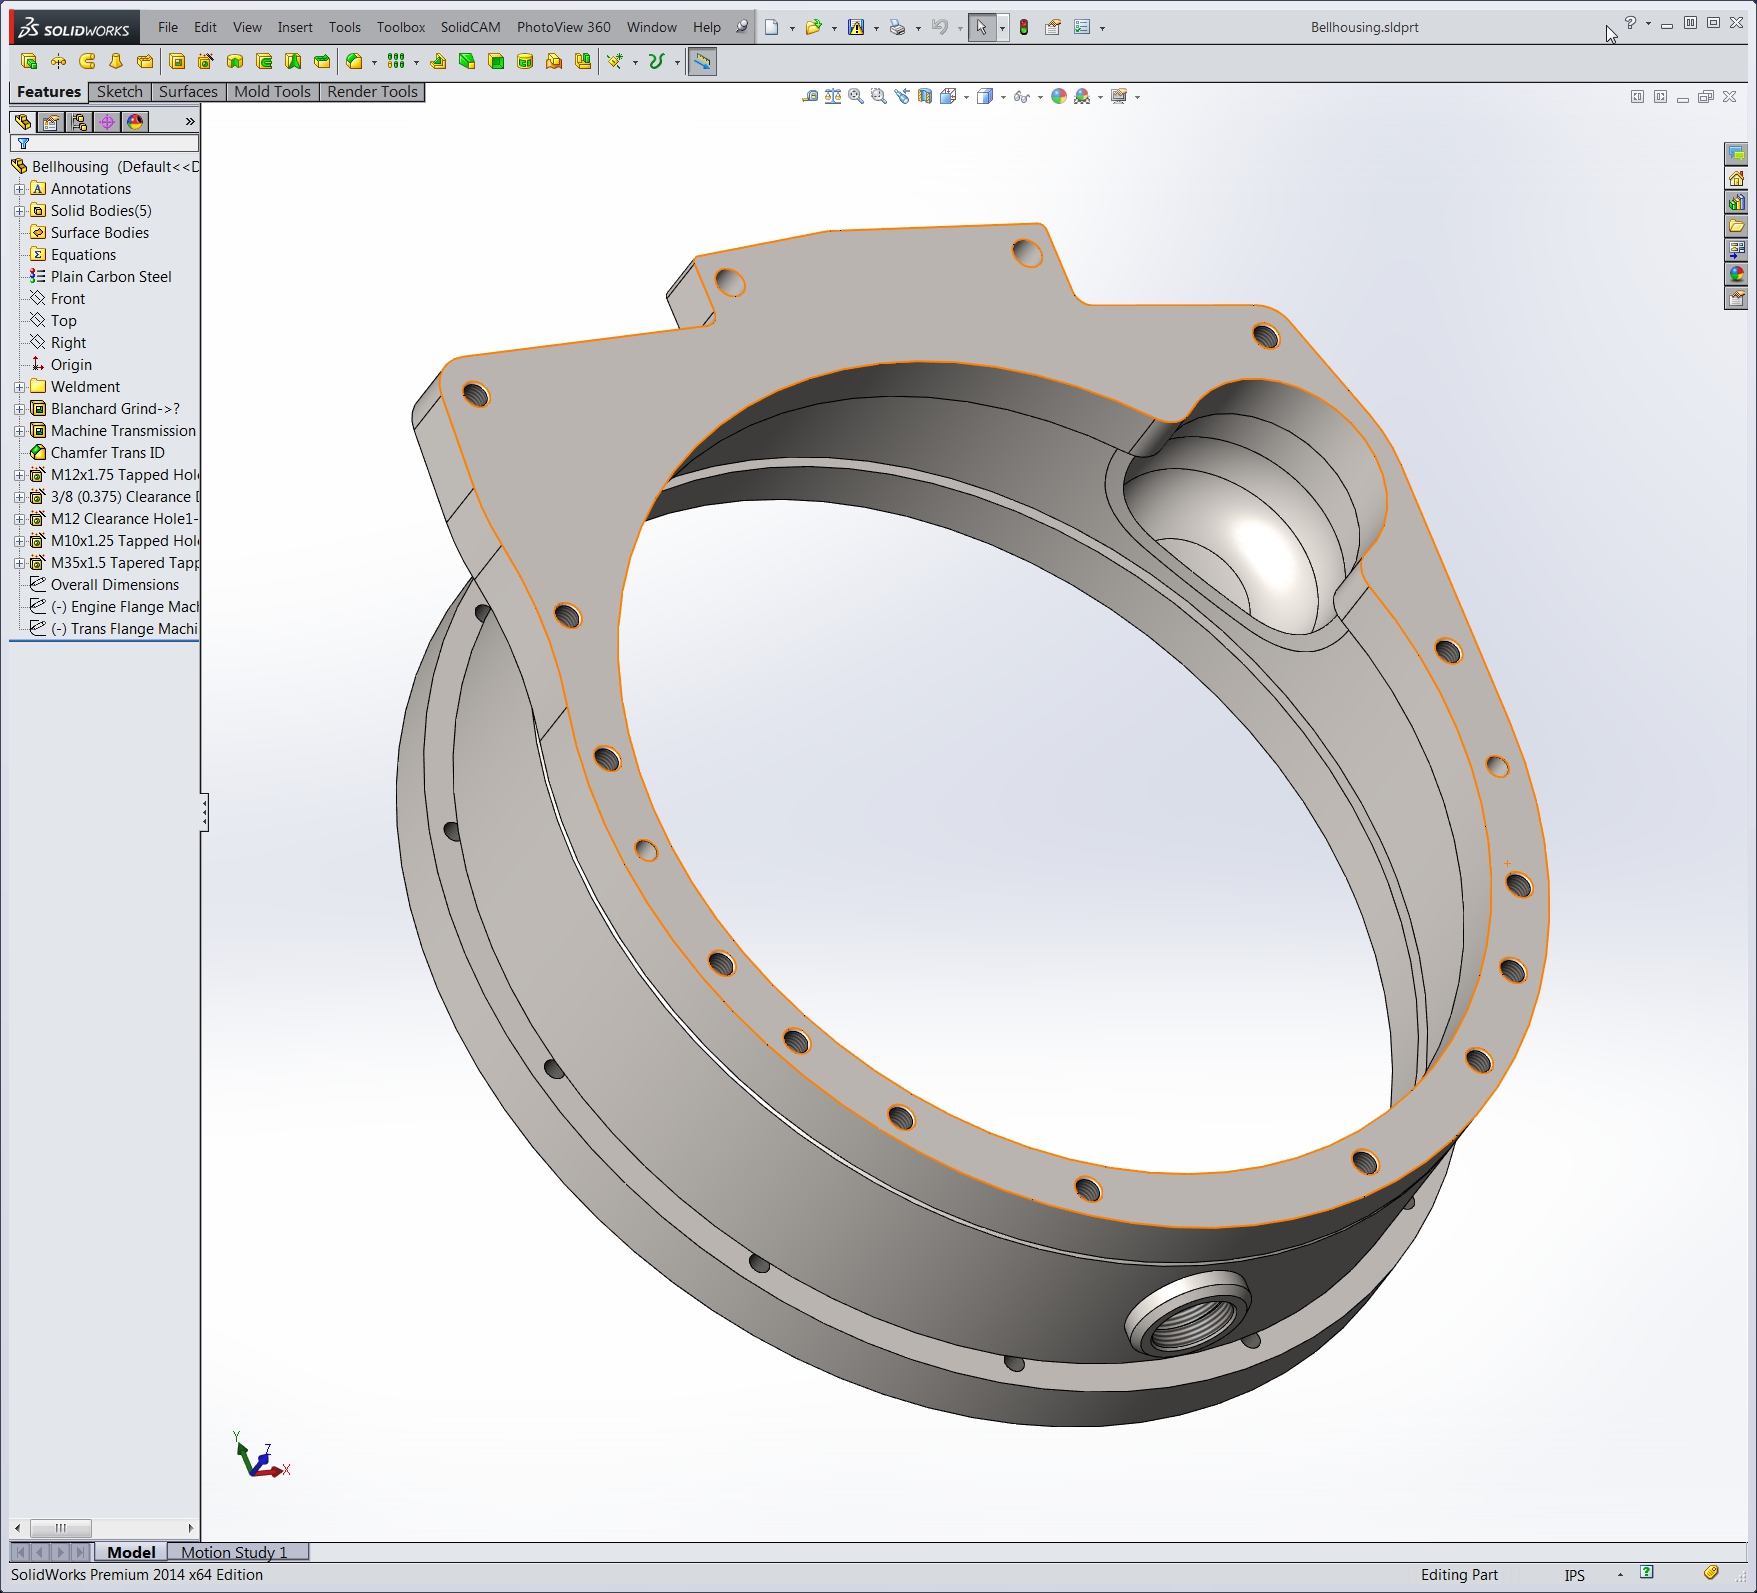
After a couple of nights spent triangulating each and every hole on the engine flange, plotting it in SolidWorks, and comparing it to the block tapping drawing, I had a pretty good bellhousing designed. The engine and transmission flanges were torched from 1” hot rolled plate, and the band was bent from ¼” CRS. The starter pocket is a 4” buttweld steel pipe cap. A new bung for the M35x1.5mm tapered pipe inspection plug was threaded on the lathe to be welded in so the existing plug could be reused.
 I made a welding jig out of some 1” aluminum tooling plate. This allowed me to fixture all of the pieces and clamp them down to mitigate warping. A couple of hours with the MIG gun resulted in a finished weldment ready for machining.
Next, it was off to the mill to face both flanges and drill and tap the mounting holes. My mill has 16.9” of travel in the Y direction and I needed 16.84” of that to machine this part. 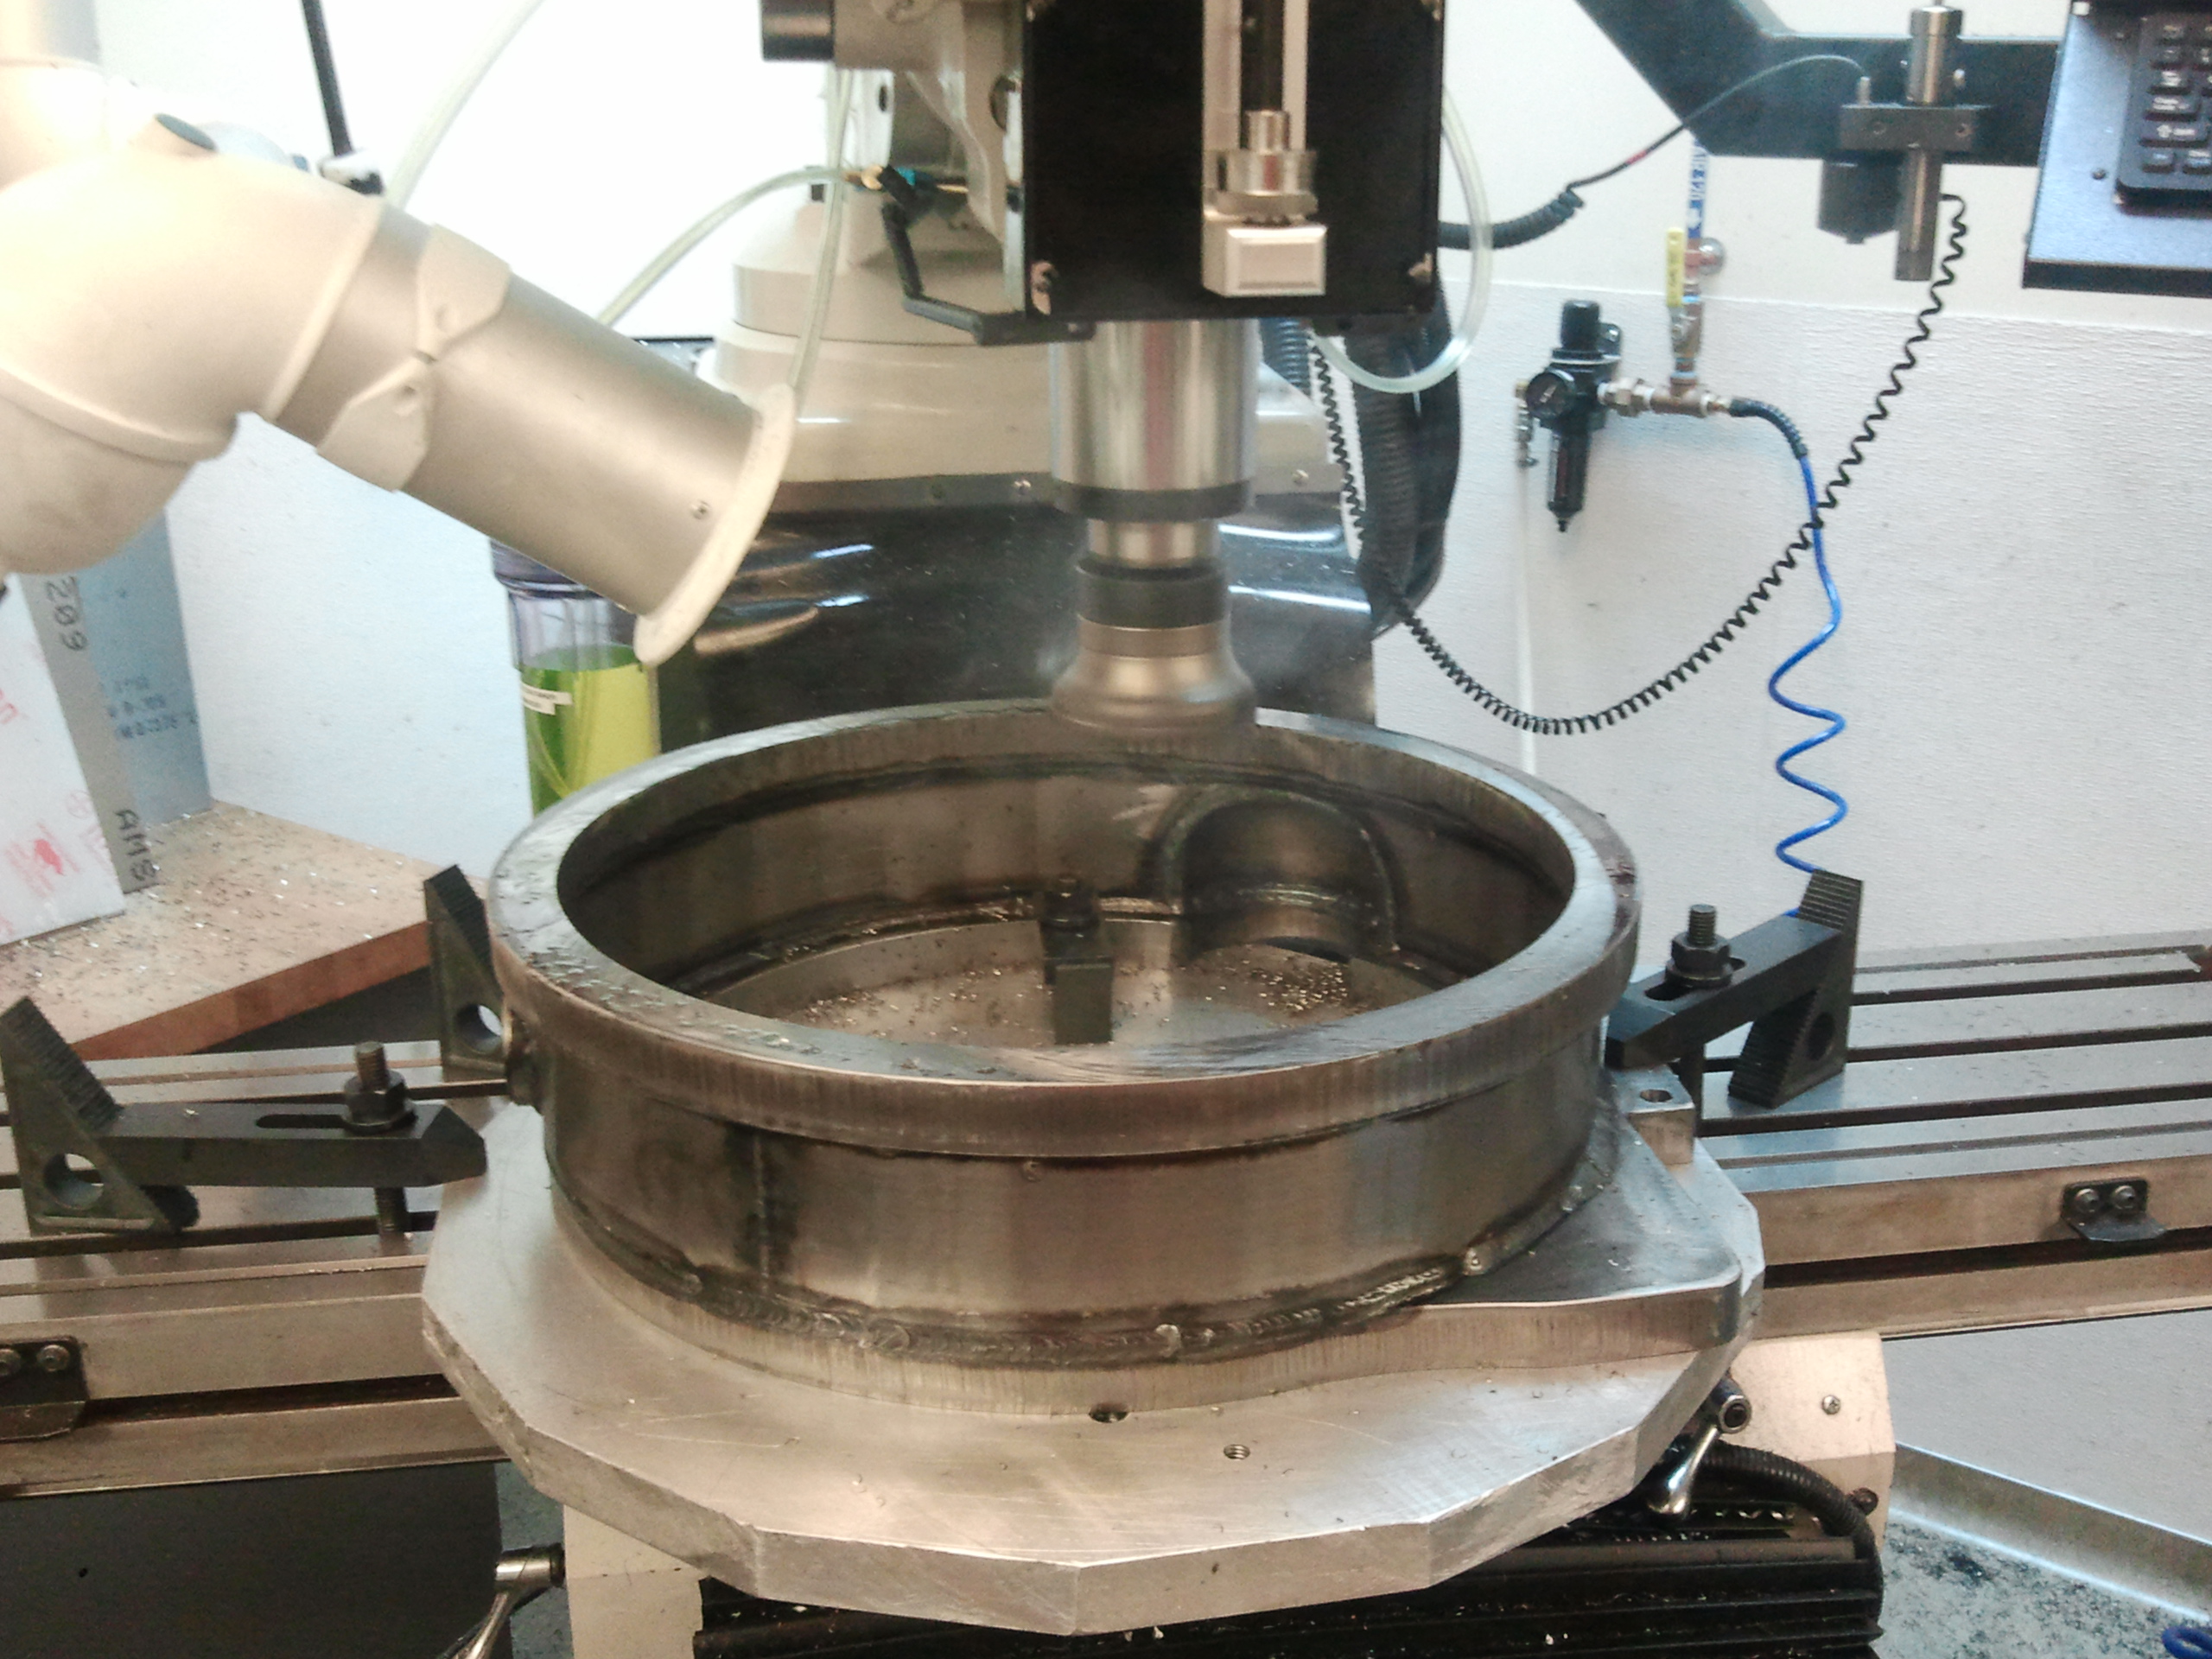 It was a very fun exercise and the final result will work nicely. All tapped holes were blind to keep dirt and rust out of the threads.