
- Quorn Parts 100/101, The Bases
- Quorn Parts 102/103, Bed Bars
- Quorn Part 104, Wheelhead Column
 I had a slight problem when making my wheelhead column. I couldn’t find any competent machine shop with a 4-axis CNC mill to run the spiral groove. So, I needed to come up with a way that I could do it myself with the manual machines I had at my disposal. My gearhead lathe couldn’t cut a 2TPI thread so I had to find a way to make this part on the mill.
First was the task of connecting the rotary table to the mill’s X-axis feed screw. I could use a worm-drive gear reducer to turn the corner, but I was still faced with the problem of needing to make a 2TPI groove with a 6mm per turn feed screw on the mill. I guess I could have decided to make the column with a metric pitch, but I wanted my Quorn to be Imperial since it will ultimately end up in the US.
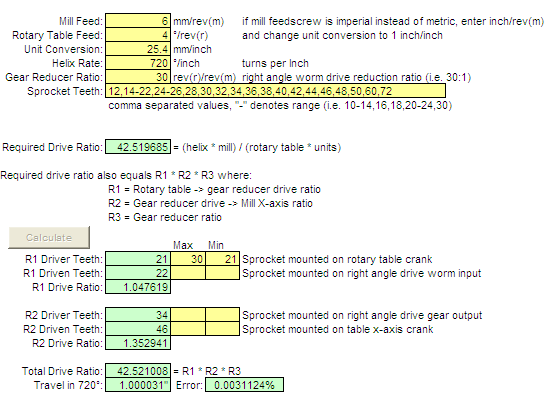 I whipped up a quick Excel spreadsheet (Helix Drive Ratio Calc) to calculate the necessary belt ratios given a 30:1 worm gear speed reducer in the middle. I gave it all the toothed pulley sizes that I could easily get and let it iterate through all the possible ratio permutations. I added the ability to constrain the pulley sizes since I was limited on how large and how small I could go on the pulley that mounted on the rotary table.
The last line on the spreadsheet was good news! I could get more than enough accuracy cutting an Imperial thread using a metric feedscrew.
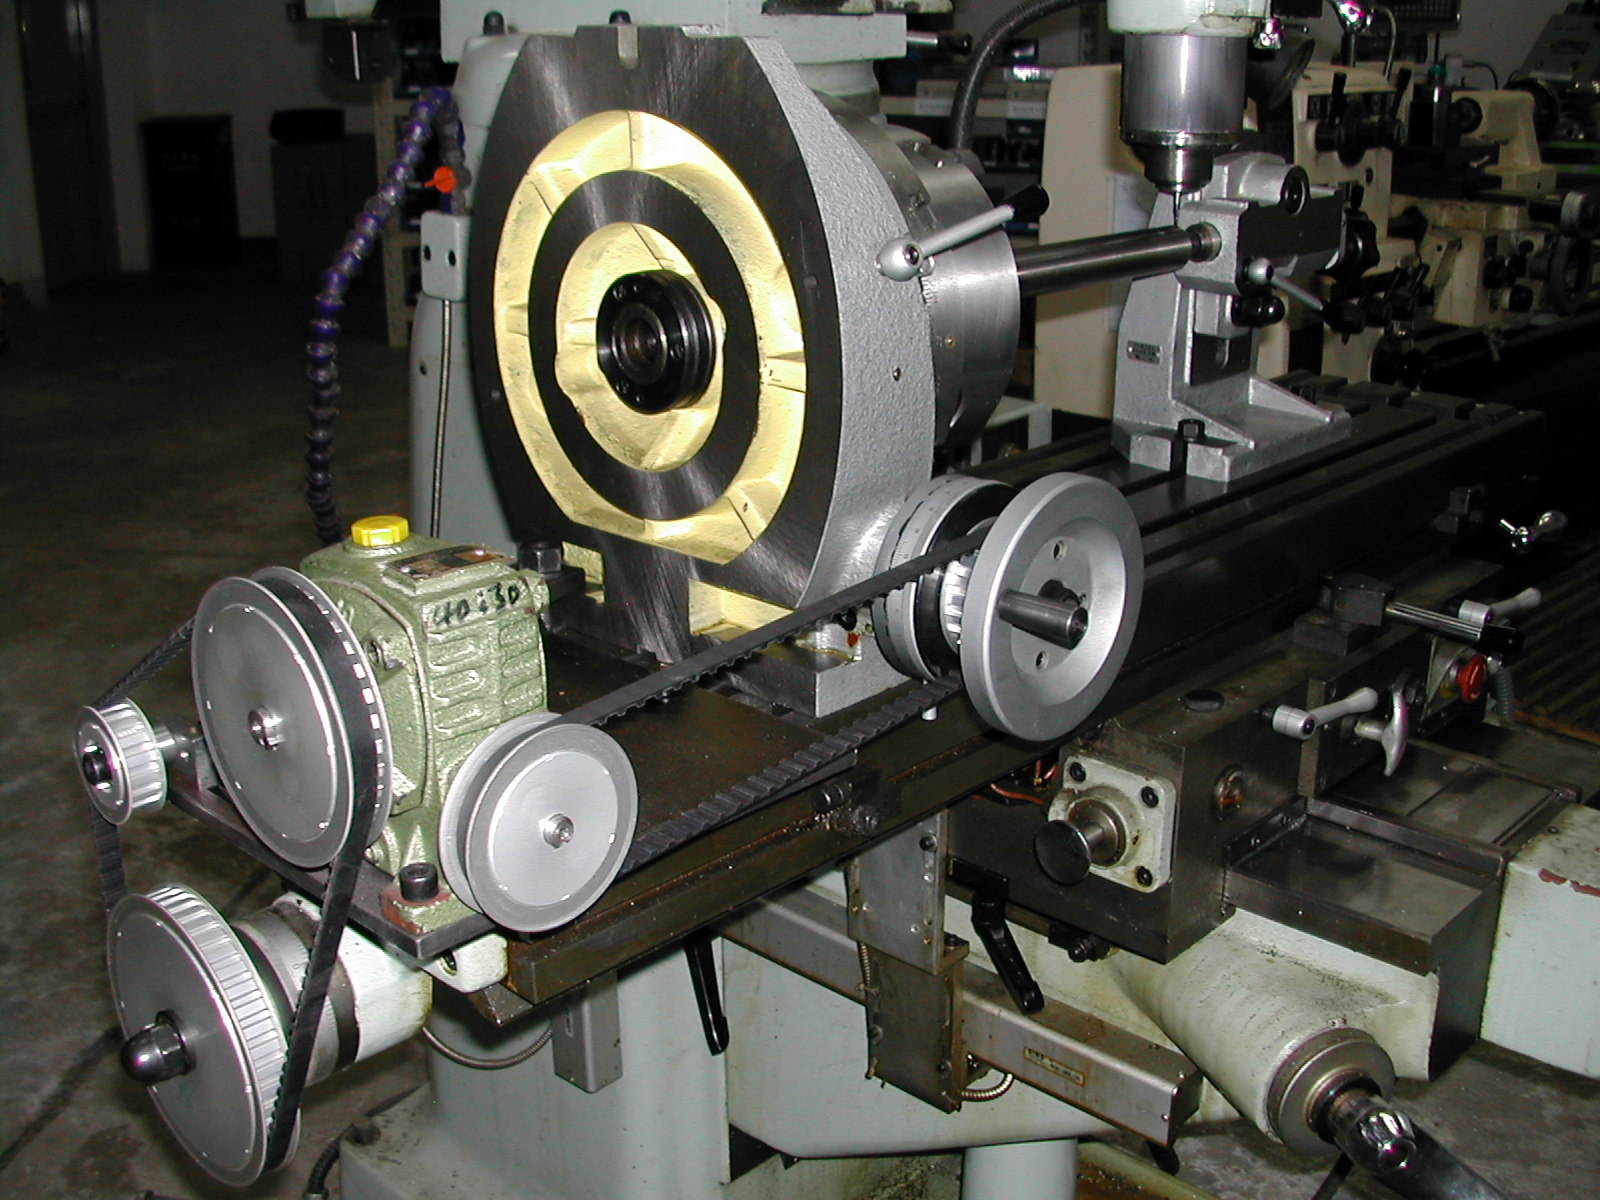 Here’s the result mounted on the mill. The belt tension for the rotary table segment was adjusted by moving the position of the rotary table along the mill table t-slots. The X-axis drive tension was adjusted with a simple tensioner mounted to the 12mm plate that attached the worm-drive to the mill table.
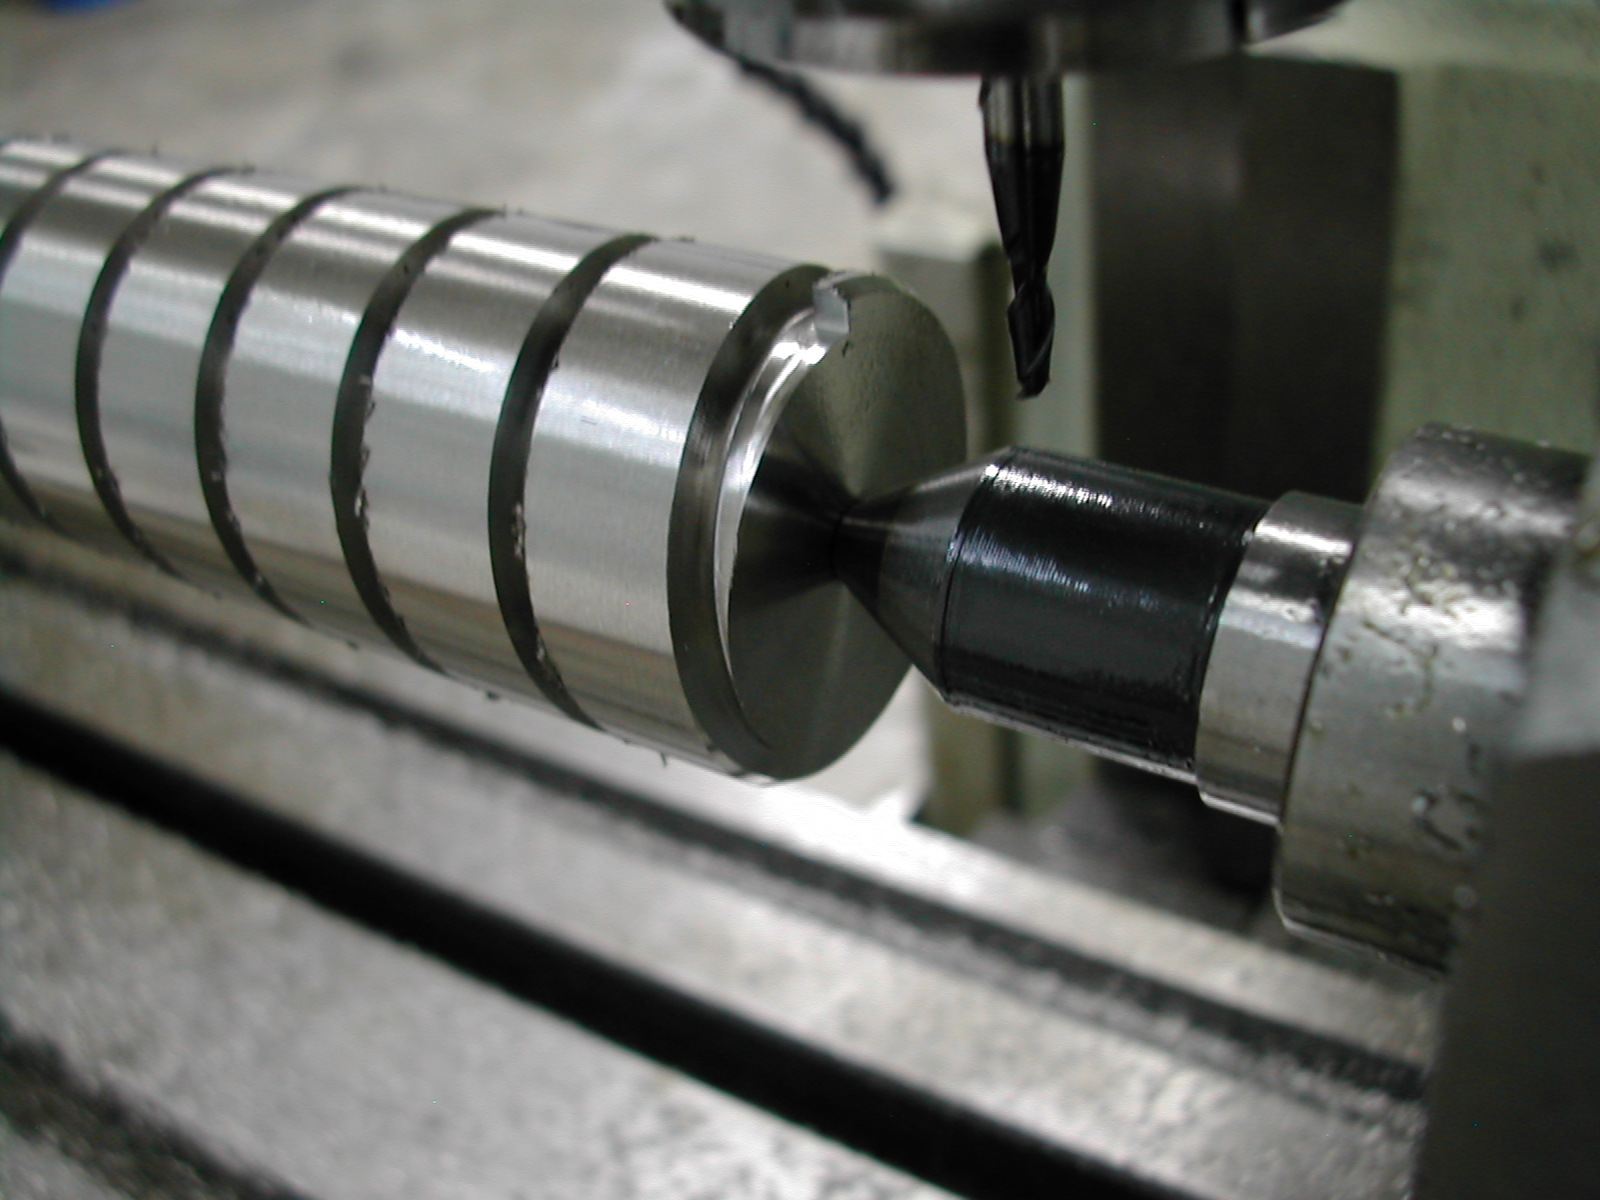
 This is a view of the cutting setup. With the belts disconnected, the rotary table is set to 0°, the mill saddle centered under the shaft, and the cutter touched off on the end and the position noted. The X-axis was the backed off a little and the drive belts connected.
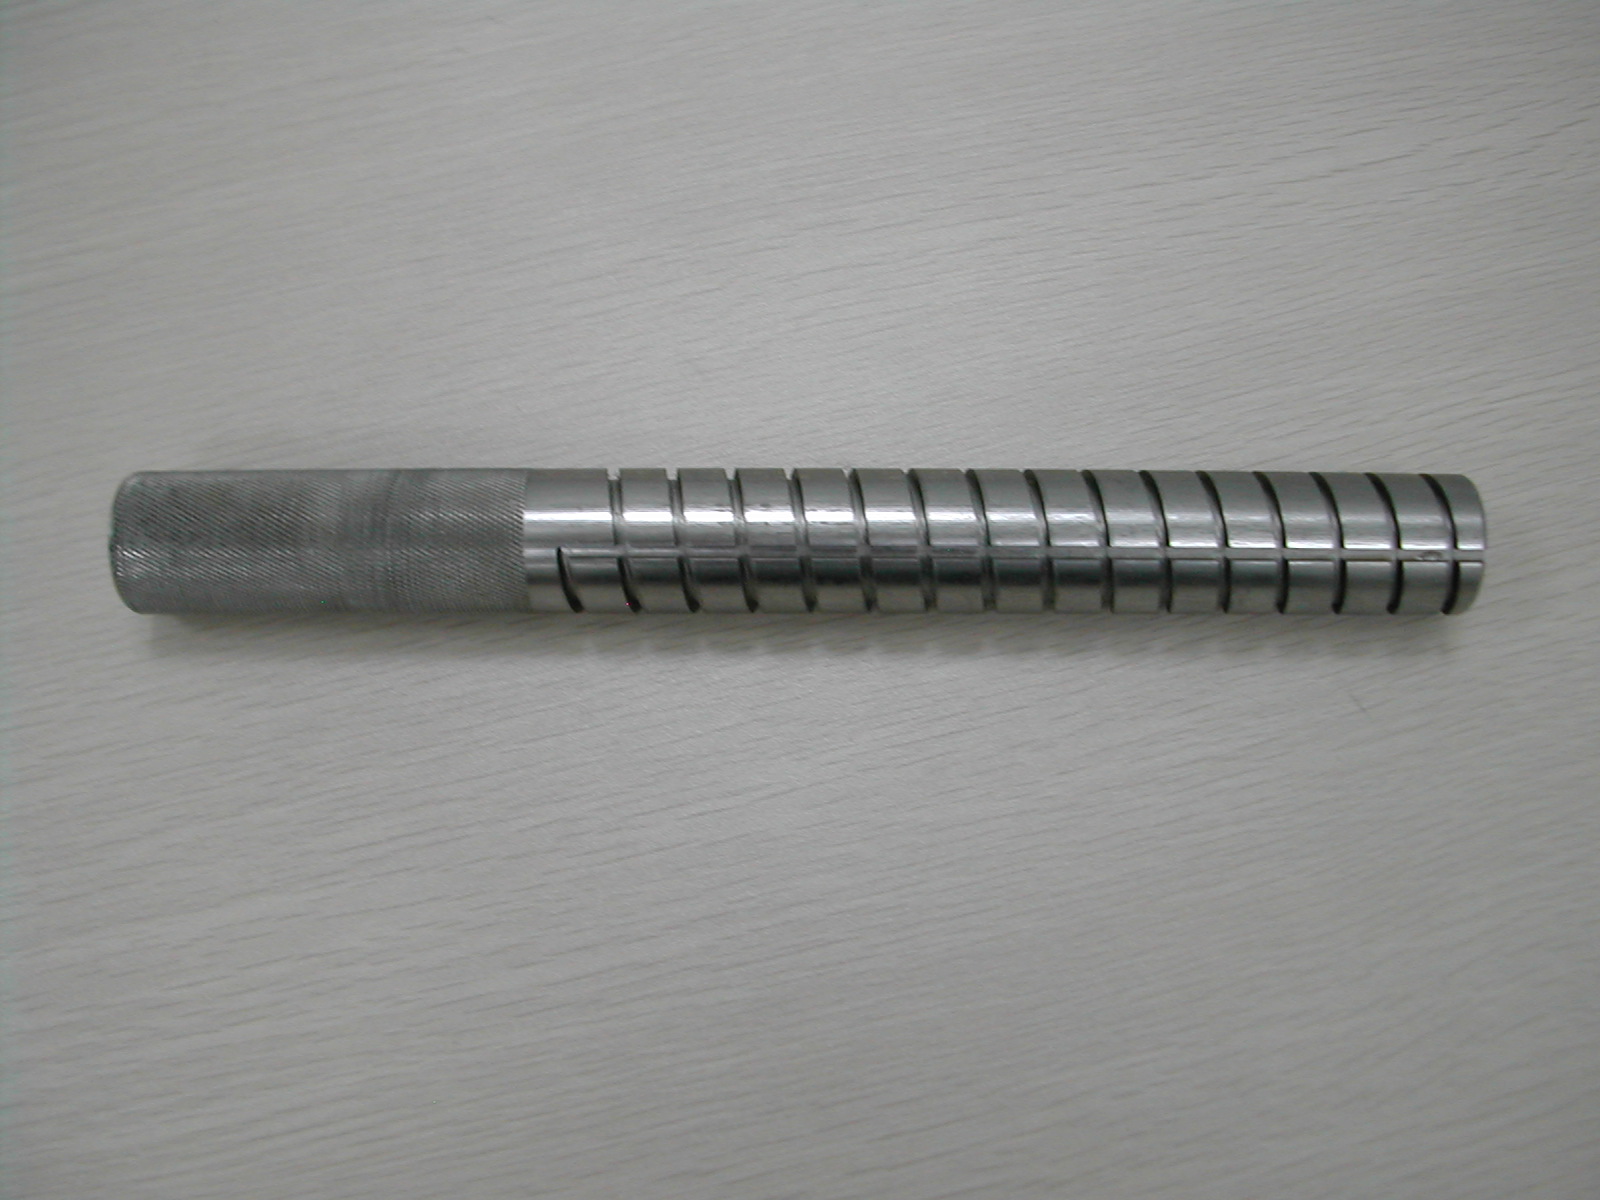
Note the knurl on the end of the column. This is to obtain the necessary Loctite film thickness without resorting to a soppy fit in the base casting.
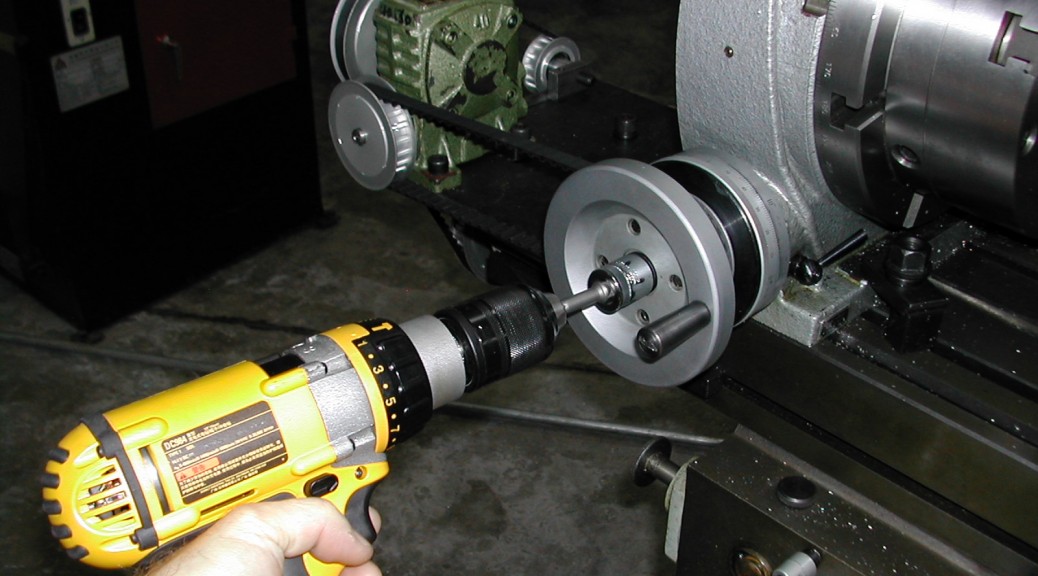
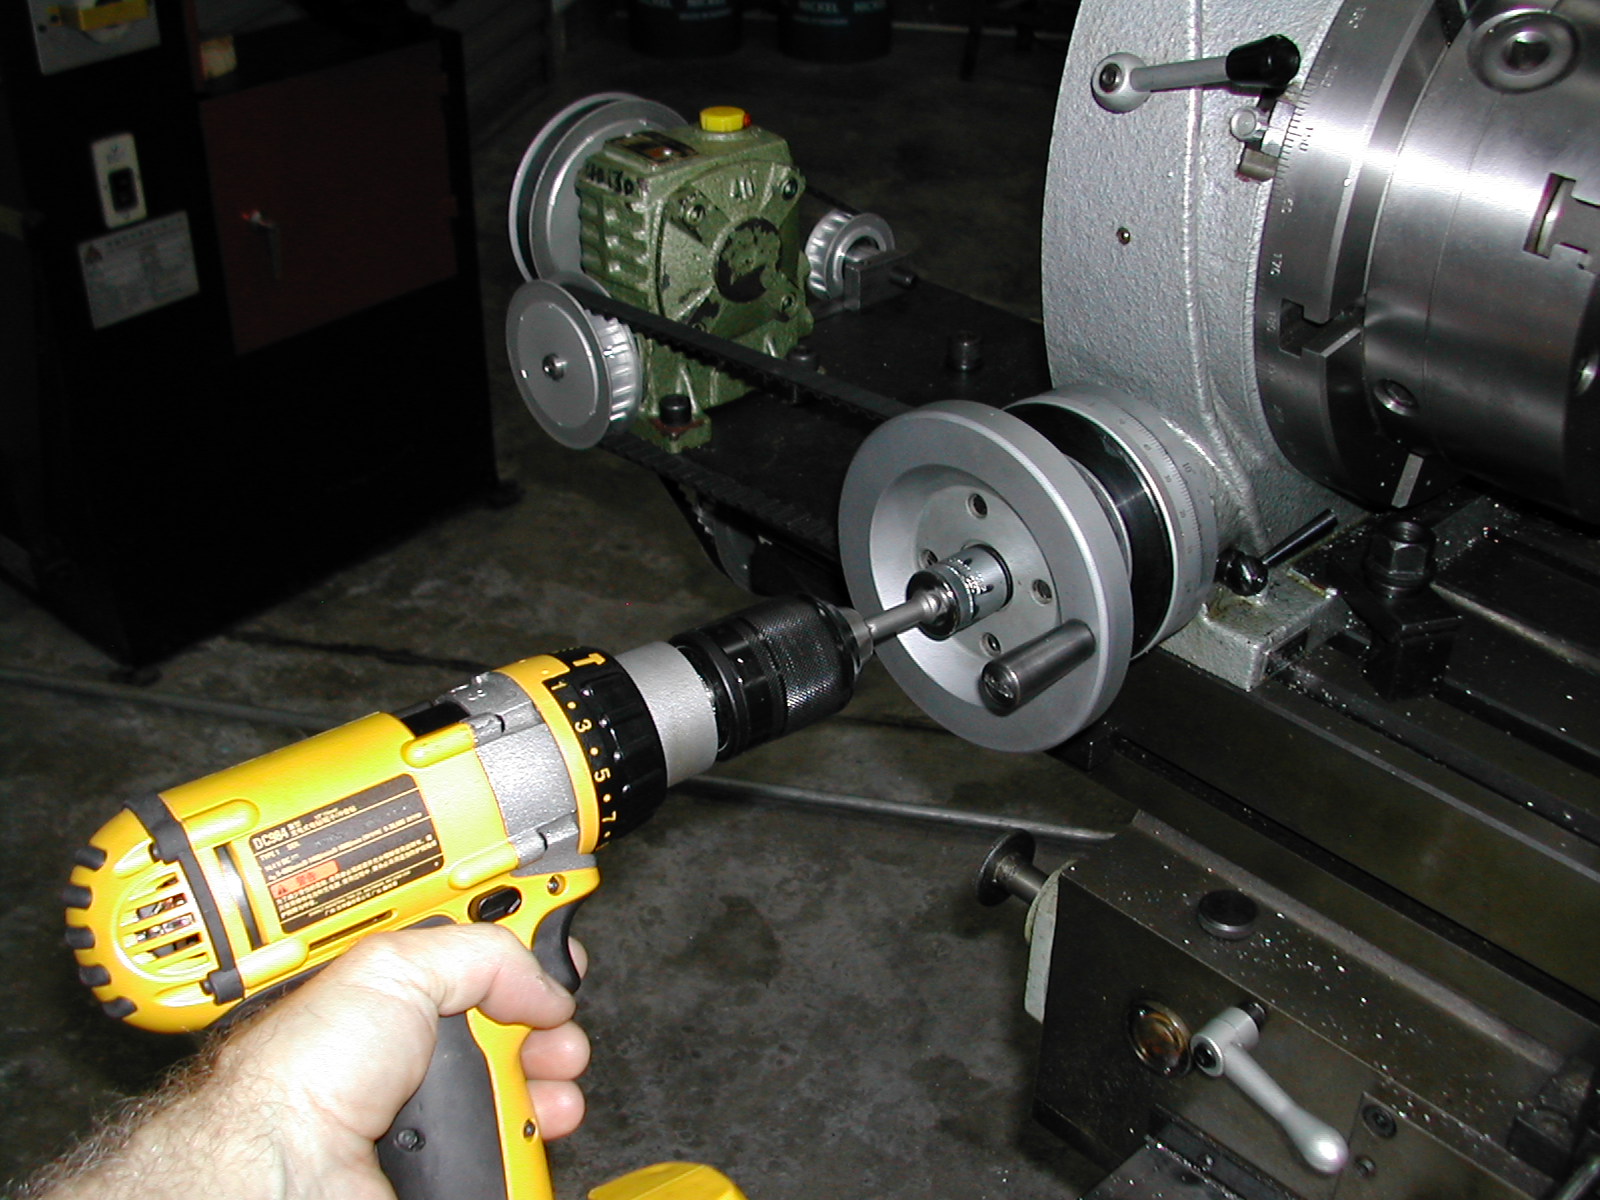 At 4° per turn of the rotary table handle and 15 revolutions of the shaft (actually a little more since I made my shaft about 1″ longer), that’s 1,300 turns per pass – one way (remember you also have to wind it the other way before making the next pass – you can’t disconnect the belt drive until you are finished). That’s a lot of blisters! So it’s the trusty Dewalt cordless drill to the rescue. Before you say “why didn’t he just use the mill power feed”, remember you can’t drive a worm gear backwards, and I’ve got two of them in this system.
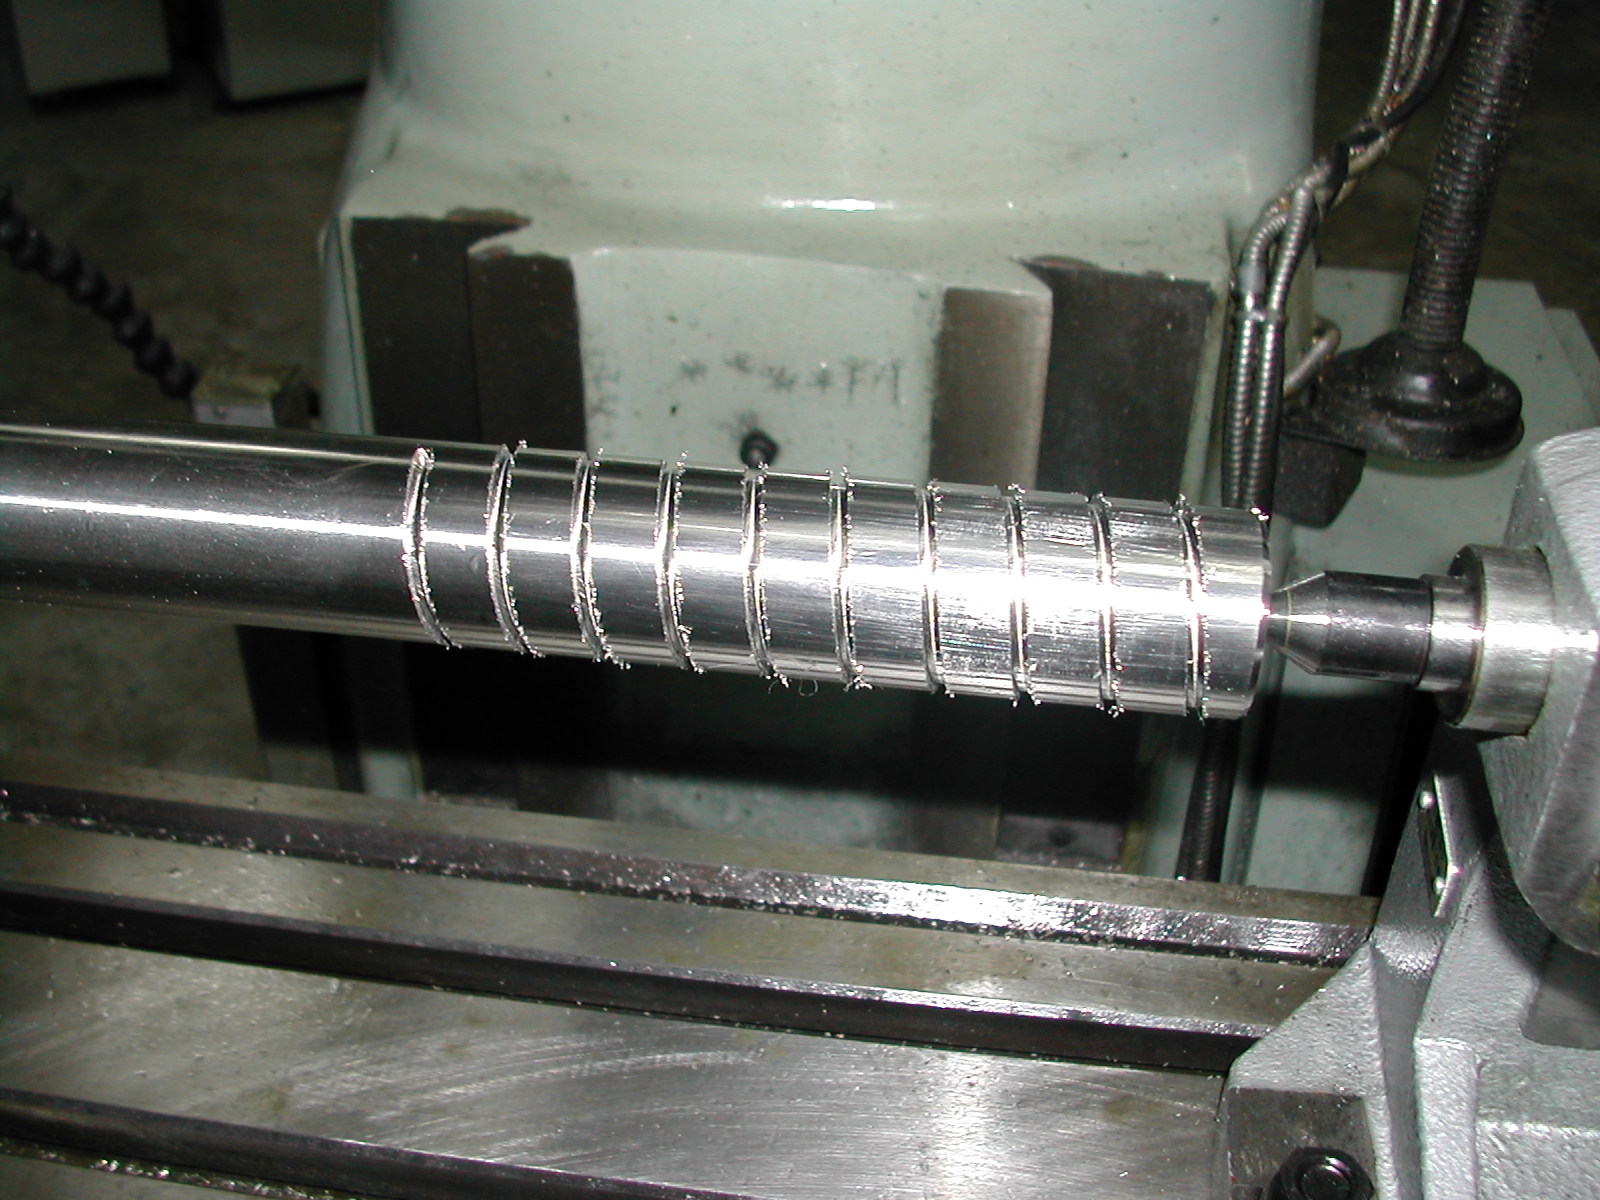 Well, I tried to cut the groove in only two passes. That’s only 0.050″ depth per pass, but it’s also 50% of the cutter diameter, and I’m cutting 440 stainless at 35HRc. I made it this far with my first cutter. I dropped it down to 0.025″ depth per pass, made two half passes to finish the groove from this point, and another two full-length passes.
Each pass took about 15 minutes to cut and another 3 minutes running the drill in full-reverse to get back to the starting point.
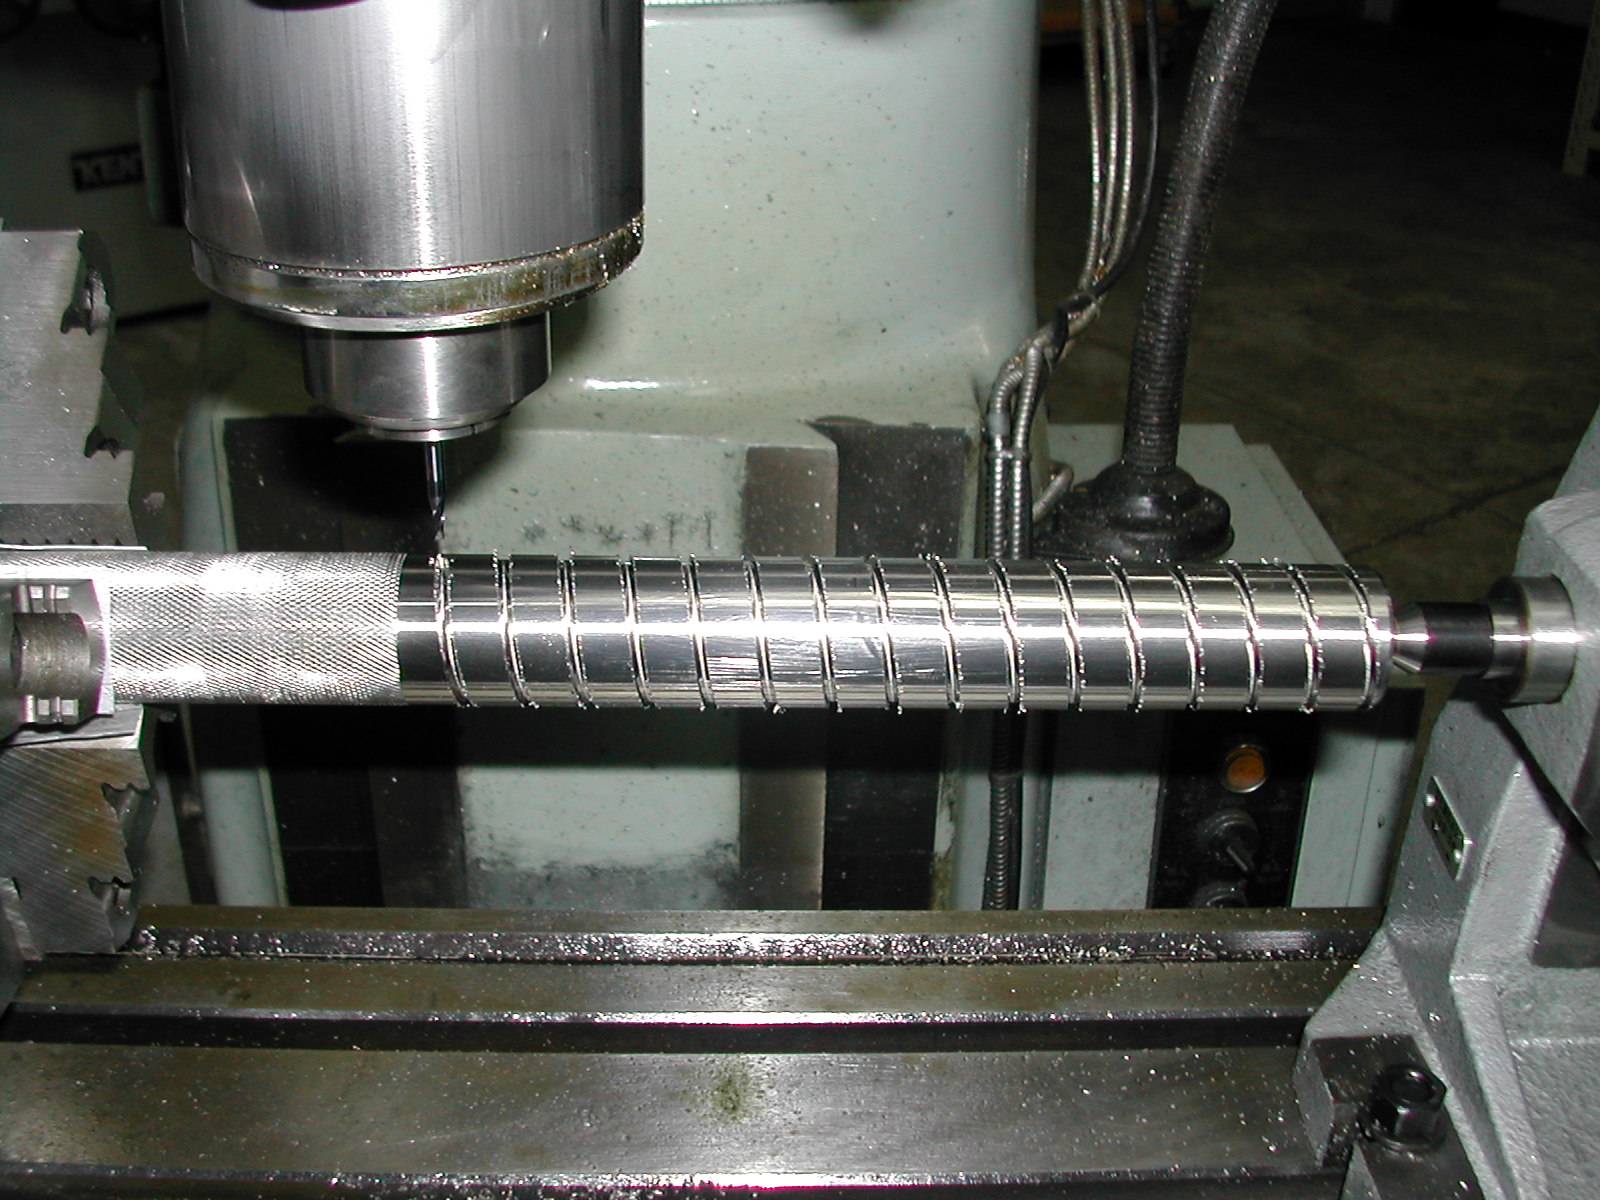 Whew! The spiral groove is finally cut. The rotary table is locked down at this point, and the belts removed. Now I can hand crank the mill table to cut the straight groove.
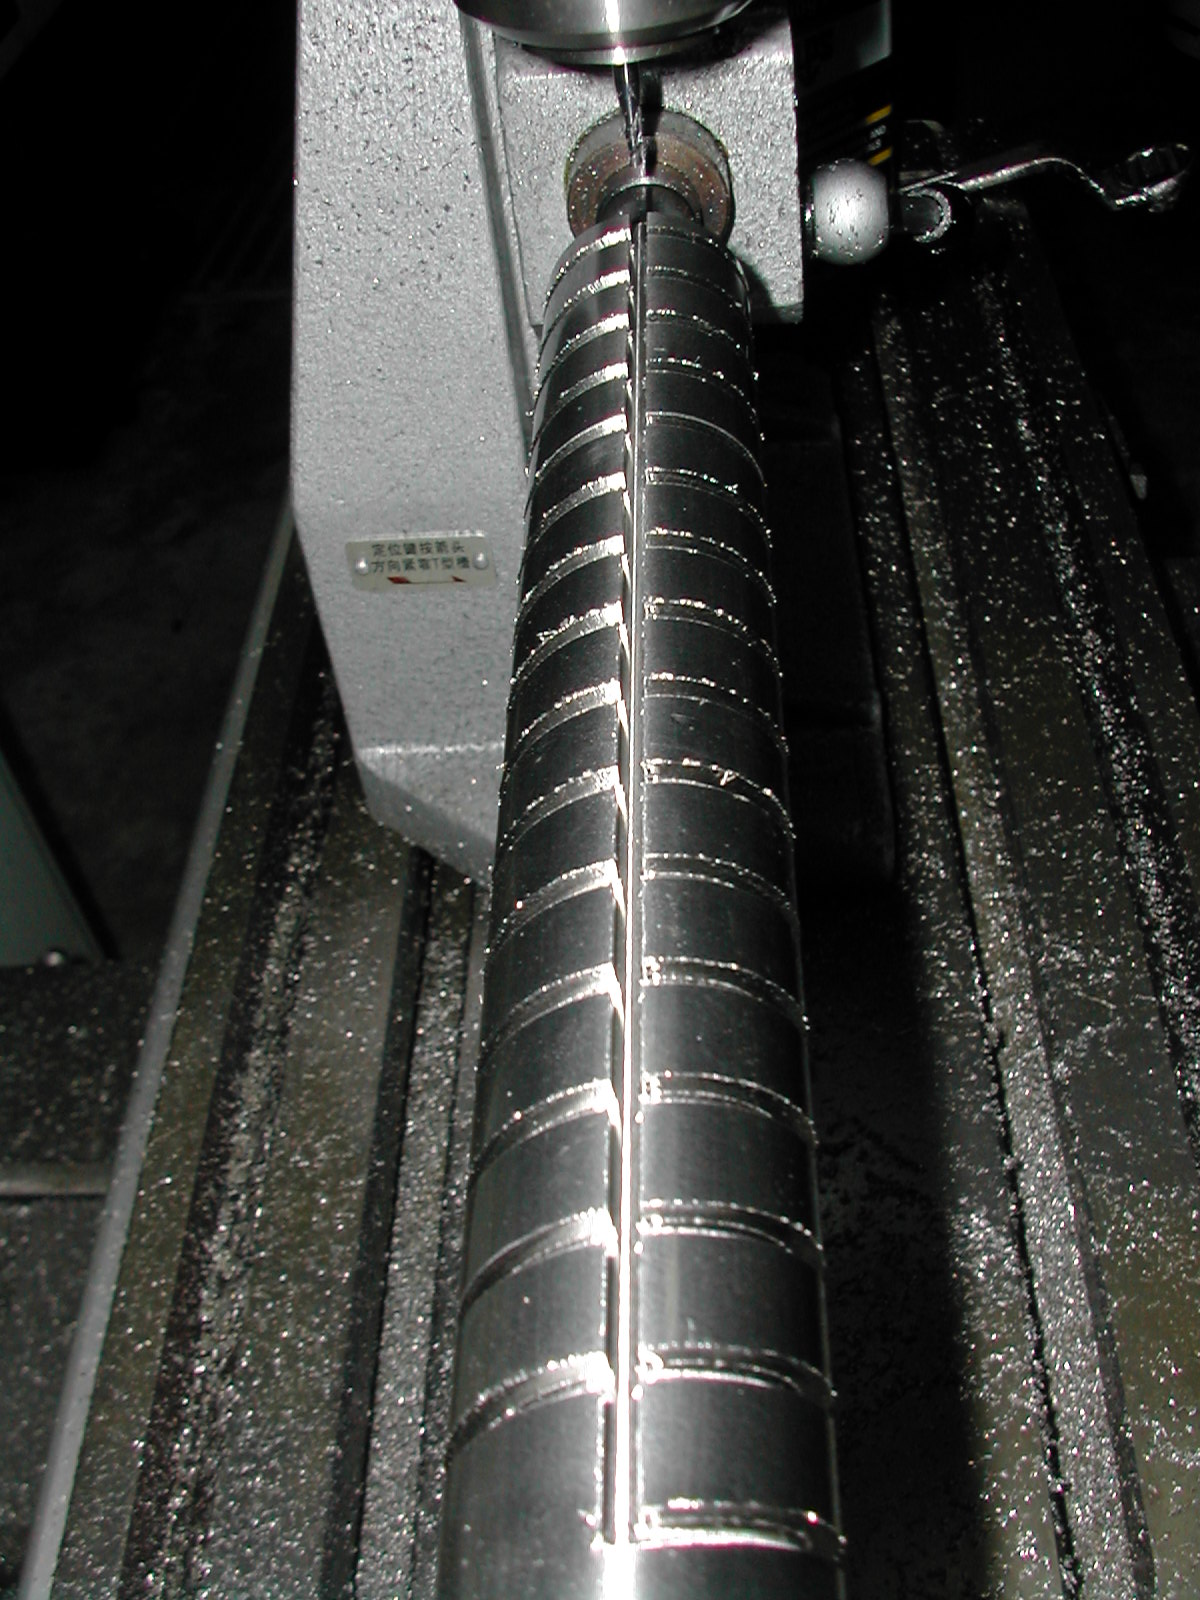 And here’s the vertical groove finished.
 A final touch is removing the flimsy, sharp, run-out at the end of the spiral. This is known as a blunt-start thread or a higbee cut. A couple of swipes with a 400 grit oilstone knocked the burrs right off and the shaft was cleaned, coated with LPS-3, and packed in vinyl netting until time for assembly.
The finished wheelhead bar.
Disclaimer and License
All material, including the CAD drawings, relating to the construction of the Quorn presented on this site is free to use any way you see fit. However, no guarantees are made regarding the accuracy or correctness of the material presented here.
CAD Files Used On This Page (AutoCAD 2008 Format)