
 There are two sizes of Quorn ball handles, the large and the small. Ten large, and nine small — all are made in exactly the same manner. I’m not a big fan of rust on machine tools, and these ball handles are used constantly so I felt that painting or plating would eventually wear off. Therefore, I decided to use stainless steel for my ball handles and give them a buffed finish. Before cutting, I made some quick sketches of the handles to make sure my ball turner would have clearance and finalize the process plan.
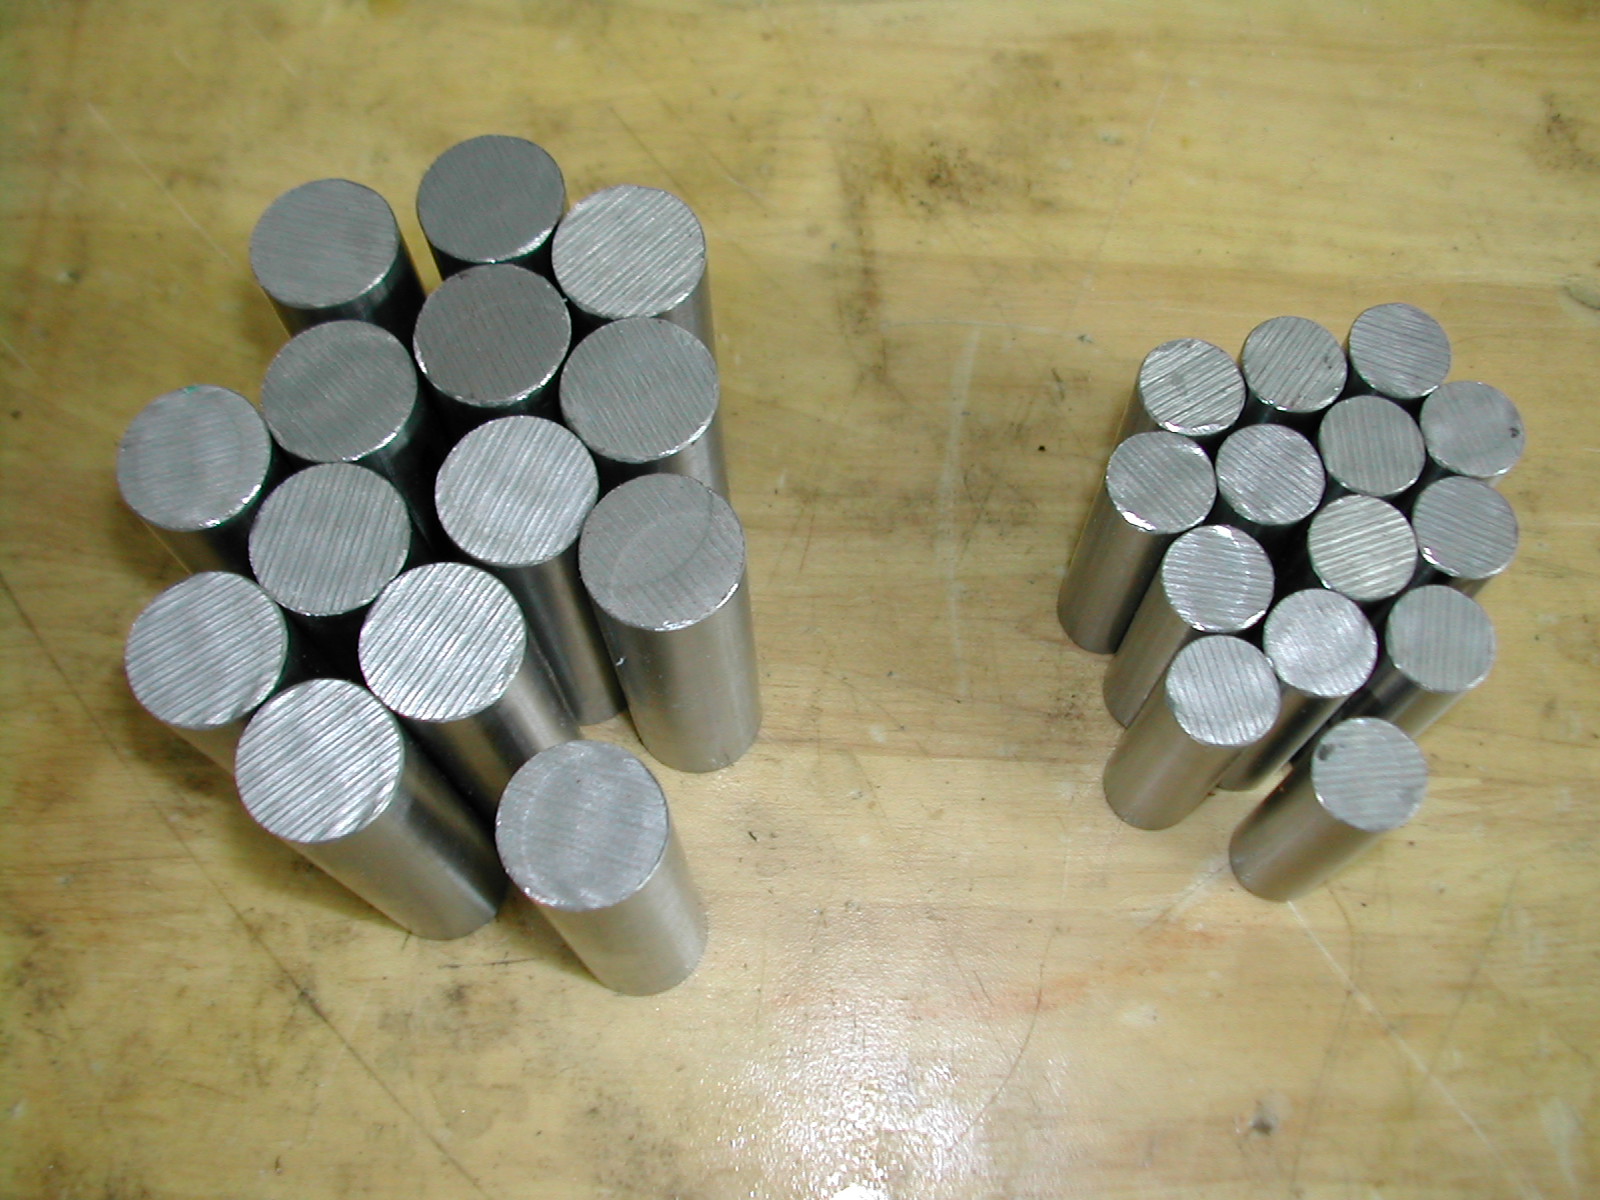 First, the material is cut to length. I was unable to obtain imperial sized material here in China, so I started with the next larger metric size stainless round stock (14mm and 20mm respectively) and sawed up my material.
I’ll be making some additional 5C toolholding attachments that will need a few extra ball handles, and I’ll need a few extra in case of mistakes, so I’m starting with 14 blanks of each size.
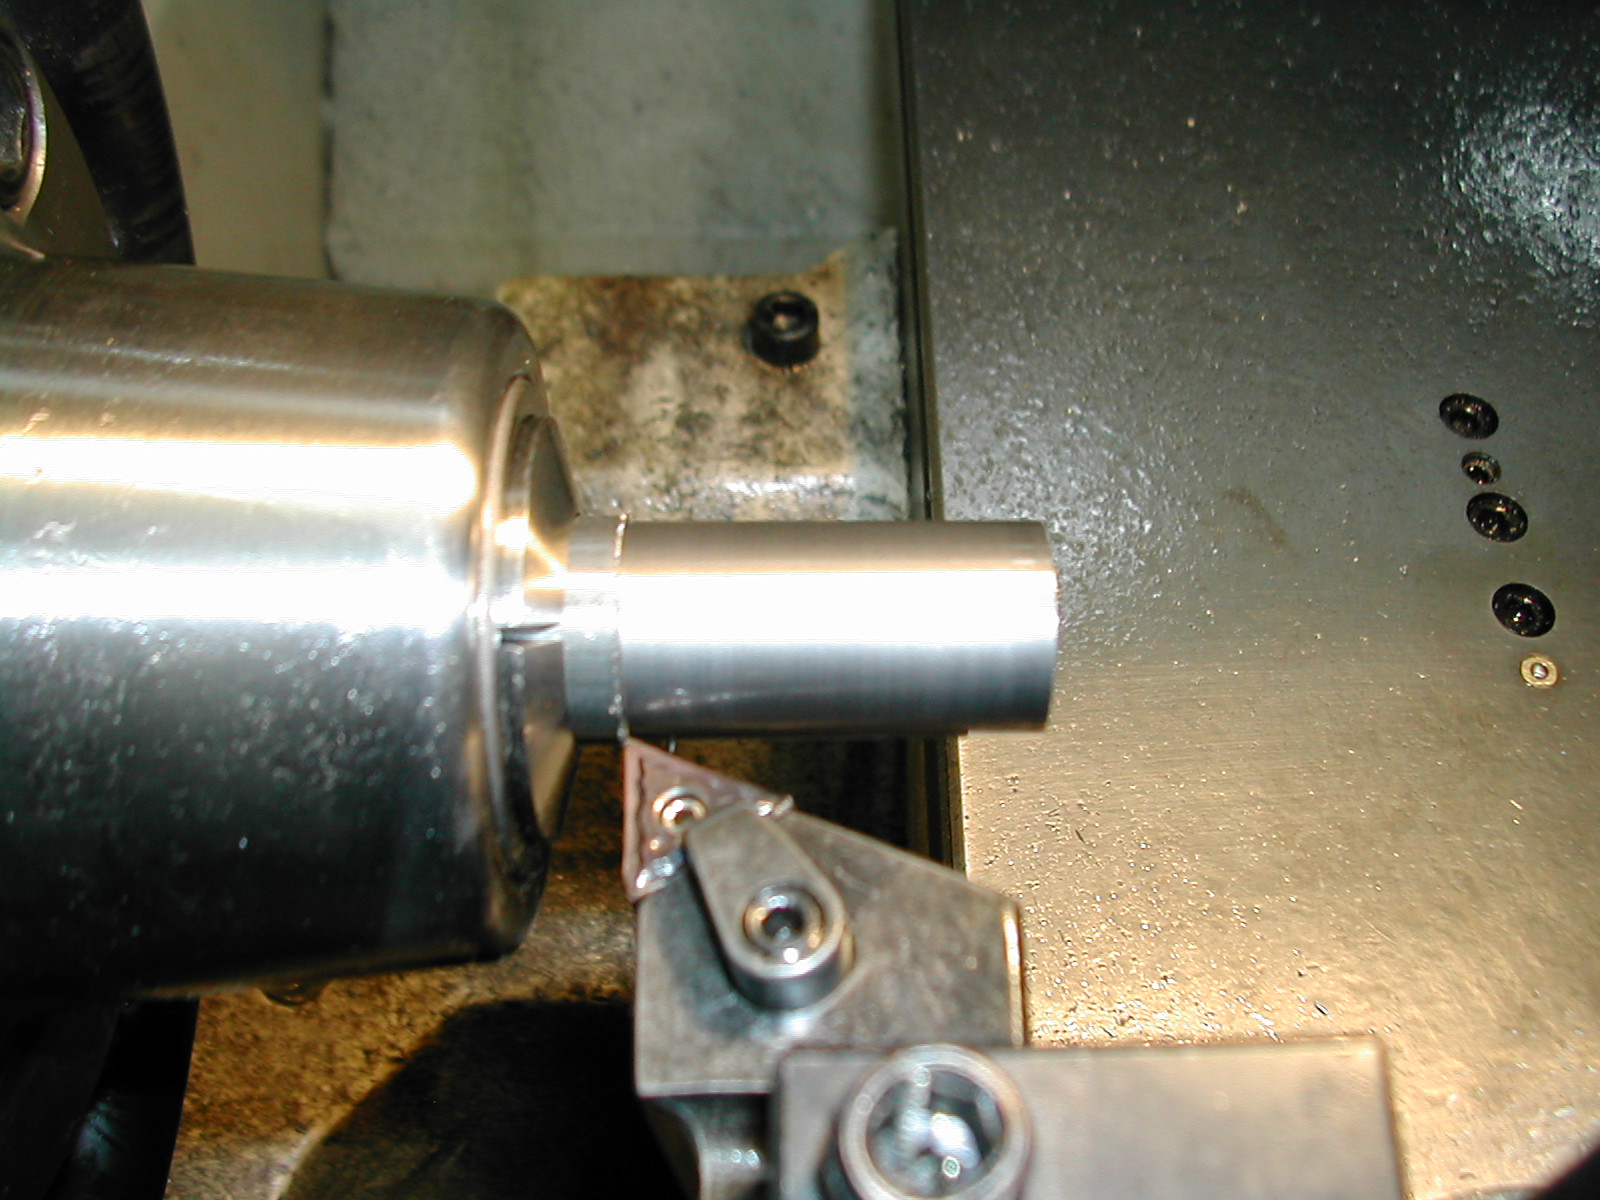 Starting with the large handles, the first step was to chuck the pieces in a 20mm collet with a collet stop, face the end, and turn down the OD to the finished size of 0.750″. There was only 0.037″ to come off the OD, so this was a single finish pass.
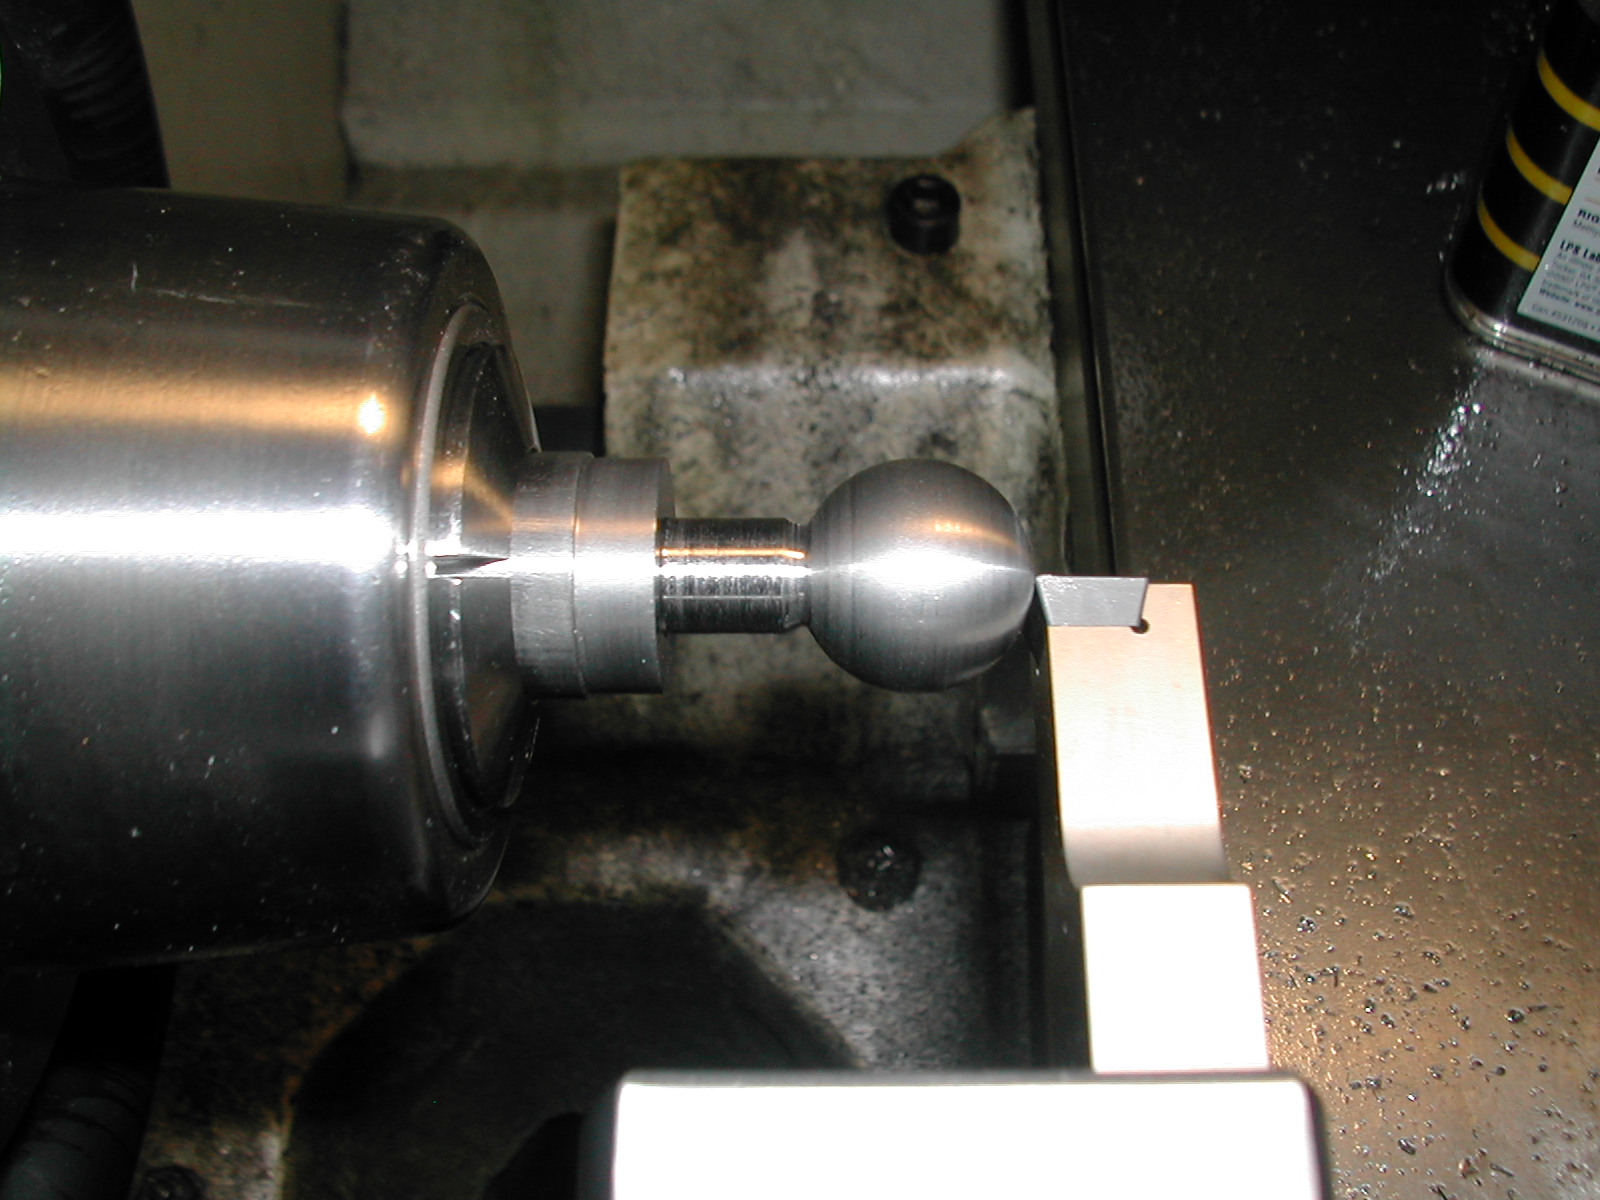
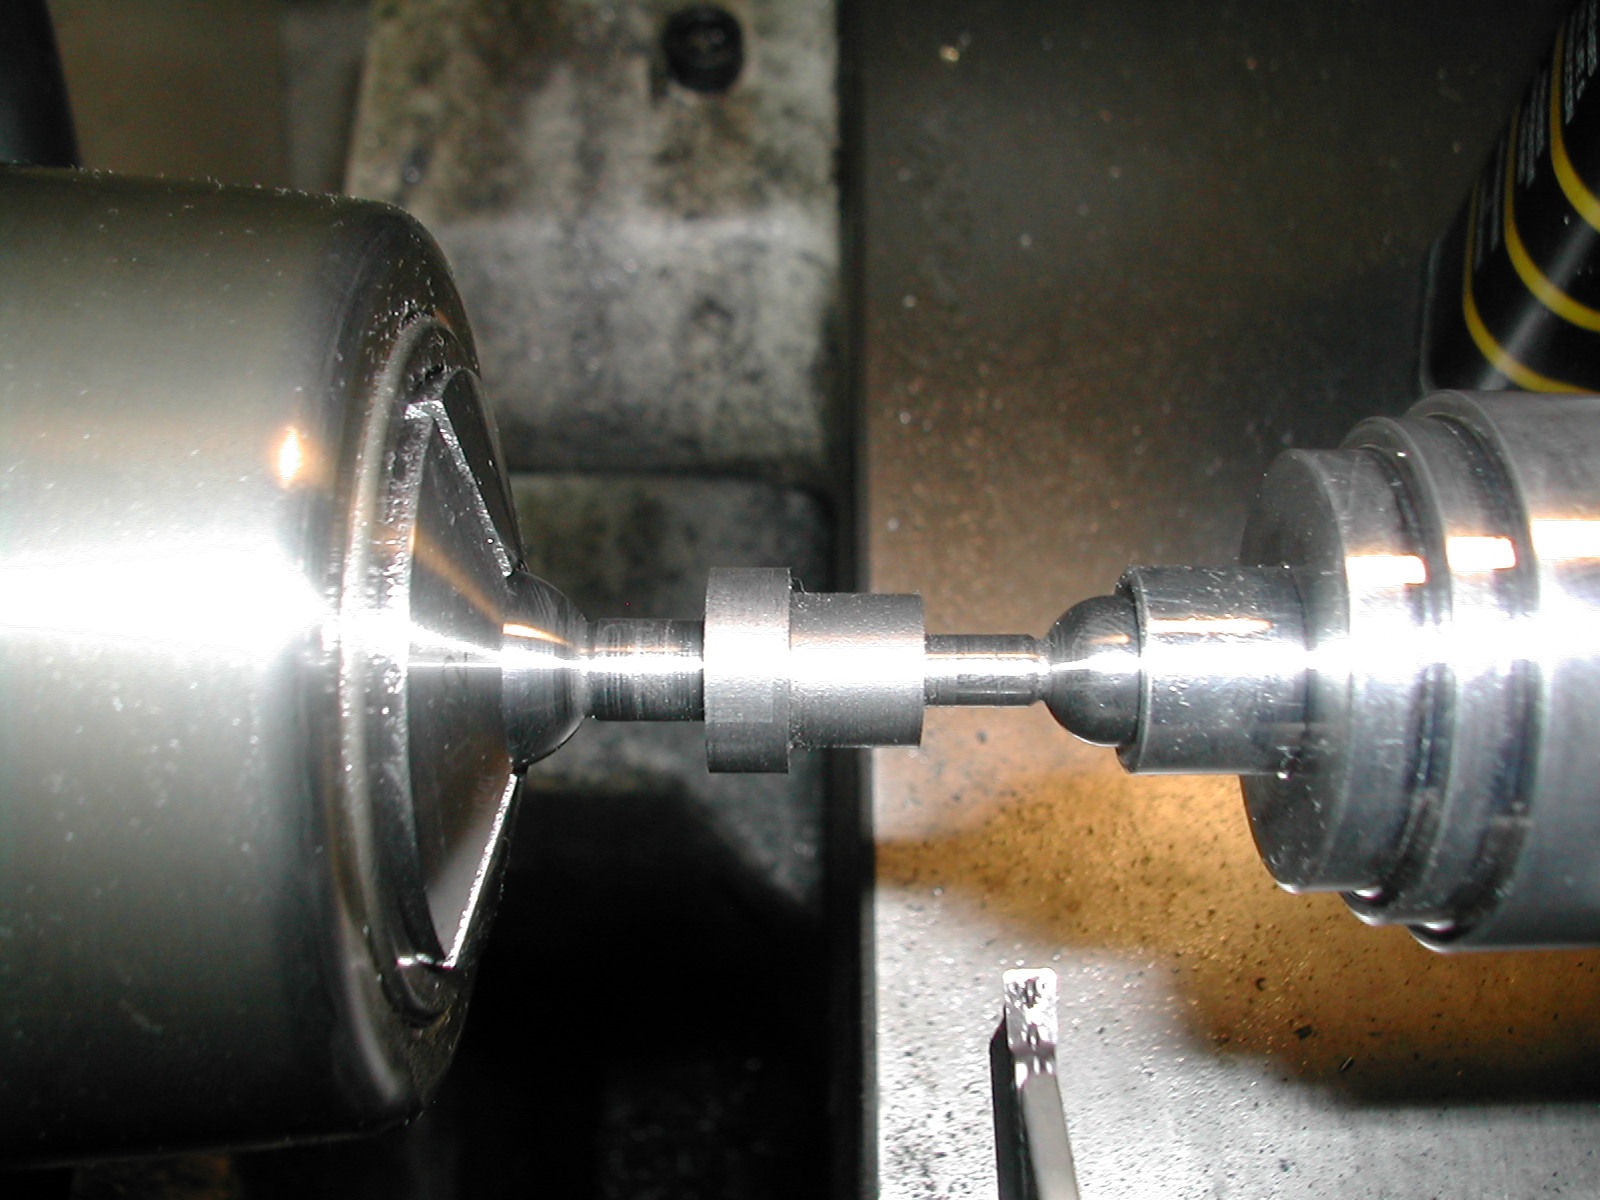
 Using a nice combination grooving/turning tool, I blocked out the ball end and rough neck. The neck was roughed out slightly larger than the finished shank diameter at this end.
This stainless was very “gummy” so it’s going to take a little emery paper to clean it up before buffing.
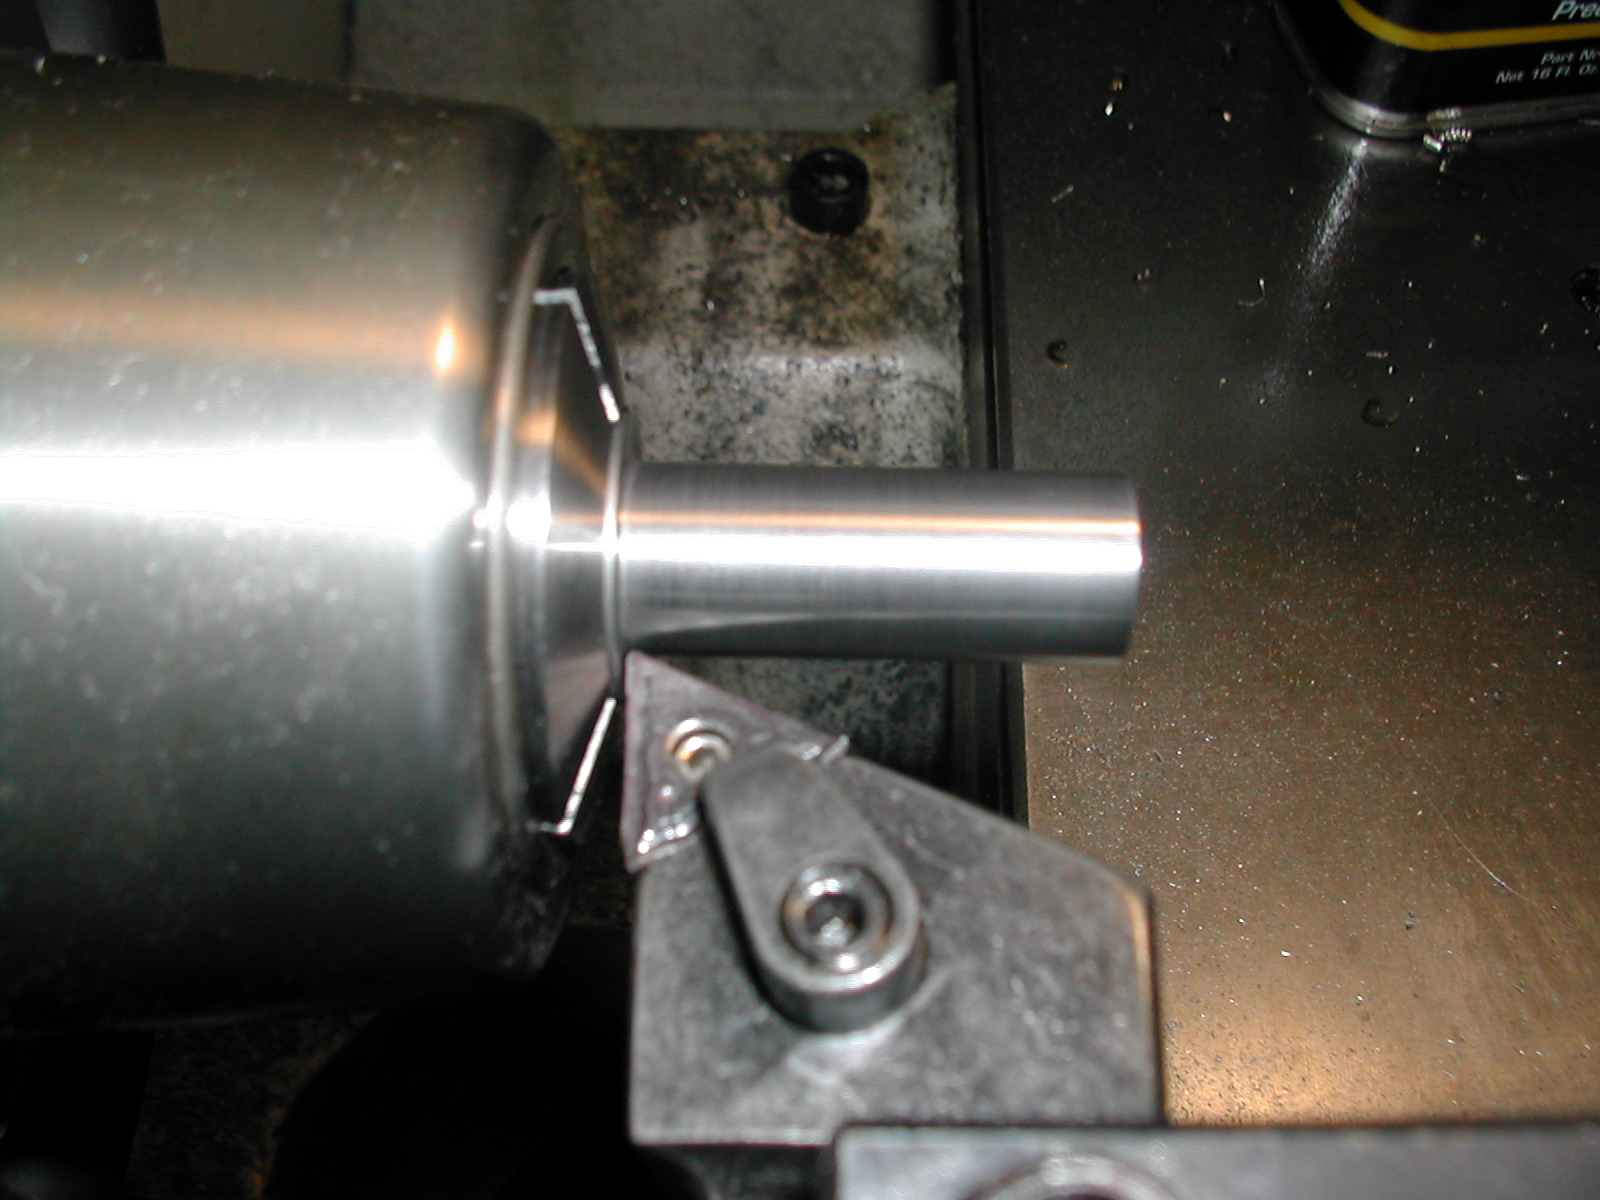
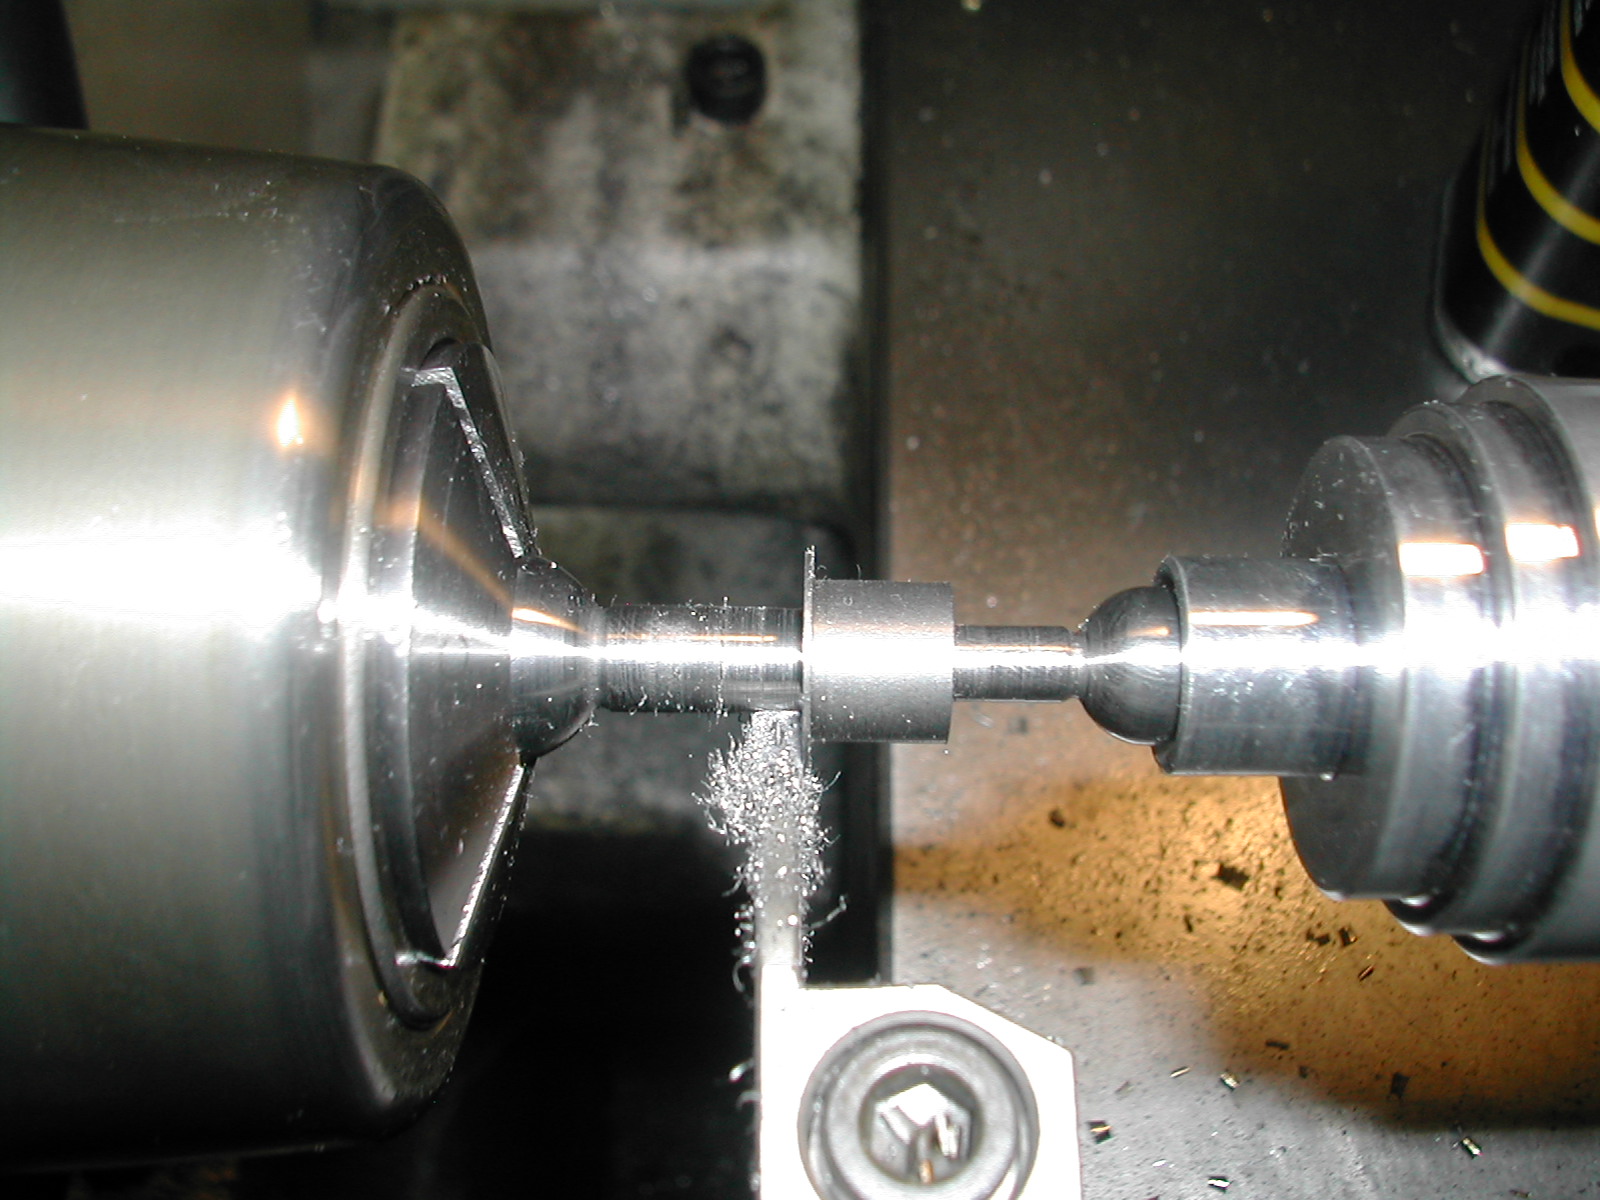
 A SNMG insert chamfered the blocked out ball to remove most of the waste. Note that the chamfers are not symmetrical because of the shank on the left side.
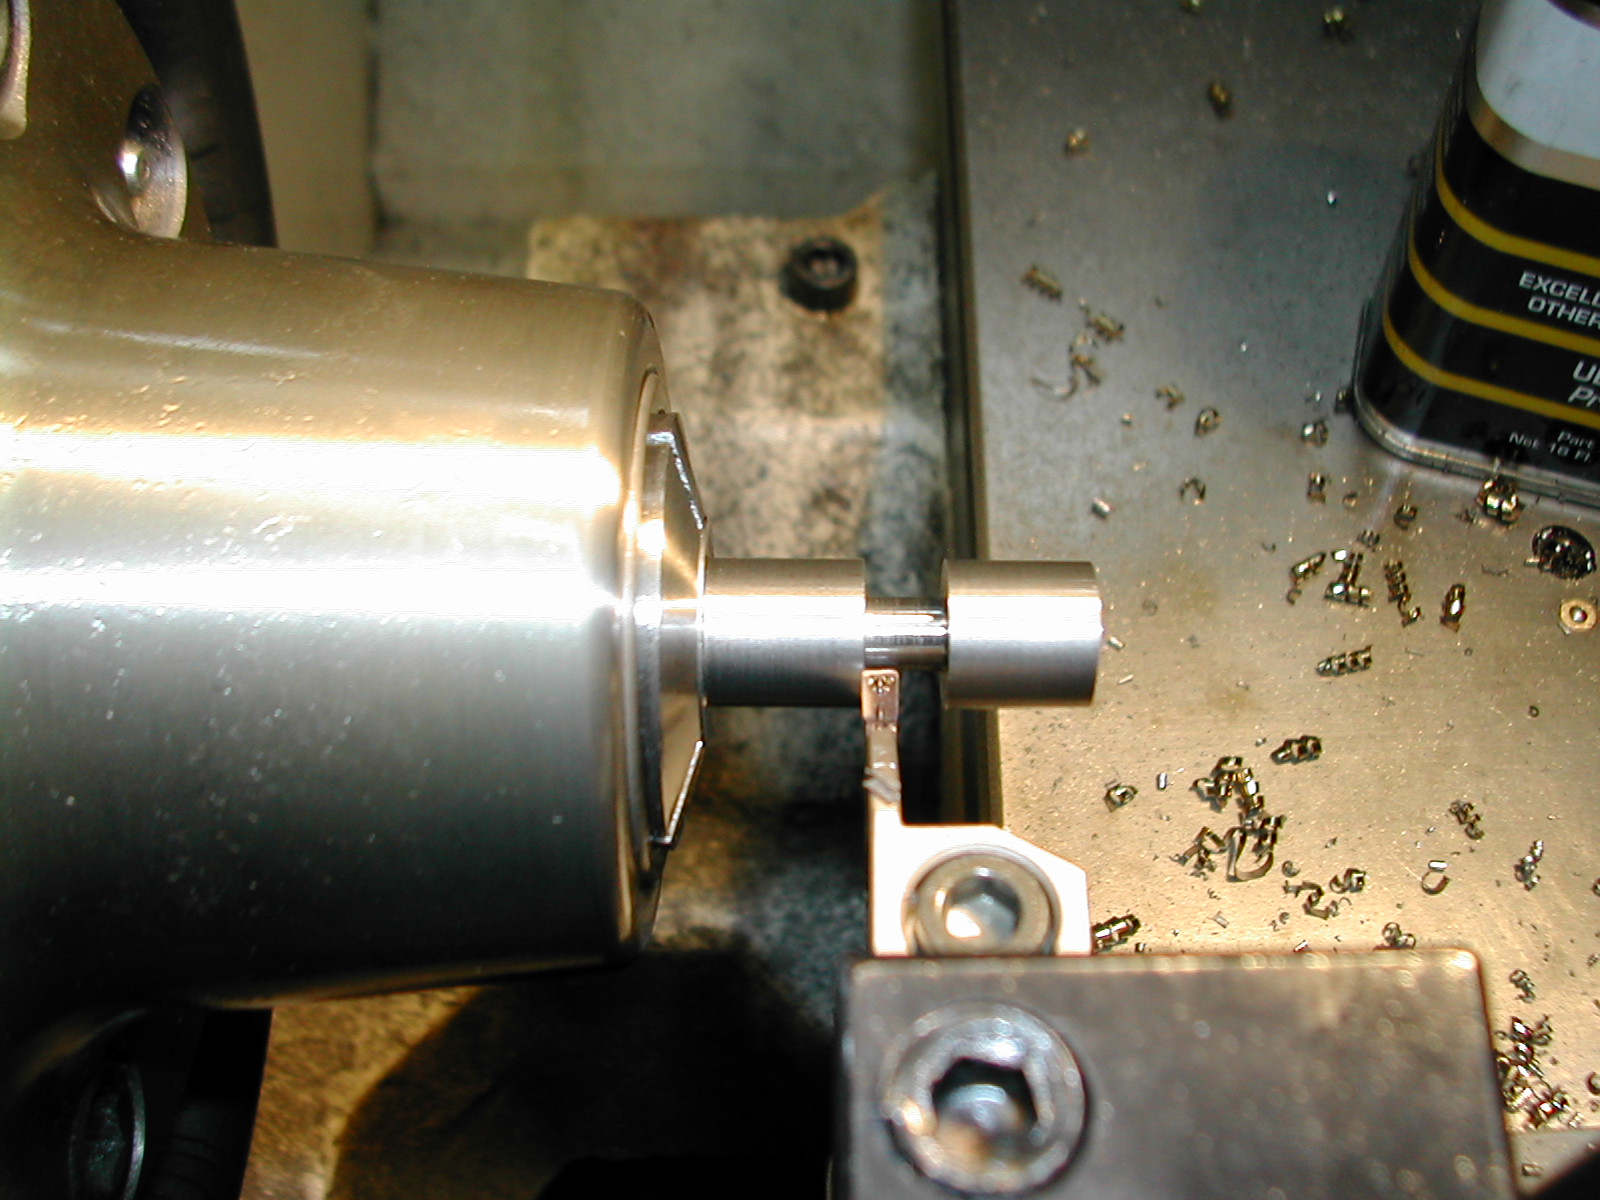
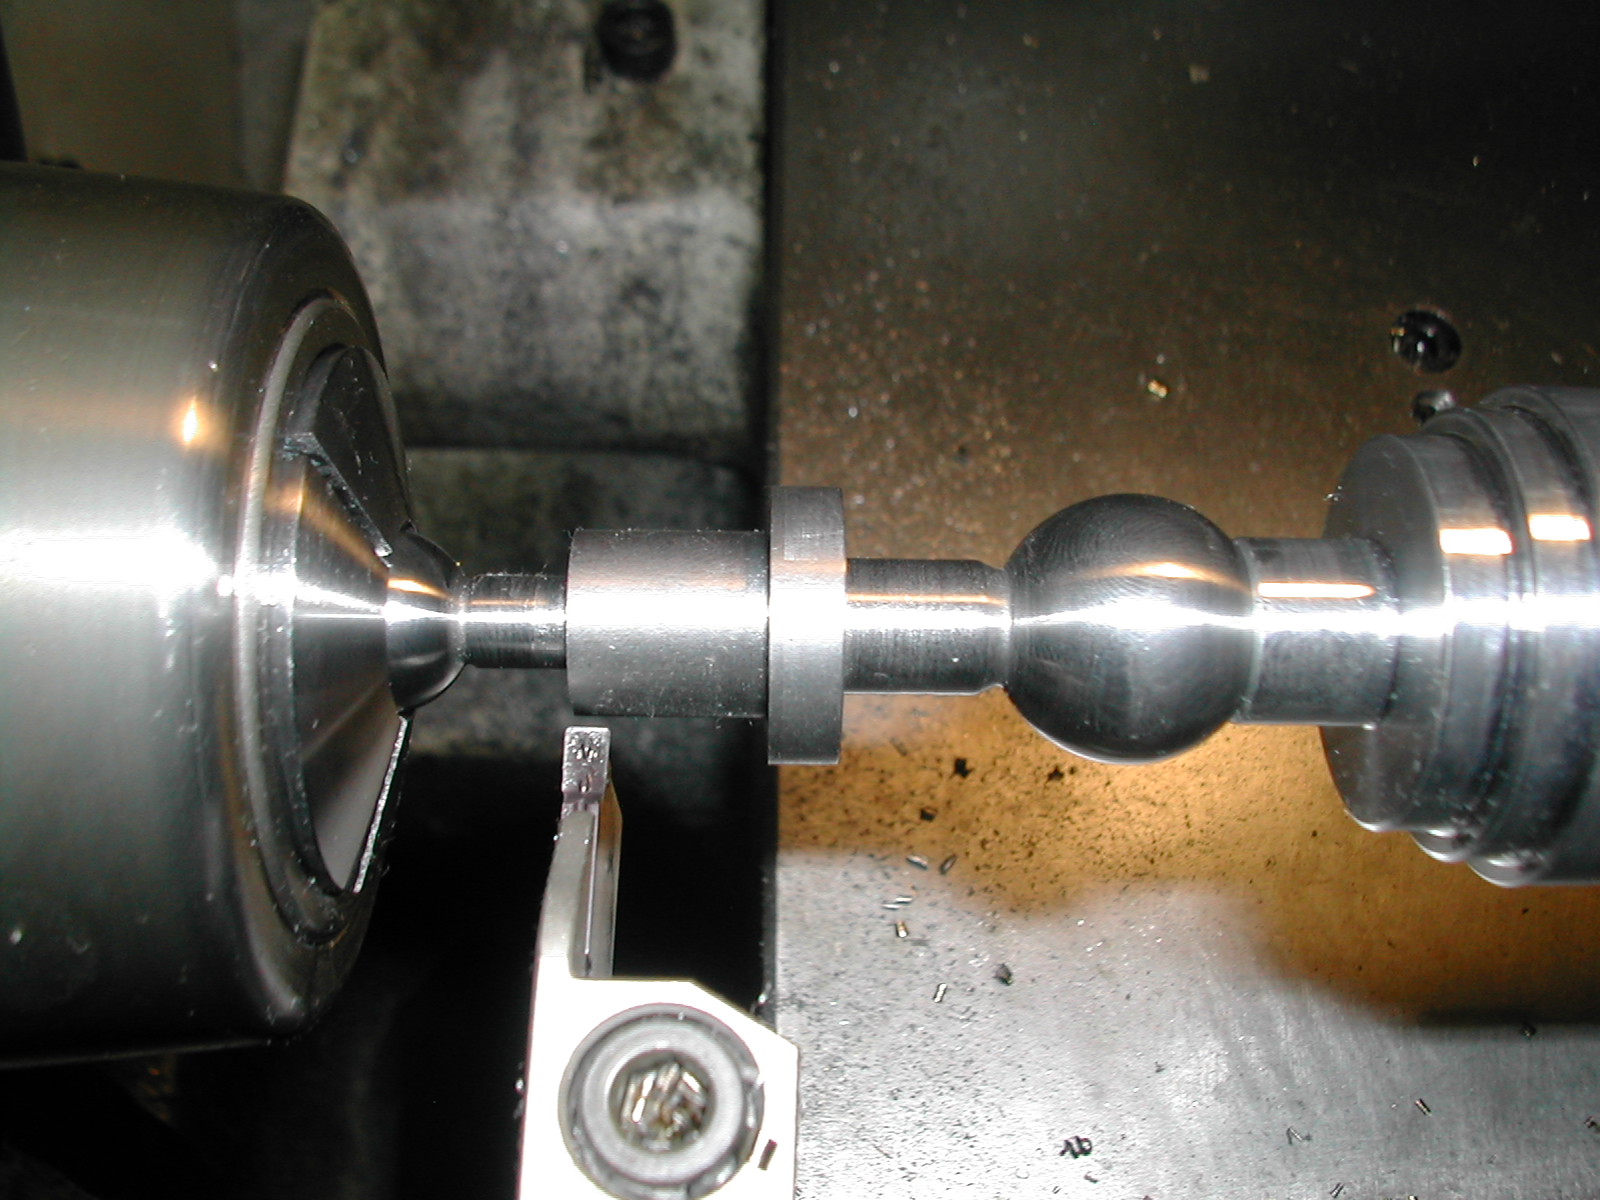
 Finally, I get to use the new ball turner that I made earlier. For the first ball of a particular size, the ball turner is set at center and the boring head is adjusted until the correct ball diameter is reached. Subsequent balls are formed, by cranking the cross-slide out and taking small cuts while moving it into center. The neck is formed to the correct finished OD at this point.
It is very important that the balls be formed accurately and to the correct size in order for them to fit in the lathe collets and mill fixtures for subsequent operations. Try to make the ball within +0.000/-0.003 when checked both 90° to the shank and as close to in-line with the shank as possible.
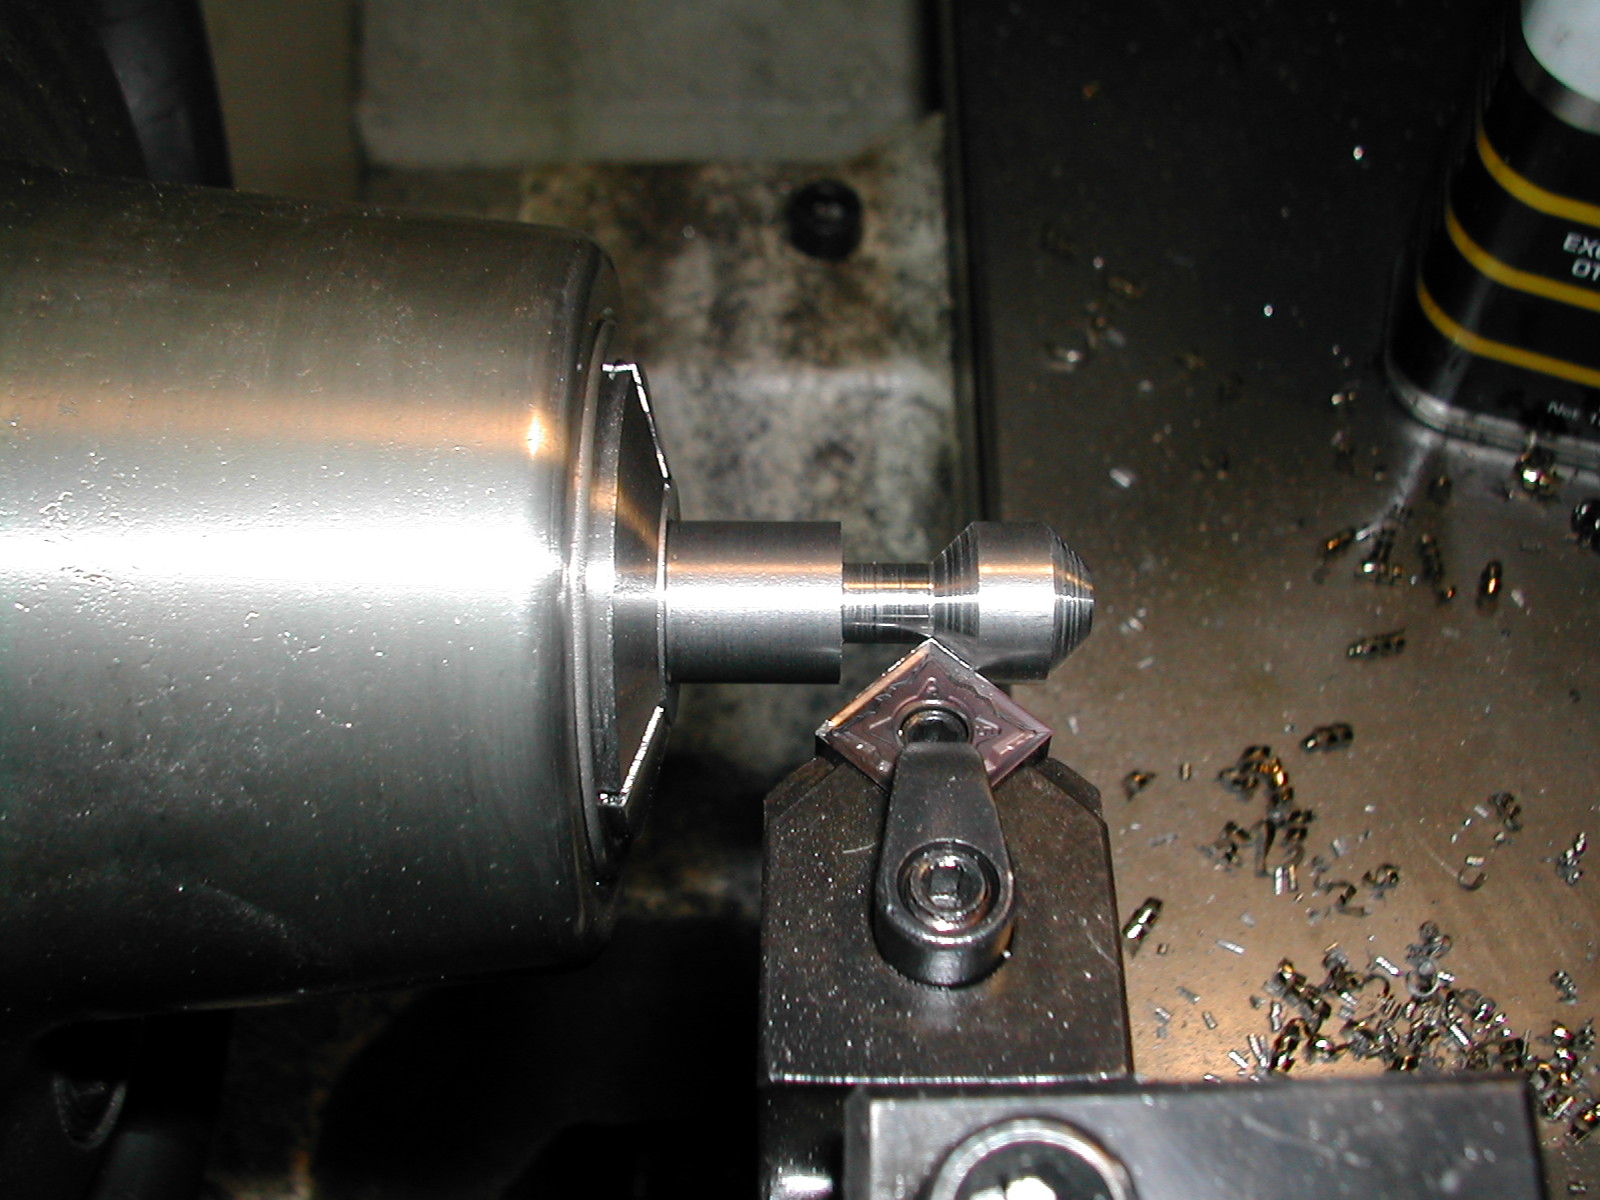
 Once all the large balls are formed, the collet is changed to a 0.750″ collet with a collet stop attached. The parts are flipped around, faced to length, and the small OD is turned to the 0.500 finished dimension.
 Using the same grooving tool as on the large ends, the small ball is roughed out, leaving the neck slightly larger than the finished diameter at its largest point on the left side of the groove.
 The 0.500″ balls are then roughed and finished turned the same way the larger 0.750″ balls were. The ball turner is set up for the first 0.500″ ball the same way I did it for the larger balls.
 Here are a few of the large ball handles with both ball ends formed. I’ll wait to turn the shank until all the balls on the smaller handles are formed. By finishing with the 0.500″ balls on the large handles, I’ll be able to use the same ball turner setup to start with the 0.500″ balls on the small ball handles.
 Here I’ve finished turning all the 0.500″ balls on the small ball handles using the same sequence of steps we used to form the 0.750″ balls on the large handles, while making use of the ball turner setup I finished with on the large handles.
 Now that all the 0.500″ balls are formed on the small ball handles, I’ll swap out the 14mm collet for a 1/2″ one and flip the small ball handle blanks around and begin forming the smallest 0.375″ balls.
 Turning the 0.375″ balls follows the same procedure as before.
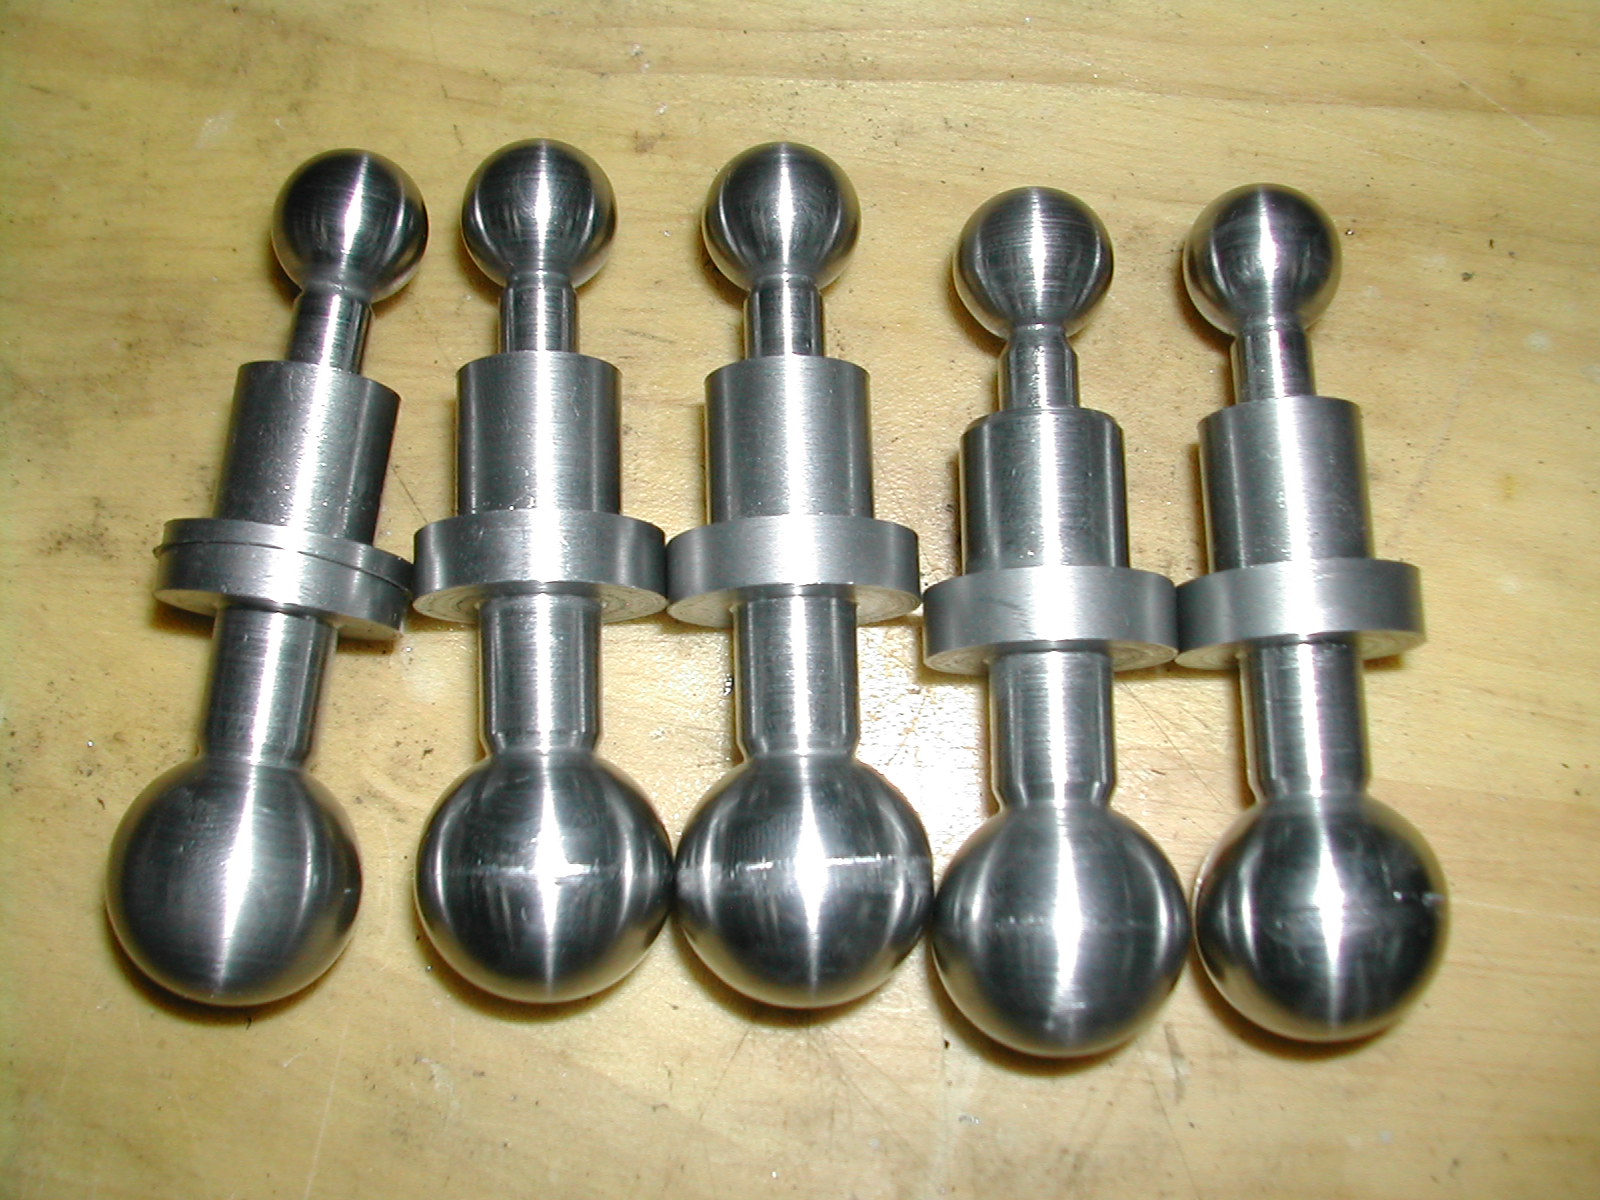
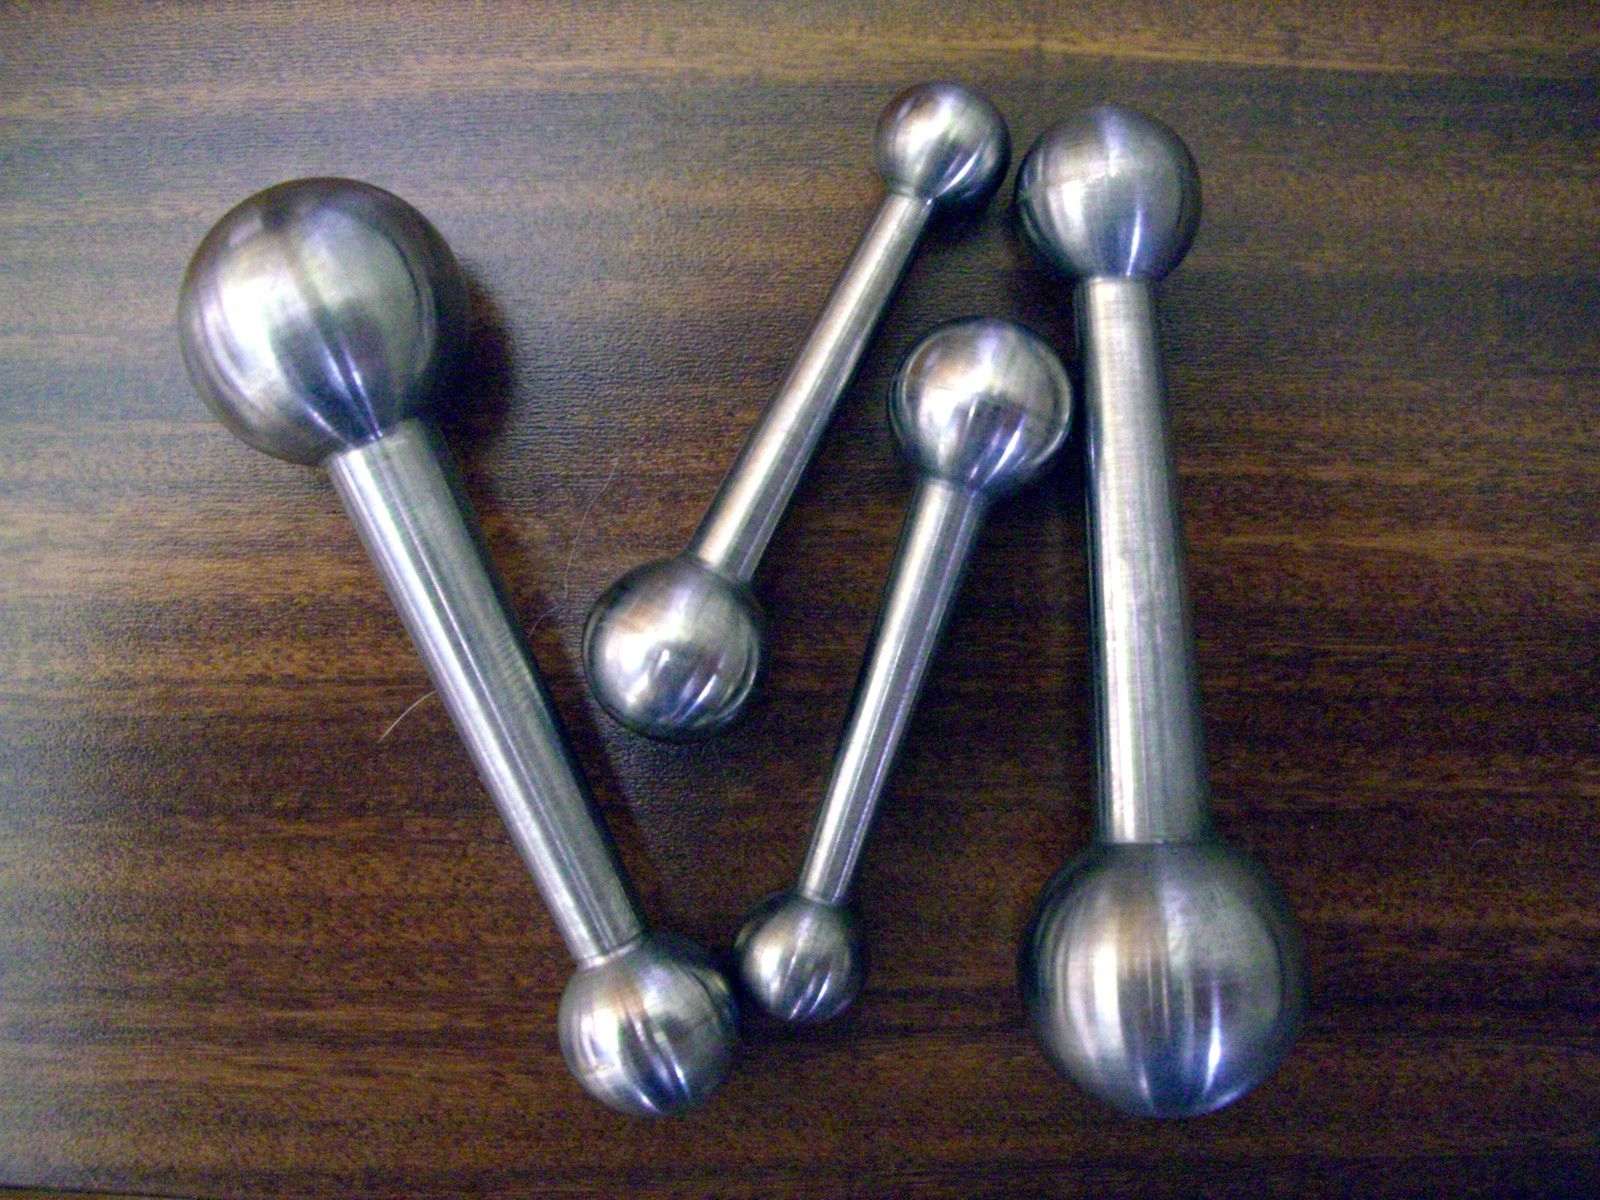
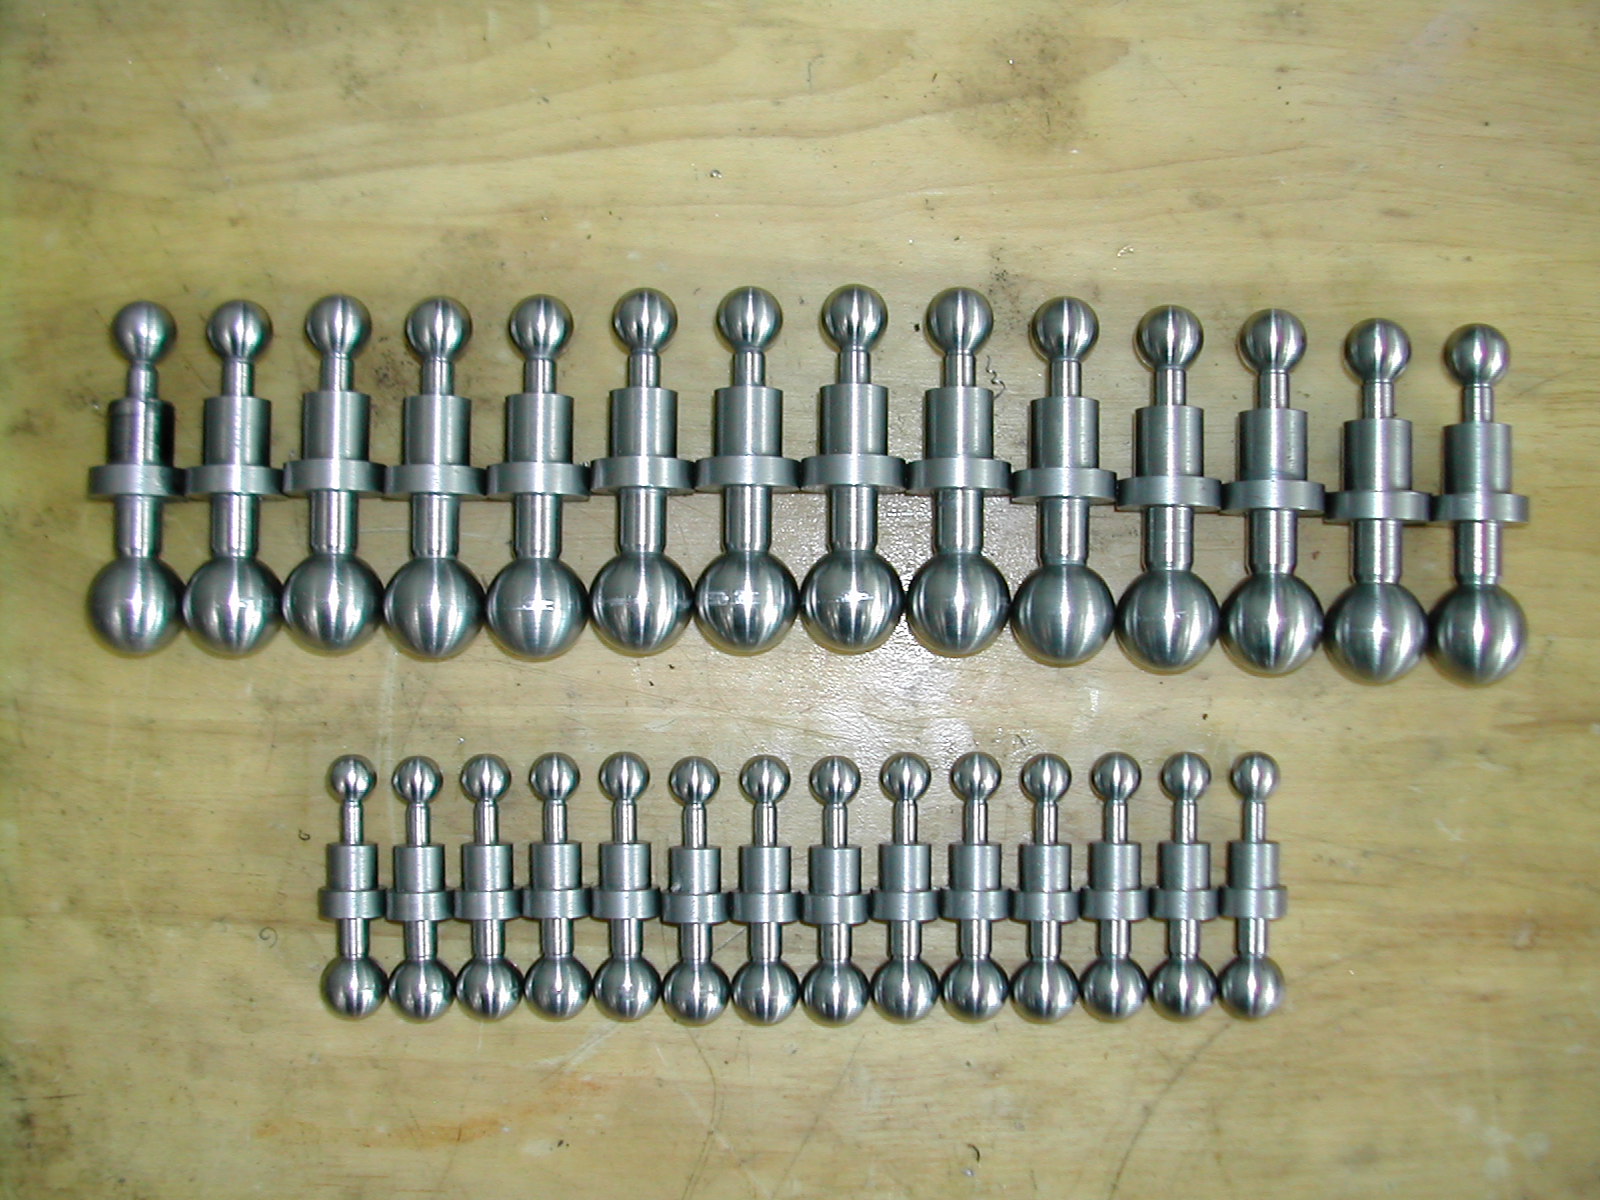 Here’s all of the ball handle blanks with the balls formed and smoothed up.
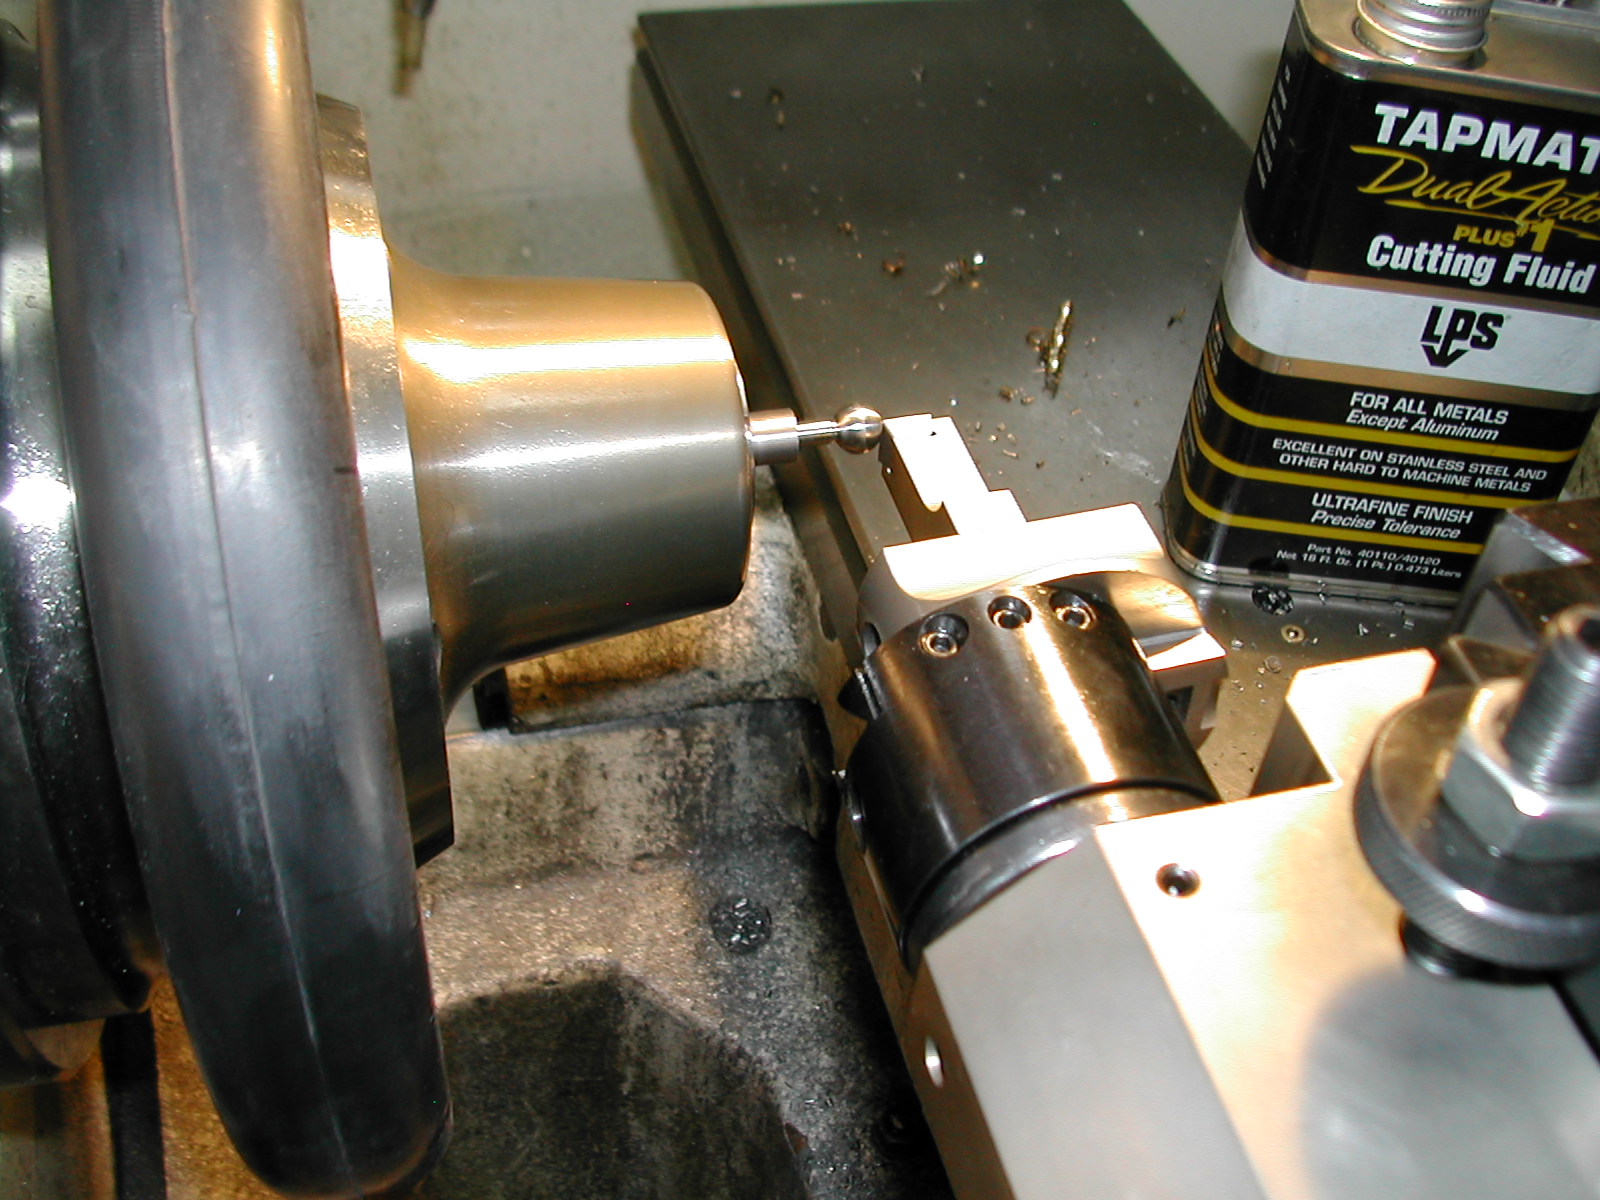
 Here I’ve made a small female cup center for the tailstock that just slips over a regular ball bearing 60° live center. I’m starting with the small ball handle with the 0.500″ ball held in the collet and backed by a soft collet stop so I don’t mar the polished finish.
 I first whittle down the excess stock in the middle of the neck with overlapping plunge cuts using the cross slide. Starting from the big end and working my way towards the small end, stopping the plunge when I reach the depth of the last plunge cut. This insures that I don’t plunge past the final diameter.
On the last plunge at the small end, I plunge to the small end neck diameter and then use the compound, previously set at the correct angle, to make the finish tapering pass back to the large end. A quick pass of emery paper polishes things up.
 With the small ball handles finished, it’s to the large handles. Using the same 0.500″ collet setup, I put the 0.750″ ball in the female cup center. This time we I work from right to left whittling down the stock with plunge cuts, and make the finish pass using the compound from left to right.
Note that the compound angle for the large ball handles is not the same as the small ones. I also don’t want to be too aggressive plunging because the large ball is easy to knock out of the female center.
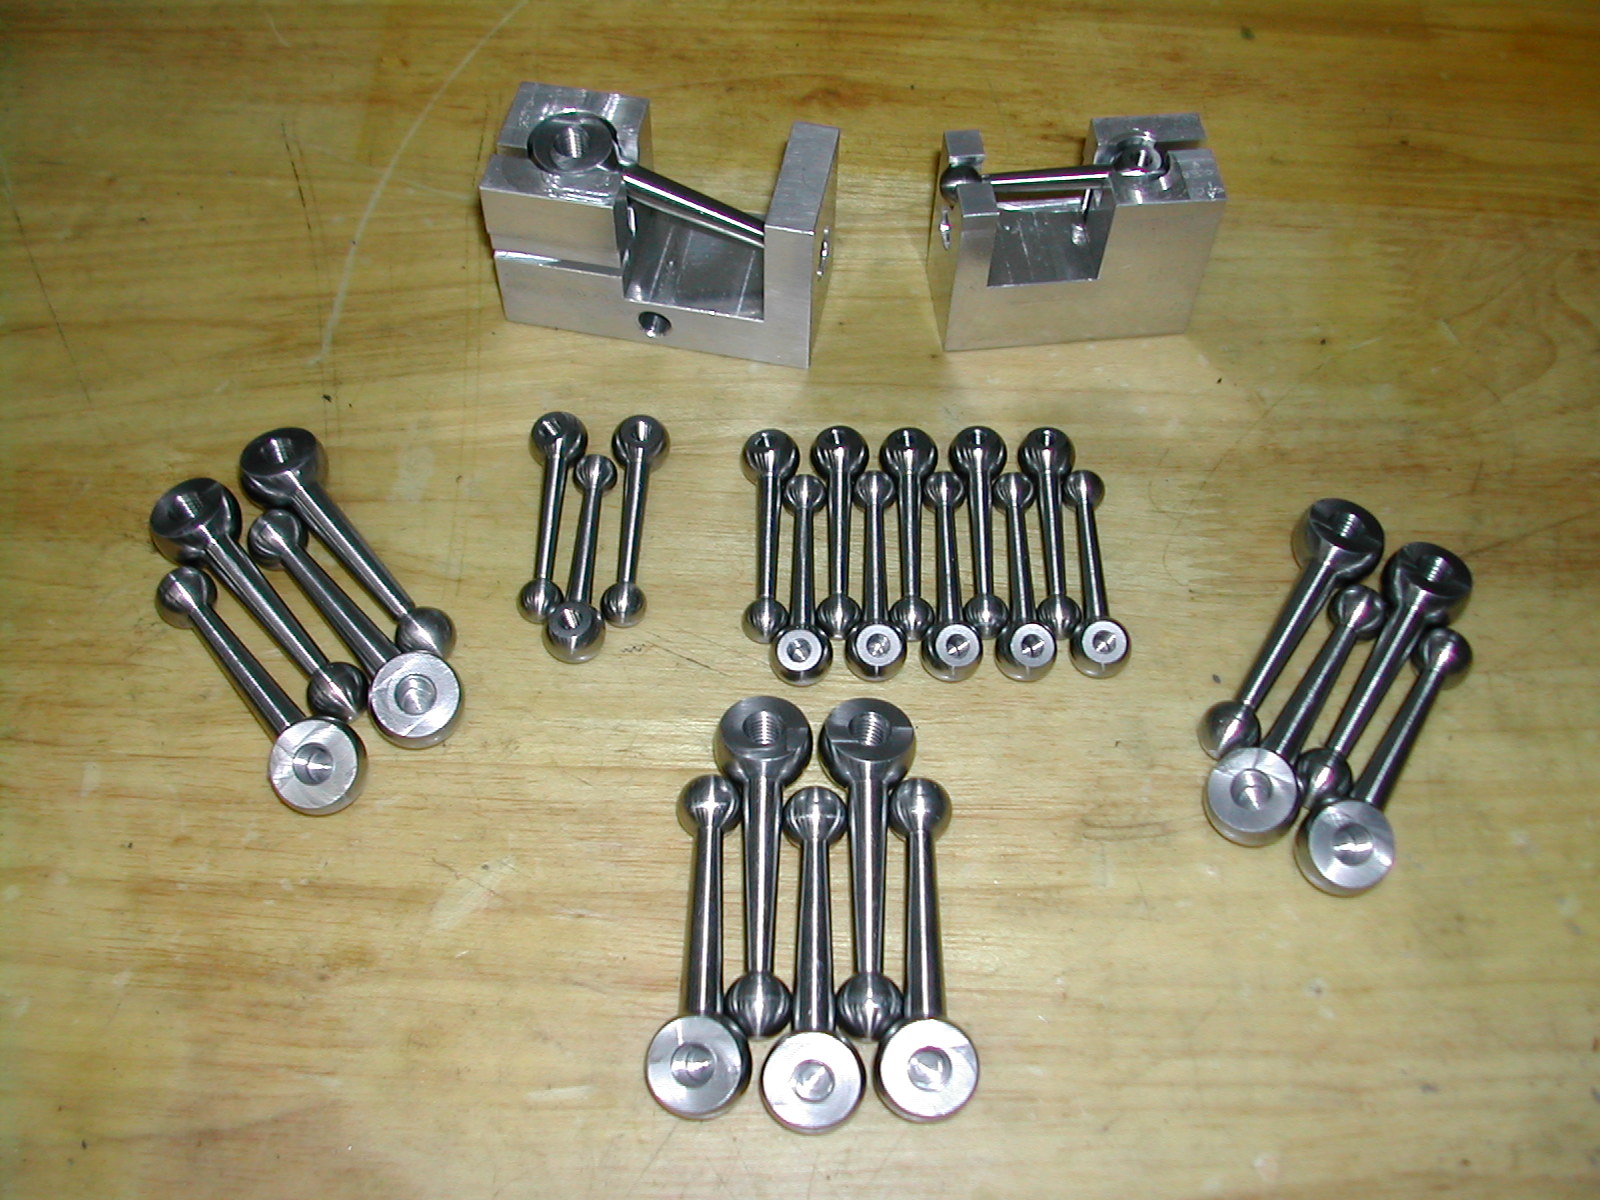
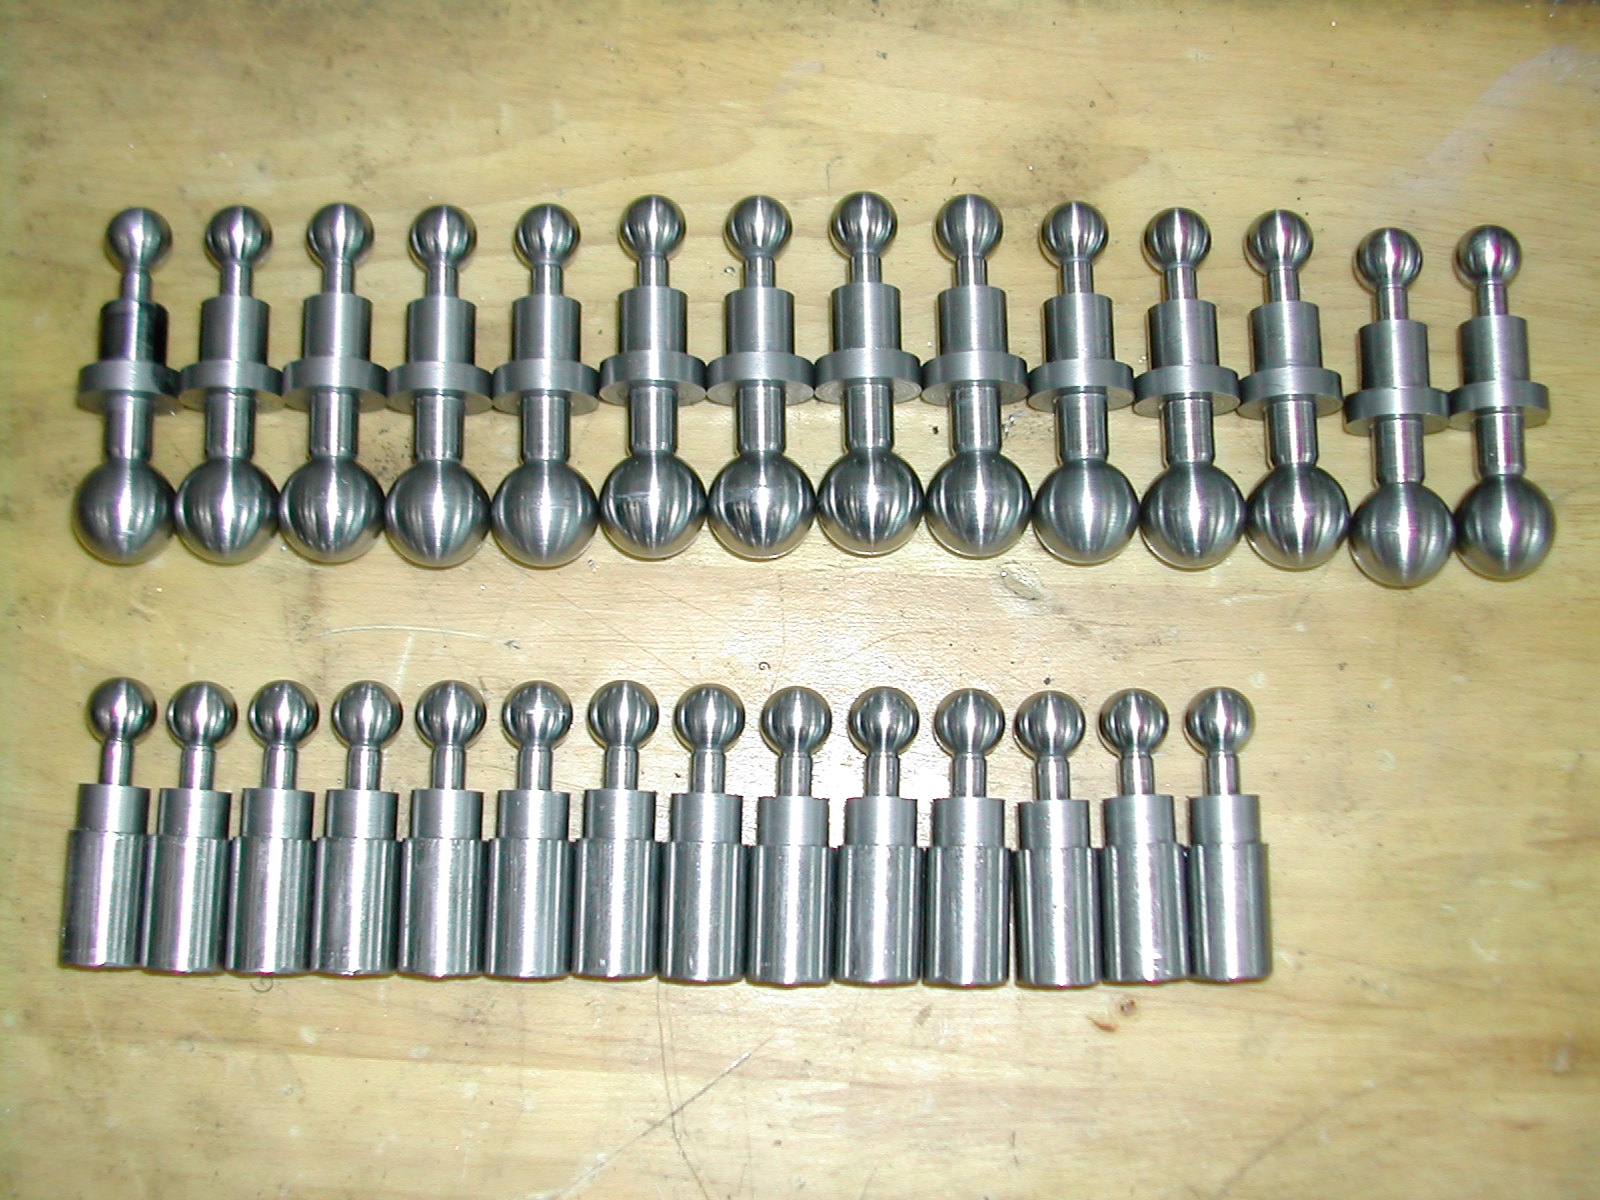
 This is a few of the ball handles with the tapered shanks cut ready for drilling and tapping. At this point, I have about 6 hours of lathe time in the 28 ball handles.
 The large ball handles and most of the small ball handles are drilled and tapped at 110° to the shank centerline. Two of the small ball handles are drilled and tapped perpendicular to the shank centerline.
One thing I worried about with all the handles was changing back and forth between a collet for the mill and the drill chuck to c’drill, drill, and tap each ball handle.
I needed a way to securely and repeatably hold the parts so I could attack them assembly-line fashion; milling all of them, then center drilling all, drilling all, and finally tapping all.
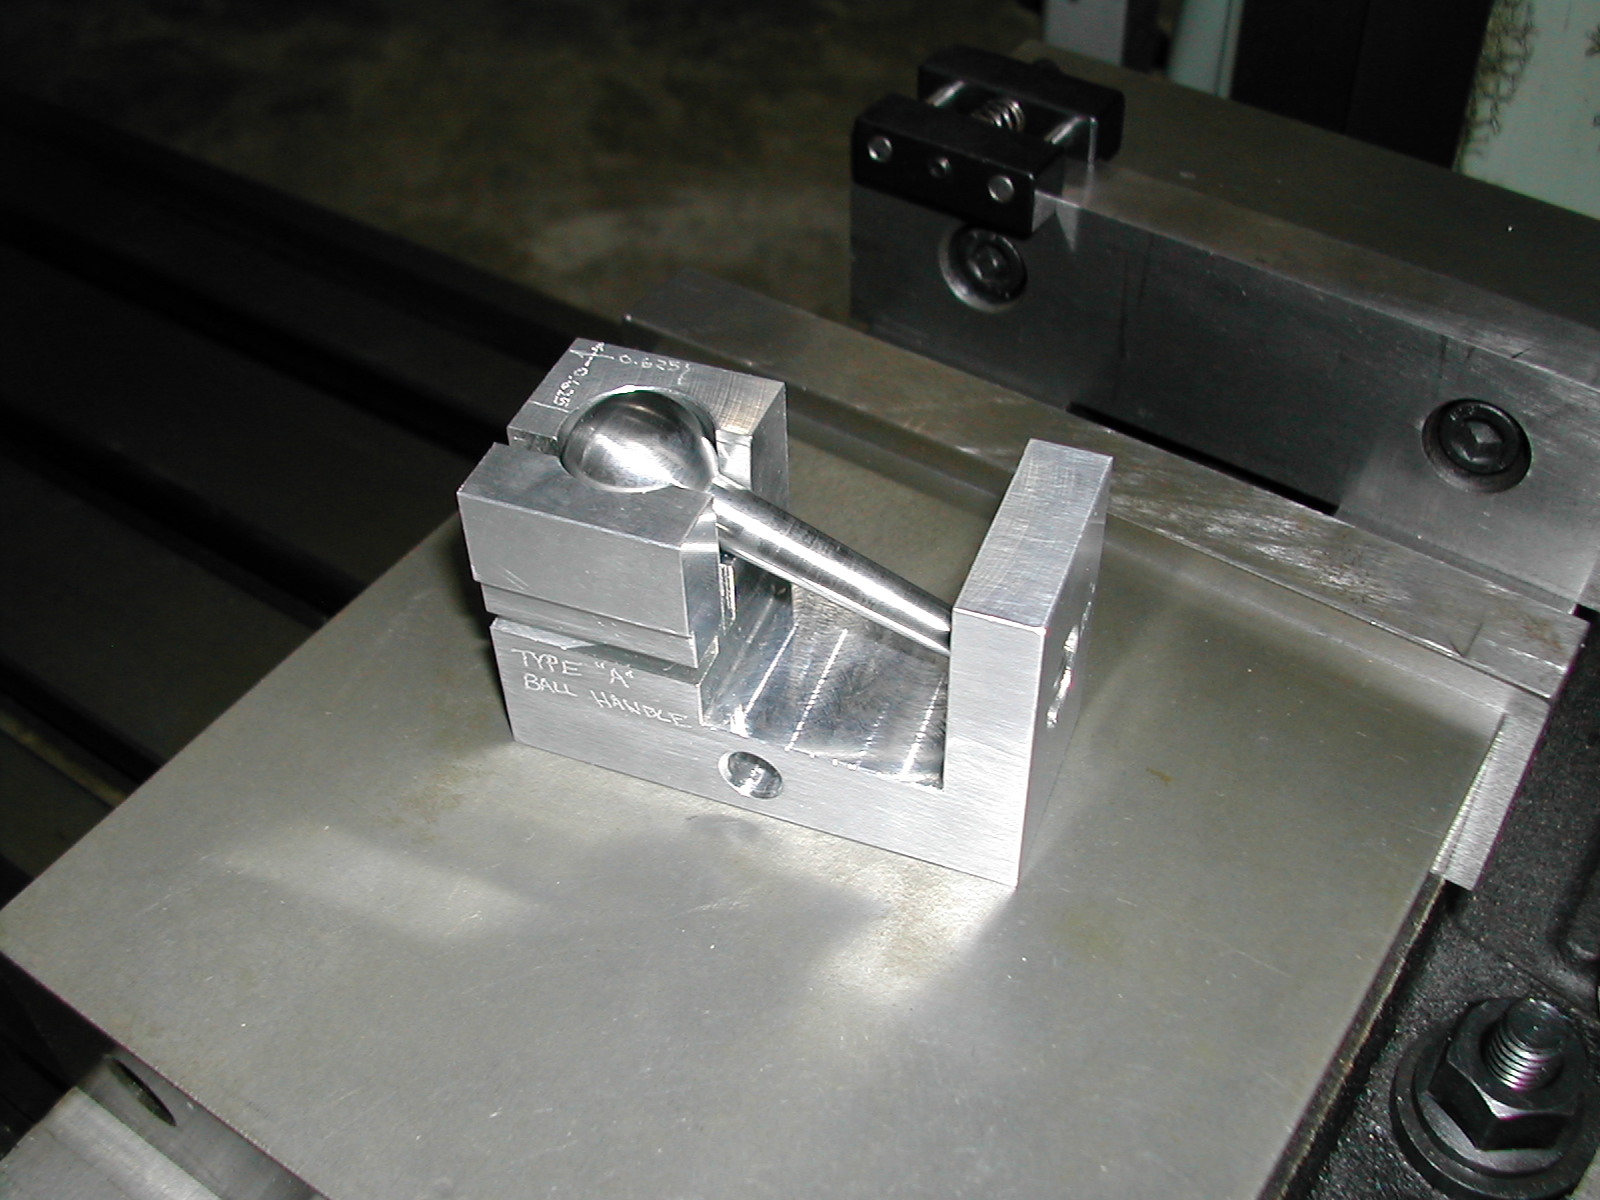
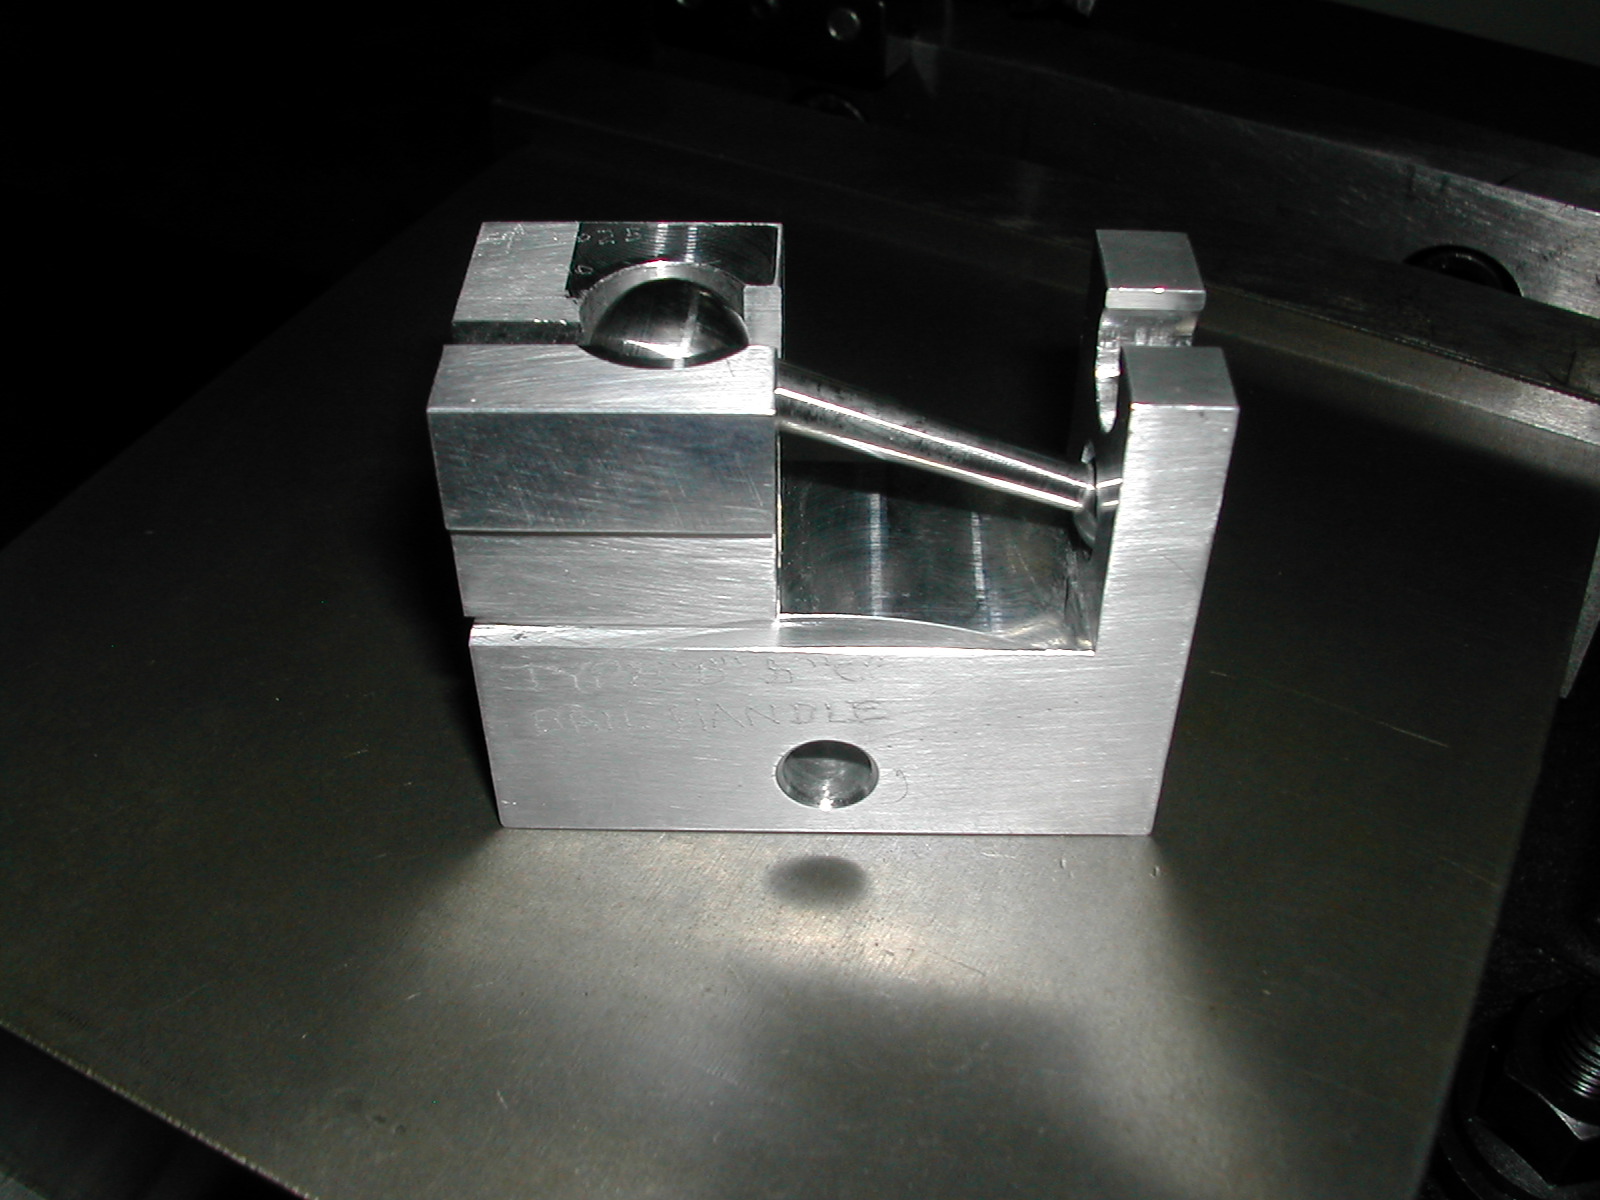
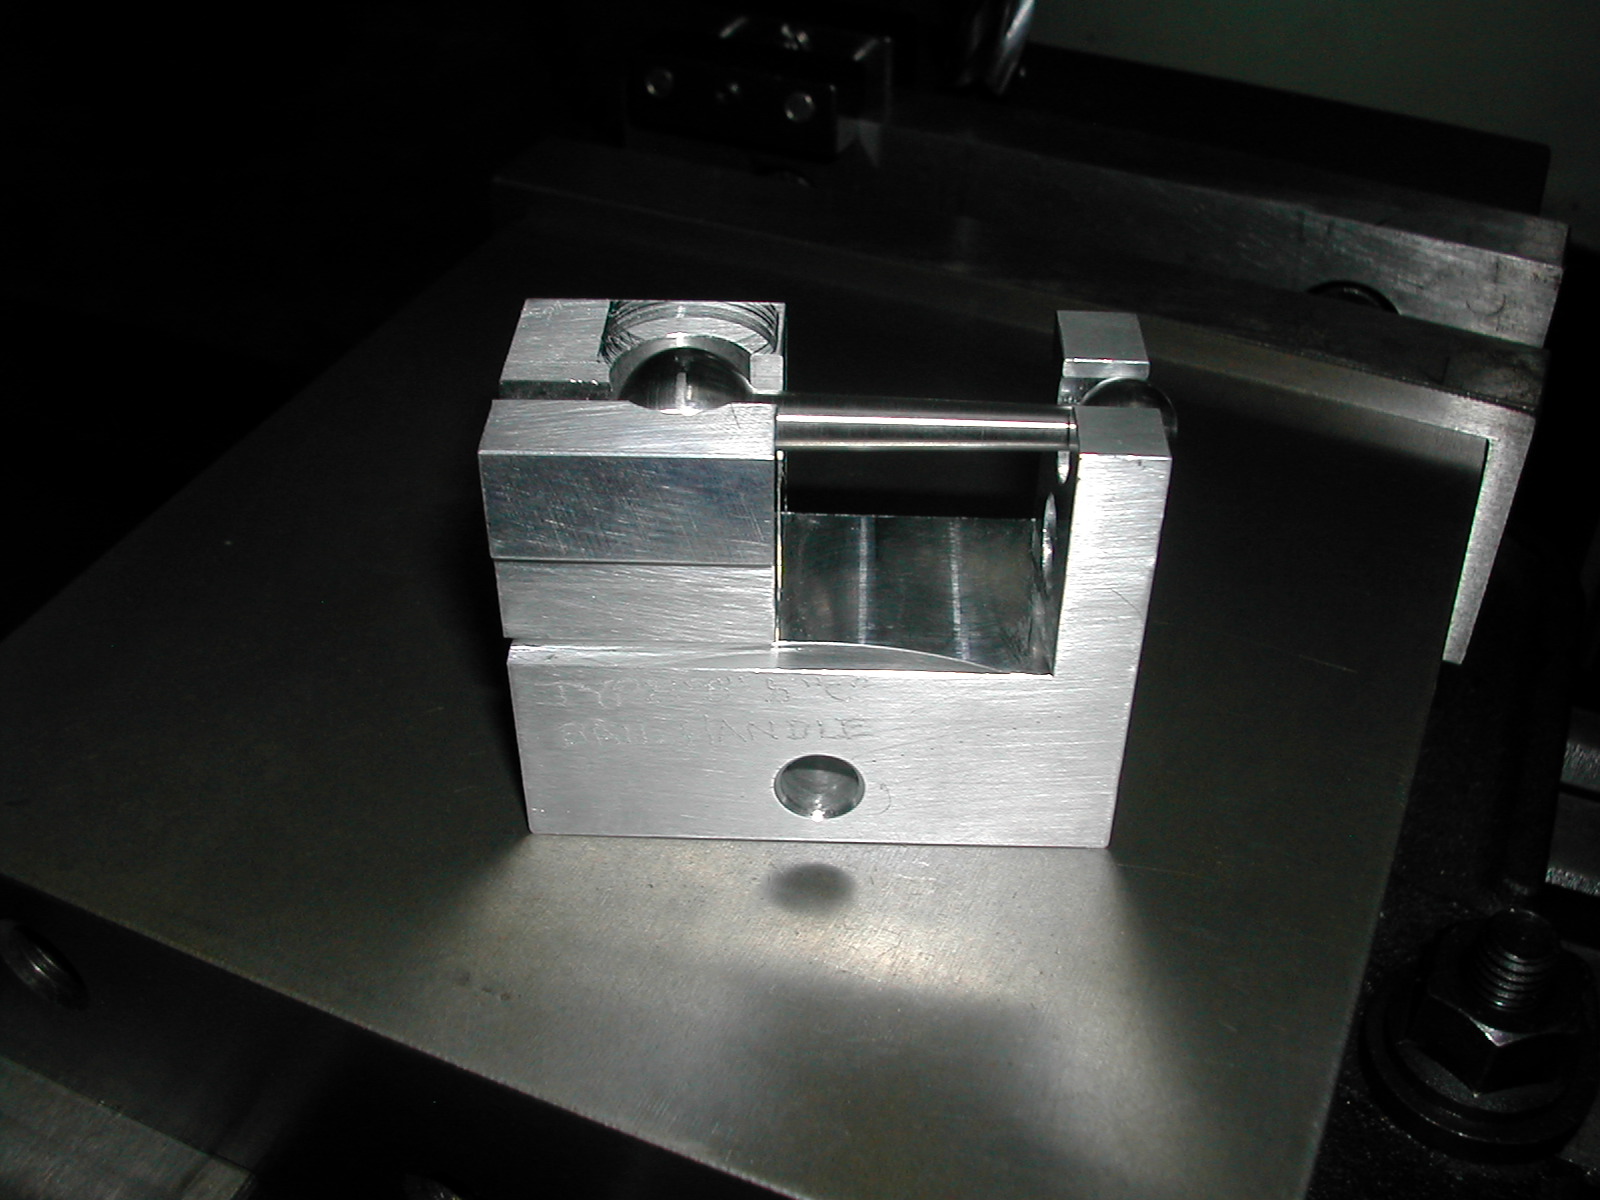
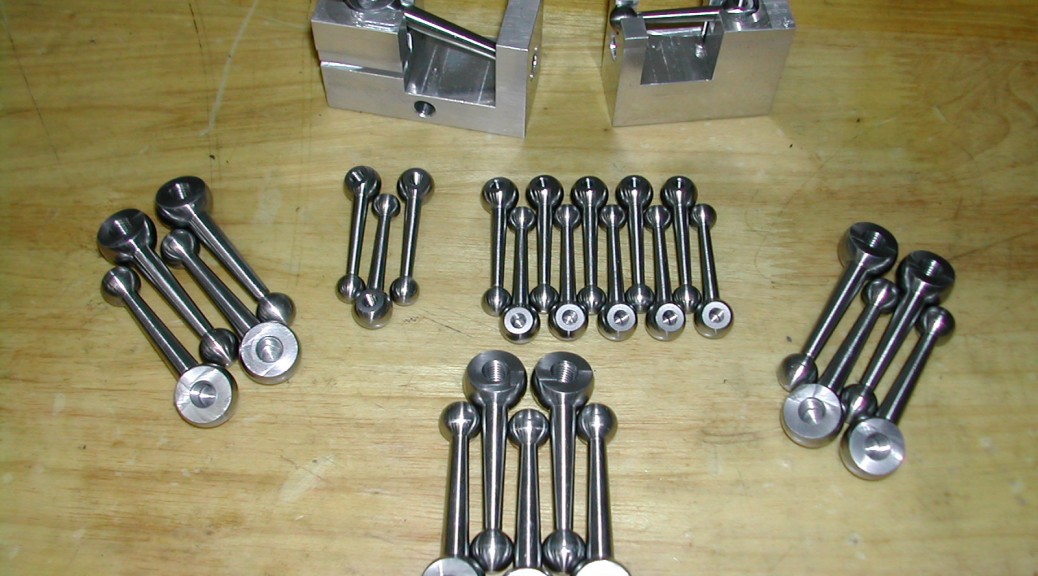
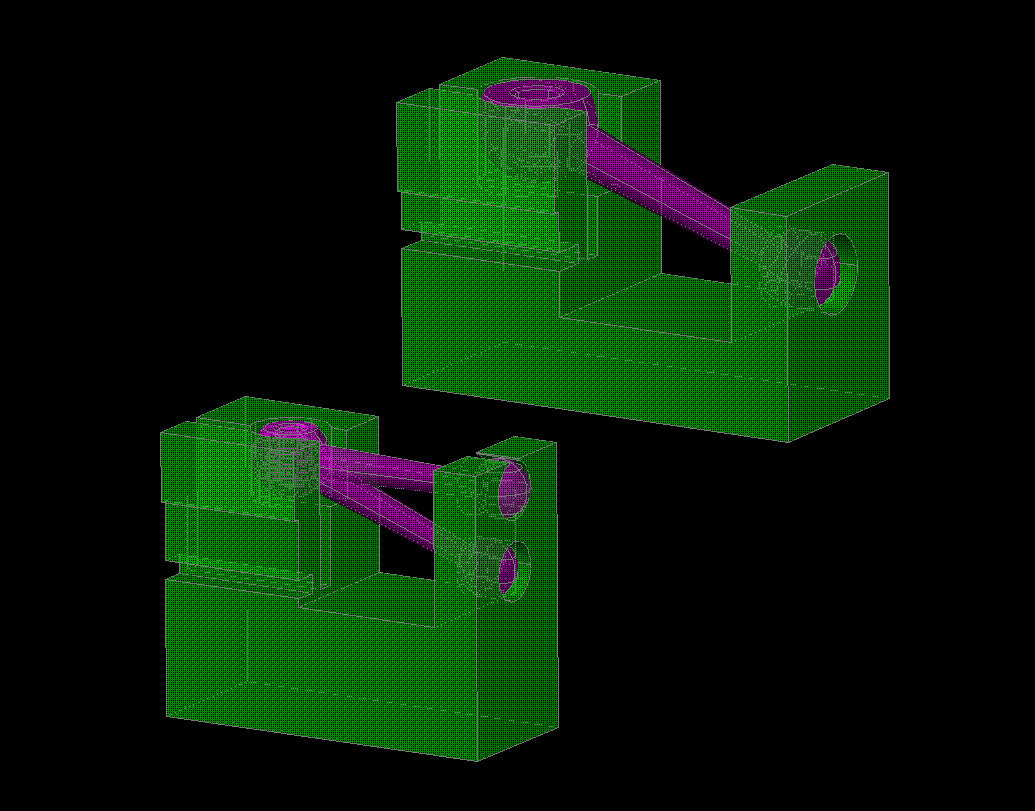
These are the simple fixtures, made out of aluminum, I devised to clamp the ball handles in the mill vise for drilling, tapping, and milling the flat clamping surface.
 Both fixtures, the Type-A and the Type-B/C are the same height. Once I had the end-mill height set, it was only a matter of changing out ball handles until all were milled.
At this point, location wasn’t critical, but I went ahead and mounted the vise stop to be ready for the next operations.
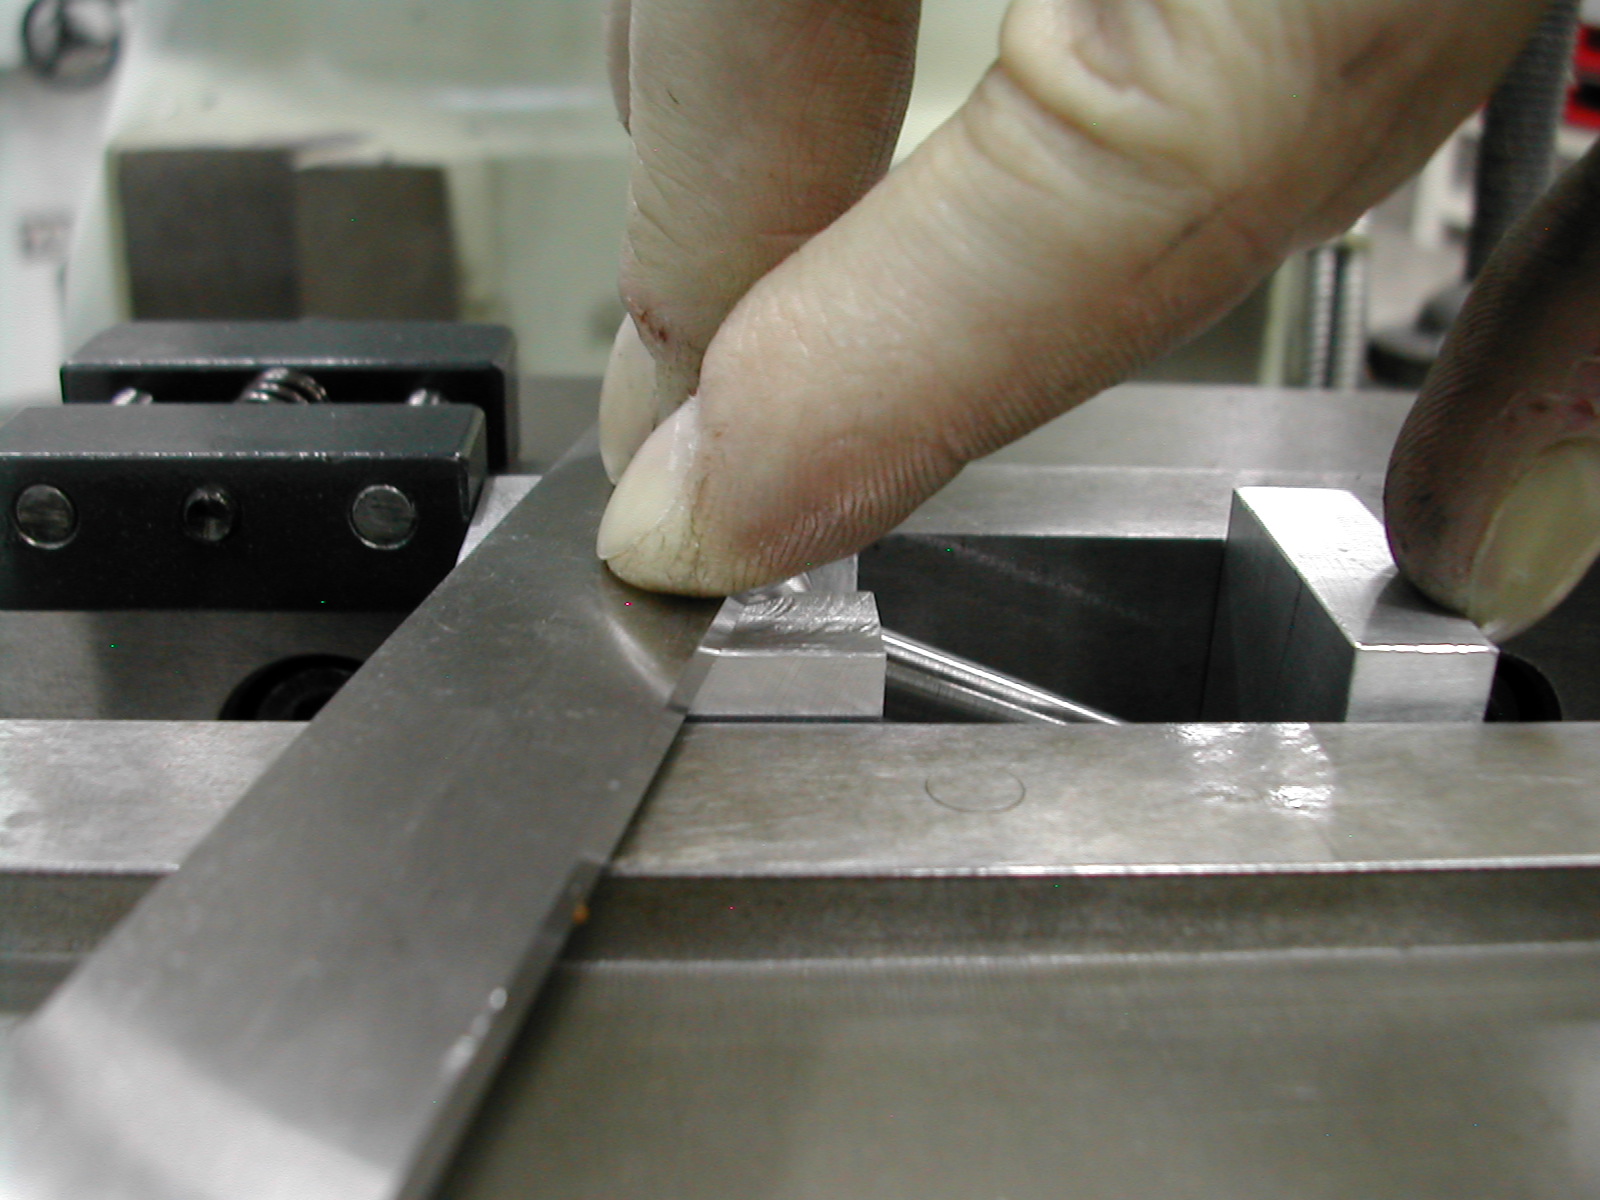 Here’s the trick that really sped things up. Since the top of the jig was at the same height as the finished flat on the balls, I could re-index the ball handles by simply using a flat object to push them level with the fixture top.
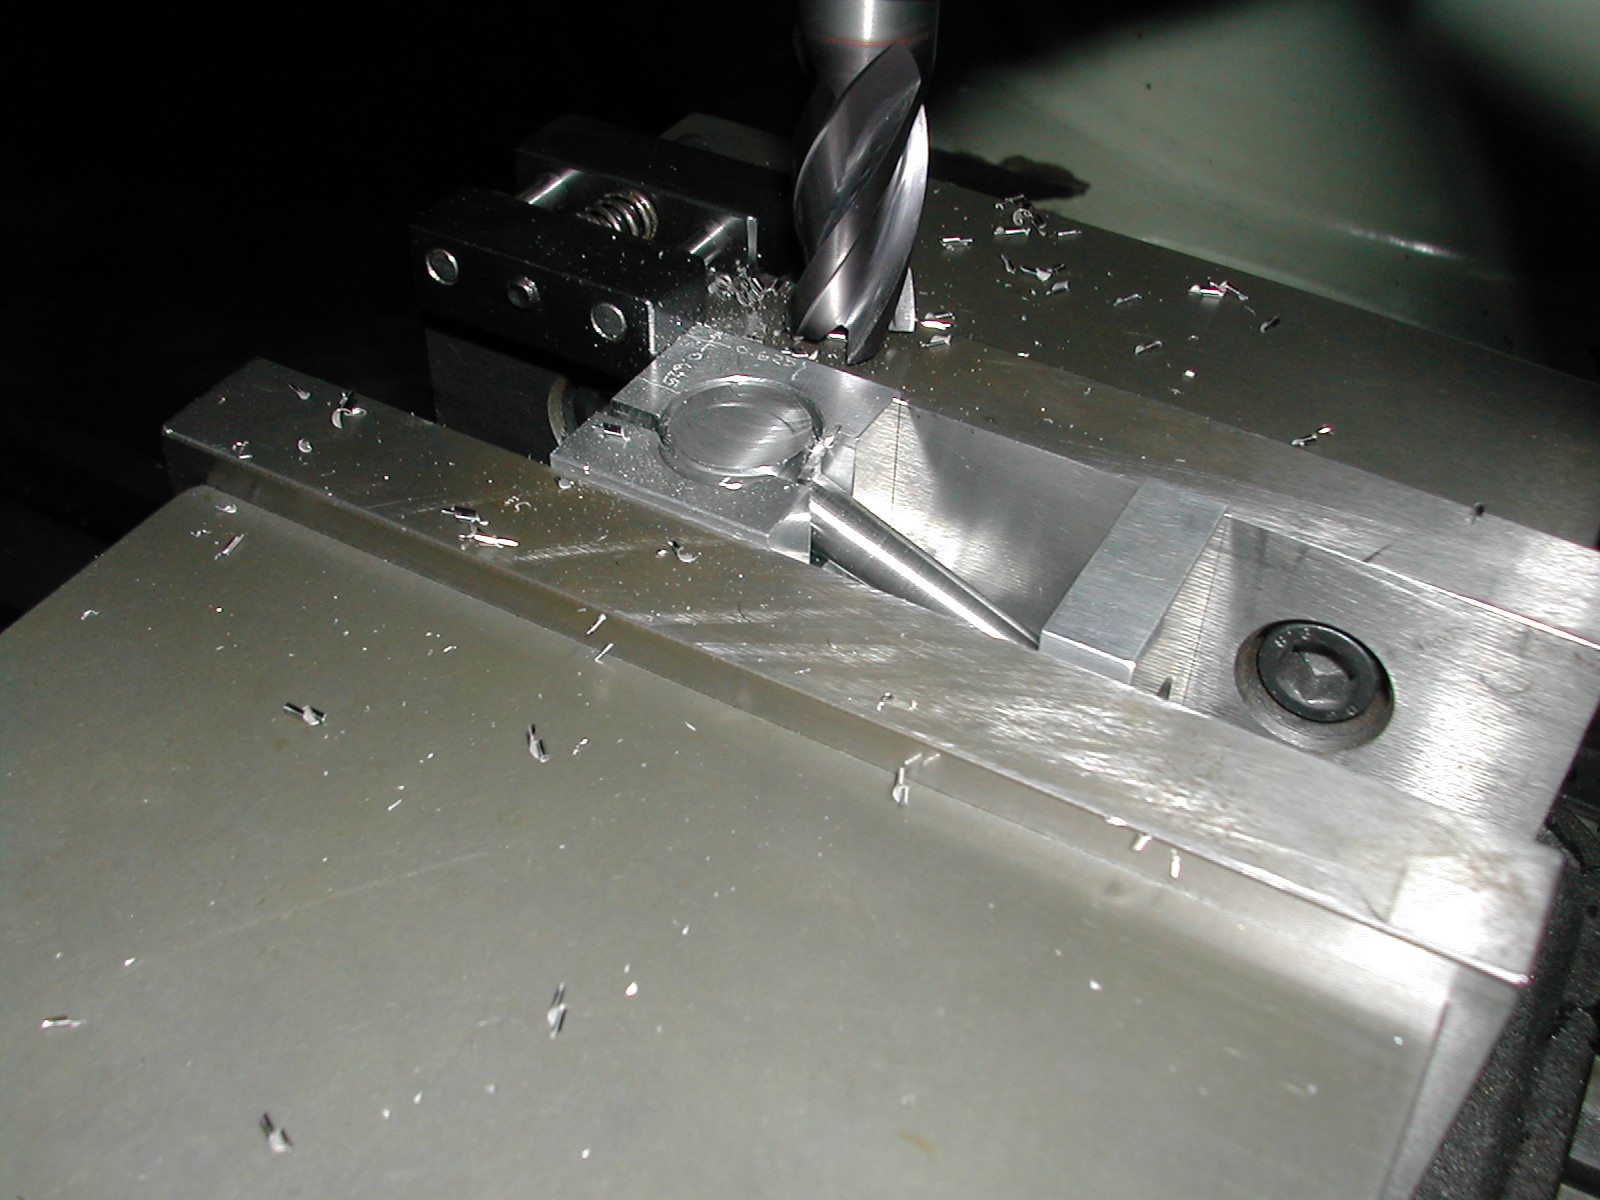
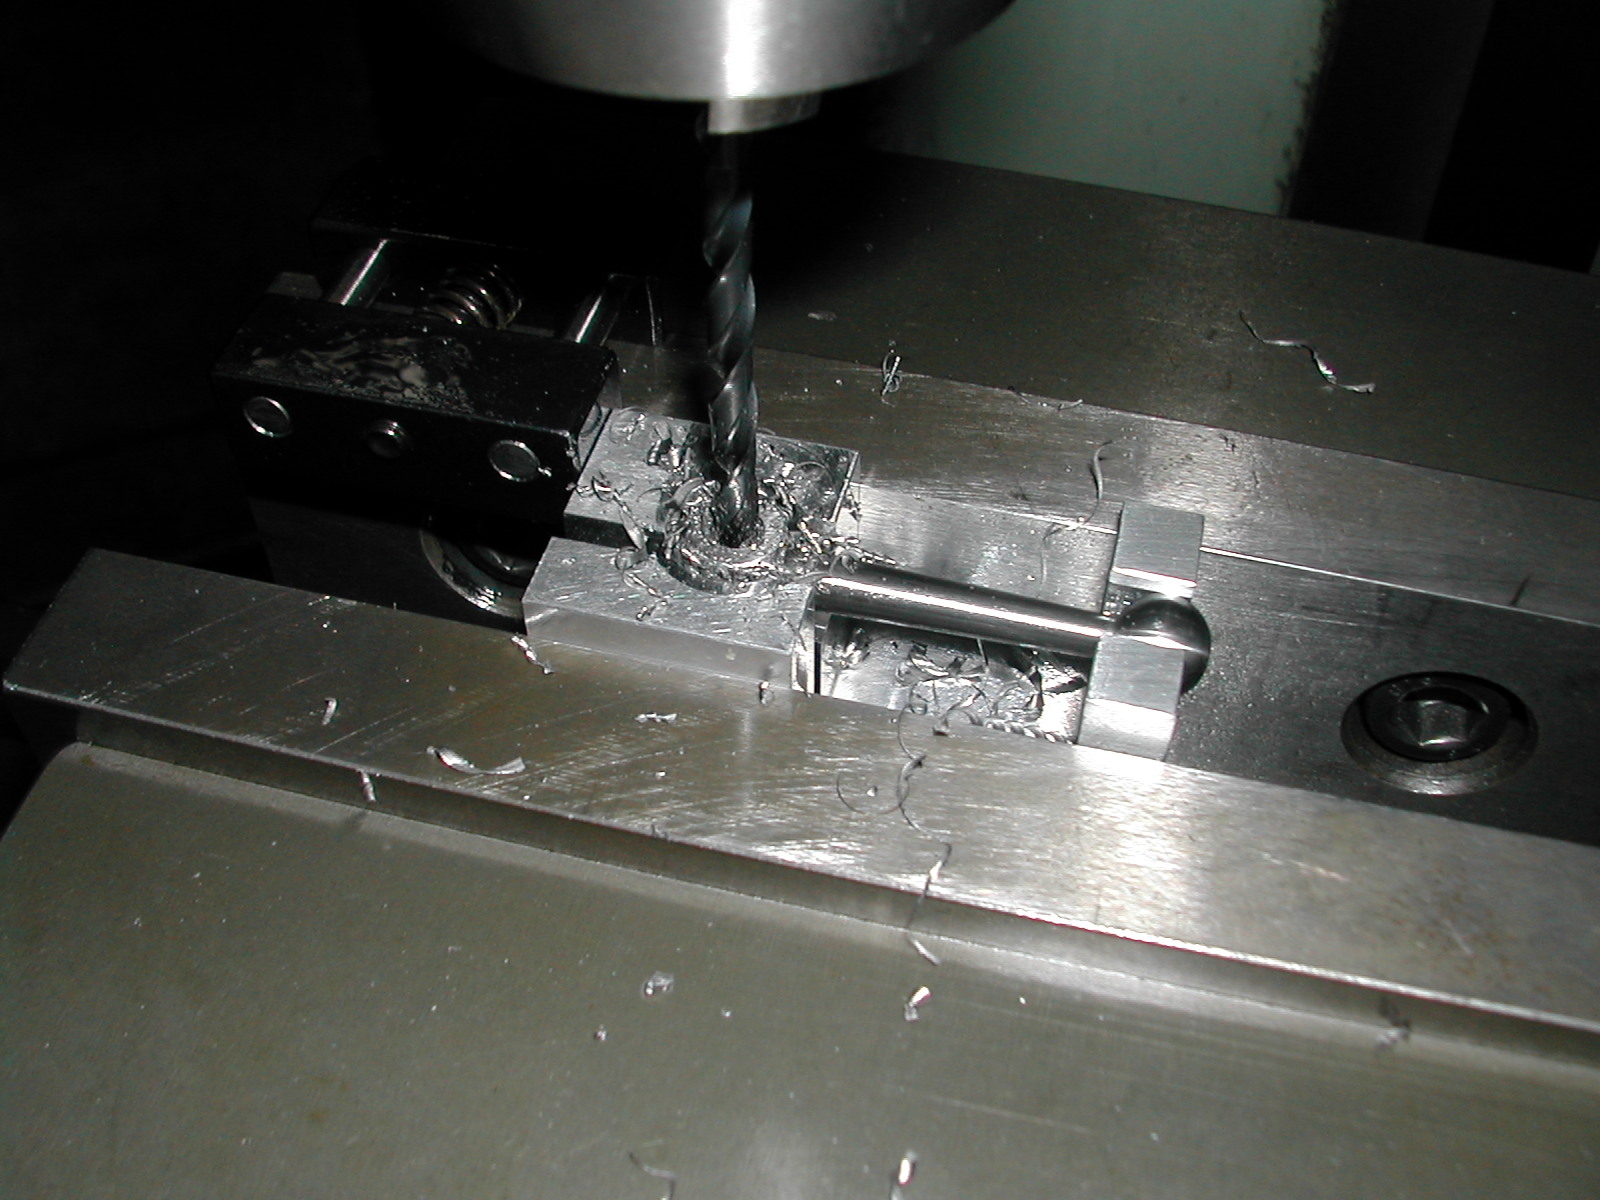
So now I changed over to the drill chuck, located the center of my ball (notice the engraved dimensions on the fixture in the previous photo), and chucked up a center drill. Since I was going to c’drill all the balls at once, I could set the height just perfect to get a nice chamfer on the finished tapped hole.
 After center drilling all the holes, setting up for drilling was easy. I ran the drill down to the bottom of the fixture and set the quill stop at that point. Then, I just dropped the knee 1/16″ and drilled away.
 Here’s the drilling progressing on the Type-C ball handles. These photos are a little mixed up. The sequence of operations is correct, but the order of the parts is mixed up. The actual order of all the operations was:
Mill all handles (Type-A, B, and C)
Center drill Type-A
Drill Type-A
Tap Type-A
Adjust table position for Type-B/C fixture
C’drill Type-B/C
Drill Type-B/C
And finally tap Type-B/C.
 I tapped both the 5/16″-24 and the #10-32 threads in the mill. Since these were blind holes, I tapped them by placing the mill’s back-gear in neutral and hand turning the chuck.
Finally, 14 large and 14 small ball handles finished. Overall, this wasn’t as bad as I thought. If I don’t count the time making the ball turning attachment, I have 6 hours of lathe time, another 1½ hours making the mill fixtures and another three hours milling and tapping. So, I passed my Quorn entrance exam making 28 ball handles in 10½ hours!
These handles were made out of stainless so now I have to decide if I want to buff them to a mirror finish. I’m not sure whether I like the matte, machined look, or if I want the glitzy polished look.
Disclaimer and License
All material, including the CAD drawings, relating to the construction of the Quorn presented on this site is free to use any way you see fit. However, no guarantees are made regarding the accuracy or correctness of the material presented here.
CAD Files Used On This Page (AutoCAD 2008 Format)