
 Another big fabrication effort was due to the fact that the water pump on the Perkins sat about 2¾” higher than the previous IVECO pump. Luckily, both were on the crank centerline so all that needed to be done was raise the radiator cowling to match the new fan location.
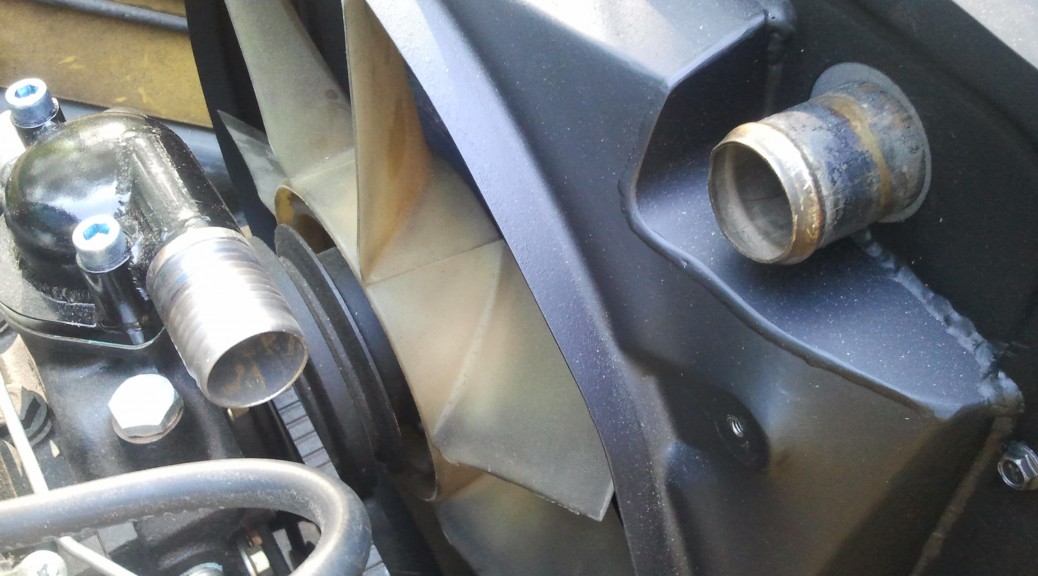
There is a rubber gasket that surrounds the radiator and seals against the hood and the two side panels to block bypass air. If I just raised the fan cowl the whole 2¾”, I would have had to cut off almost all of the sheetmetal flange at the top of the cowling that this gasket attached to. Additionally, the current radiator position was such that the top of the fan blade was above the top of the radiator core.
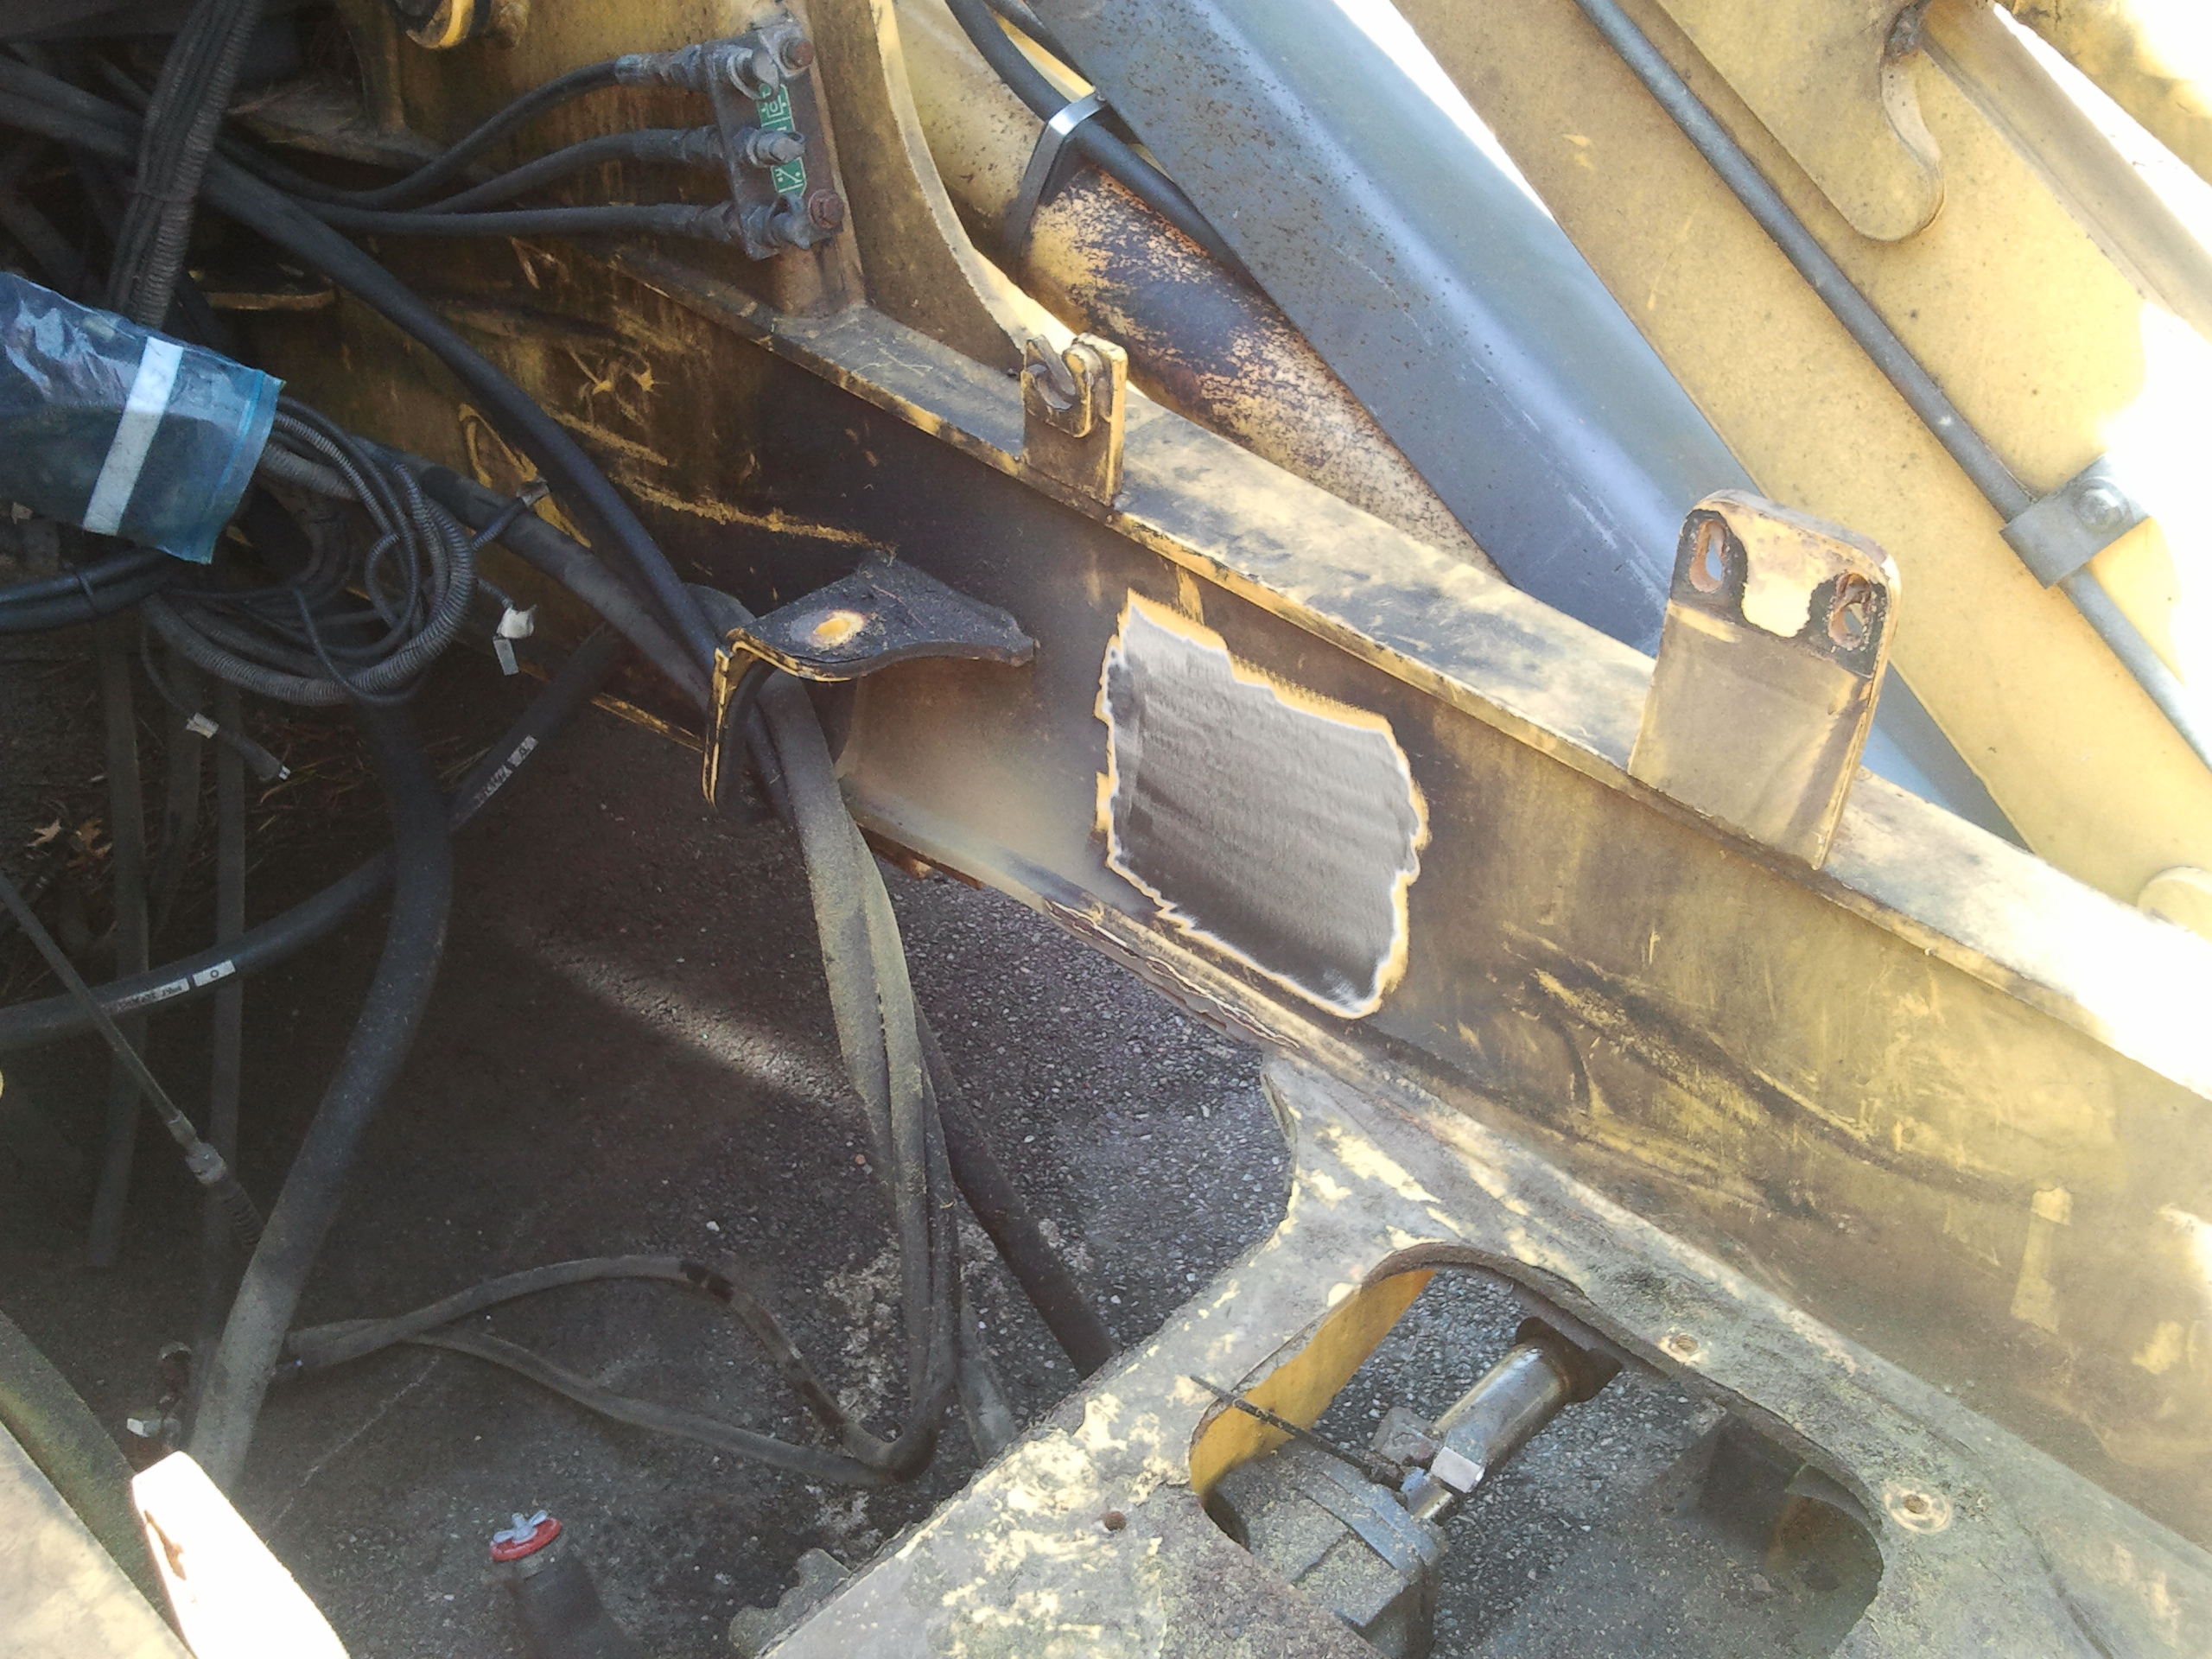 Careful examination showed that I could safely raise the radiator 1½” and still clear the hood. This would mean that the fan cowling would only need to be raised 1¼”. The tractor portion of the radiator mounts are slotted as can be see at the right side of the image. As you can see from the eroded spots on the radiator bracket in the photo below, ¾” of the necessary distance could be garnered by simply raising the radiator from the bottom to the top of the mounting slots. Small spacers were cut and placed in the bottom of the slots to hold the radiator at the top.
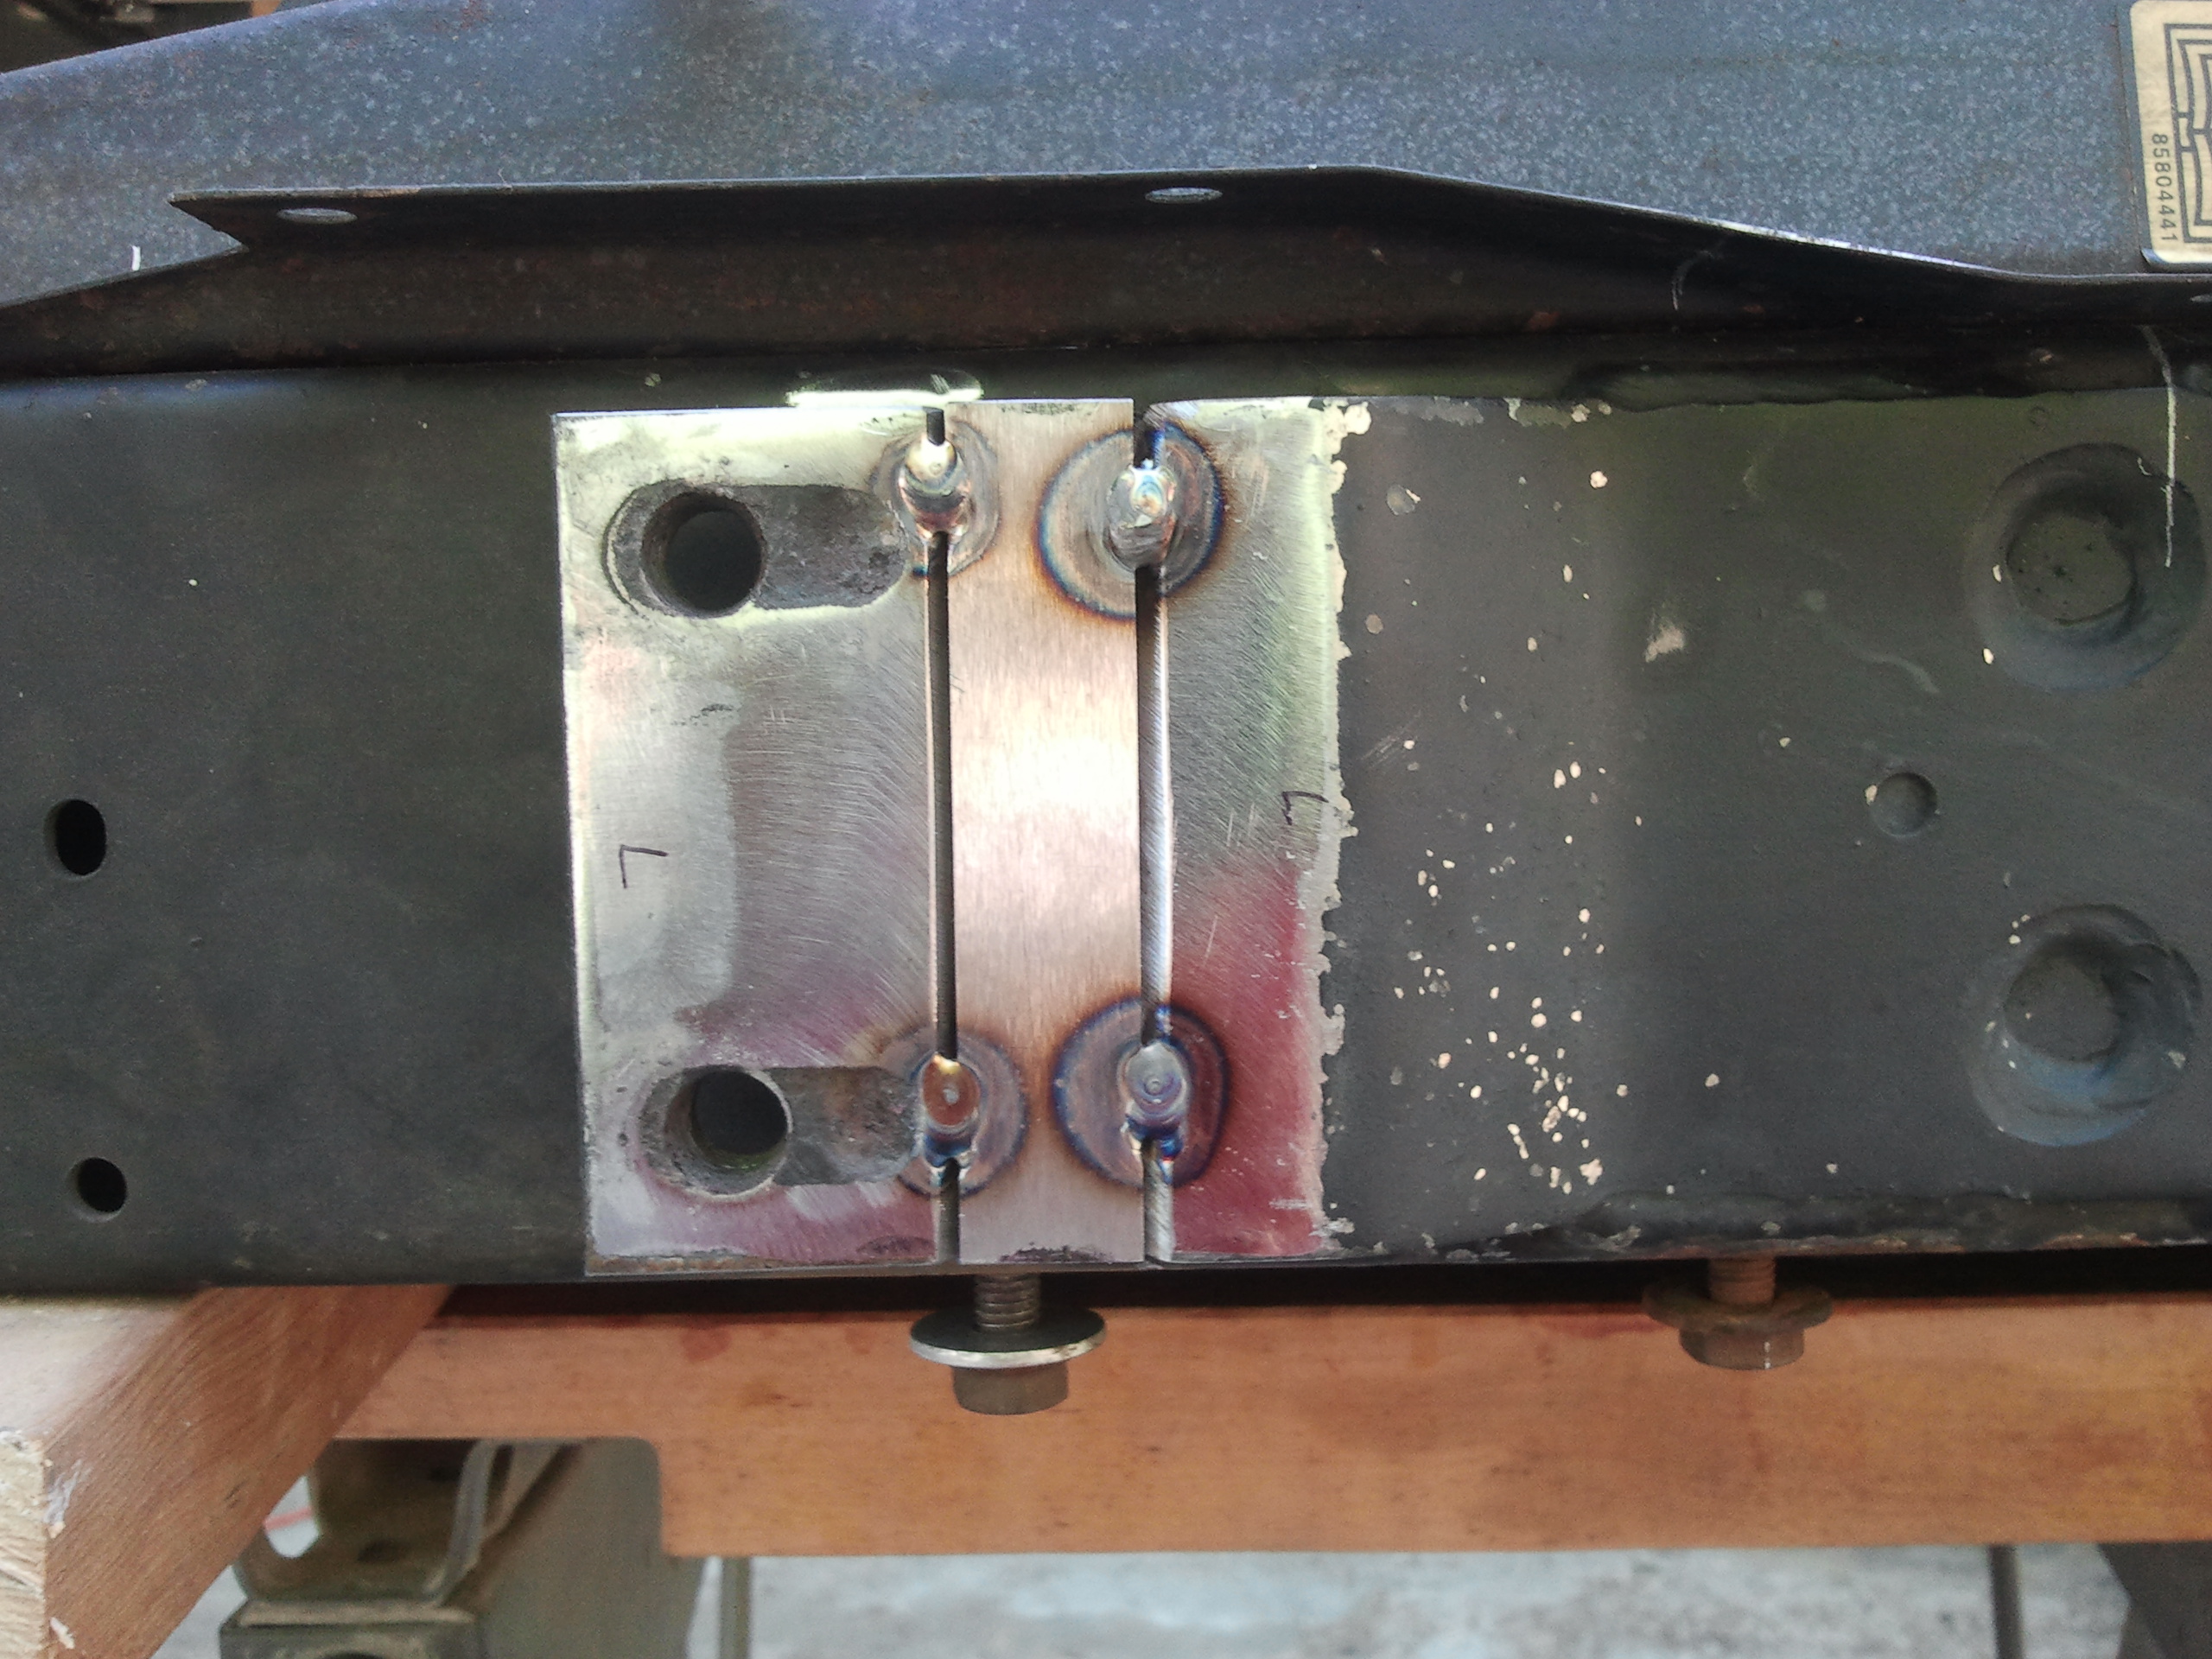 For the remainder of the 1½”, the mounting tabs were sectioned and a ¾” strip of material was added to the radiator portion of the mounting bracket. With the extensions tack welded in, the radiator was remounted and verified that it would clear with the hood in place.
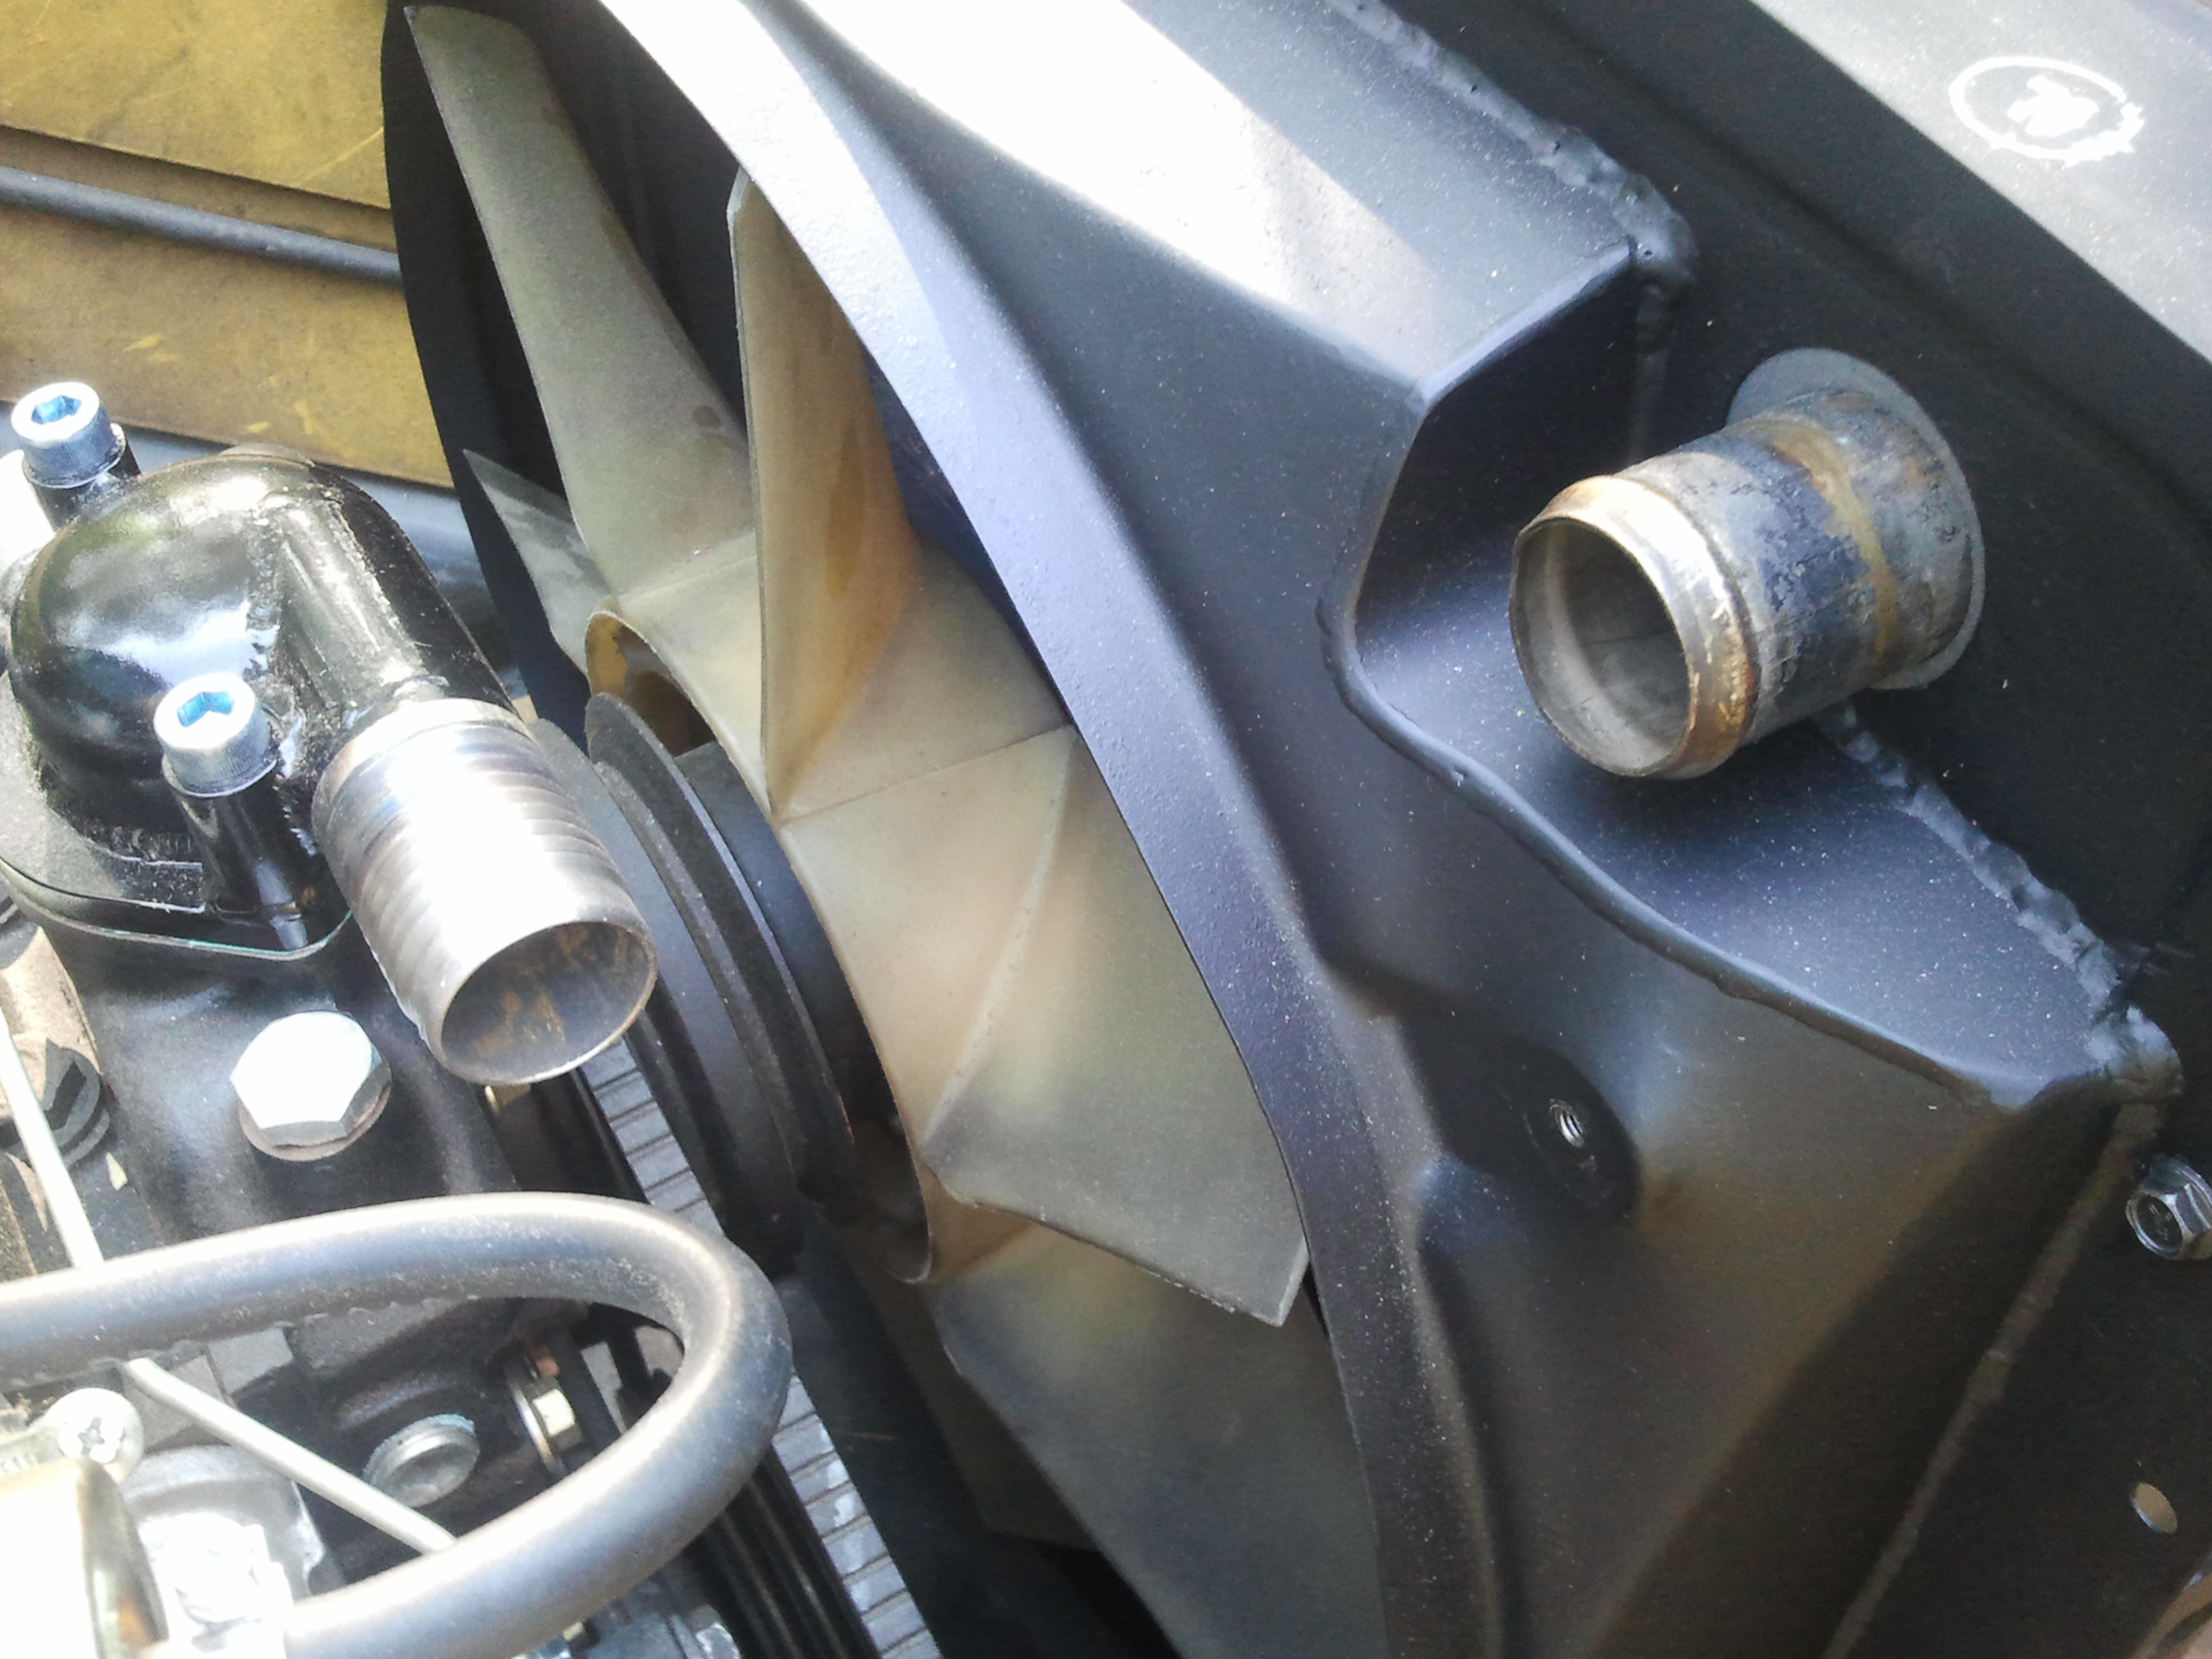
 Raising the radiator made it so that the top of the fan was now below the top of the radiator core and all that was left was to move the shroud up the remaining 1¼”.
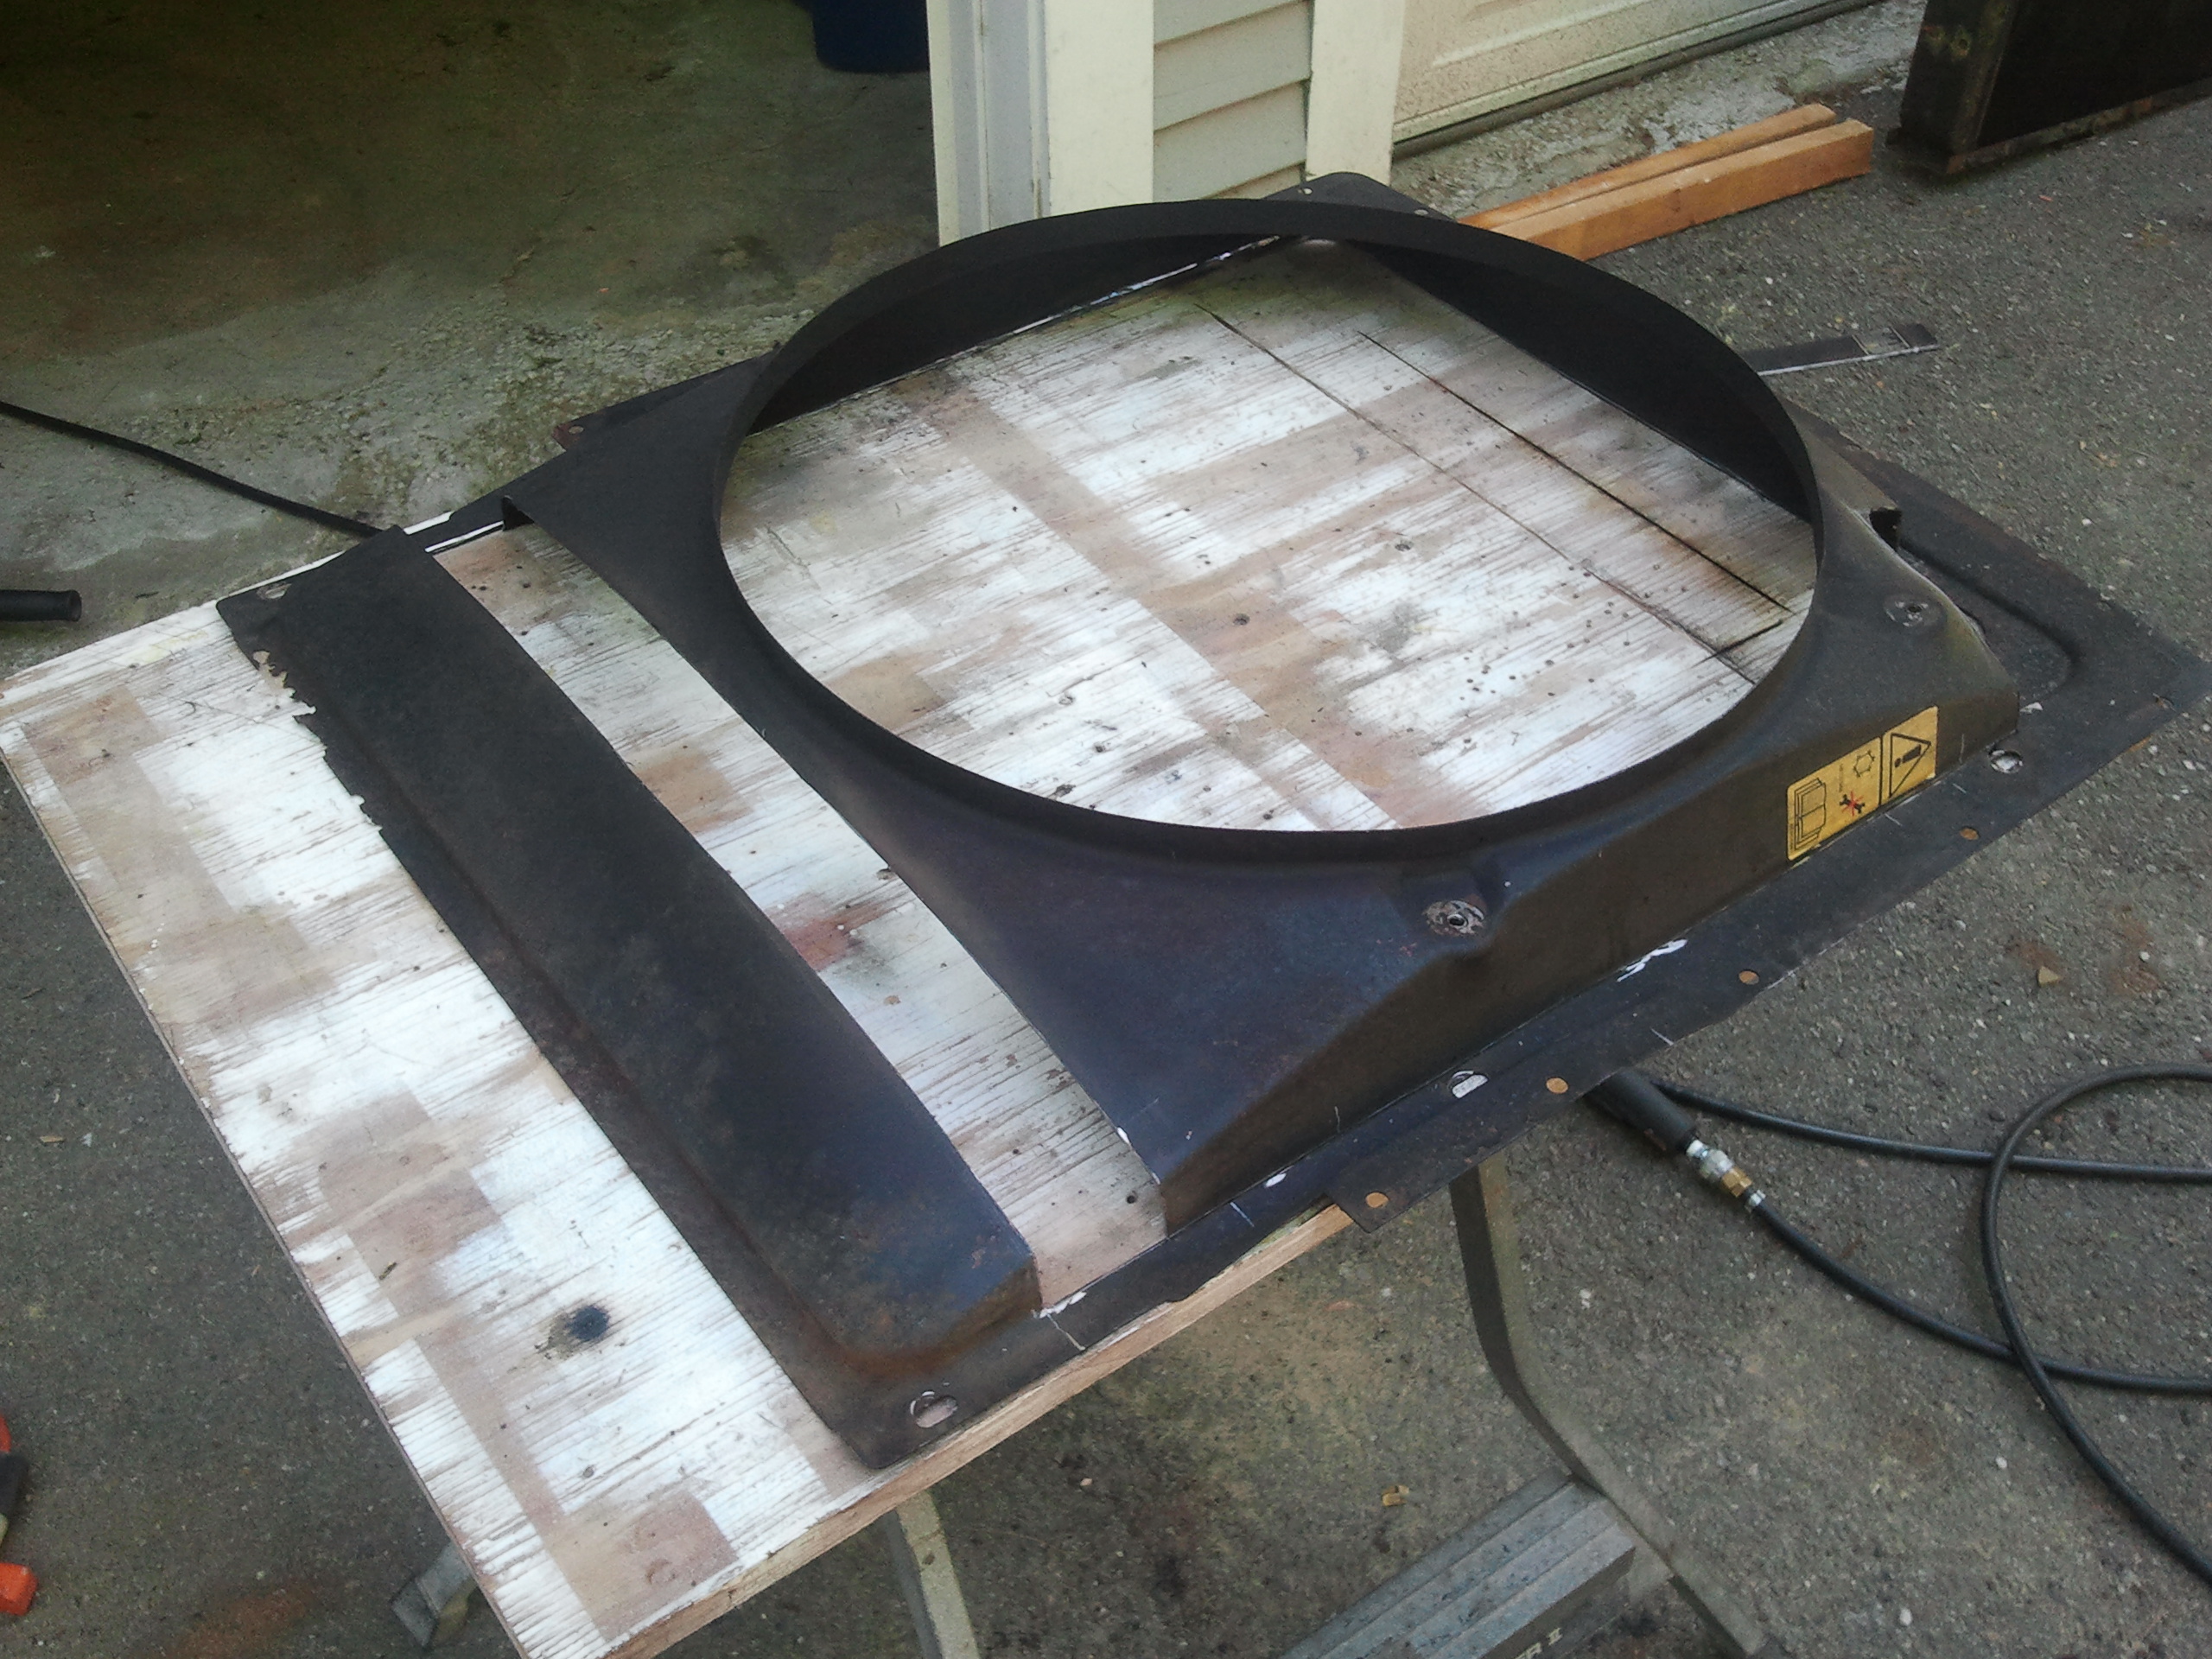 The center portion of the shroud was cut from the outer frame and a section of the outer frame was removed at the top.
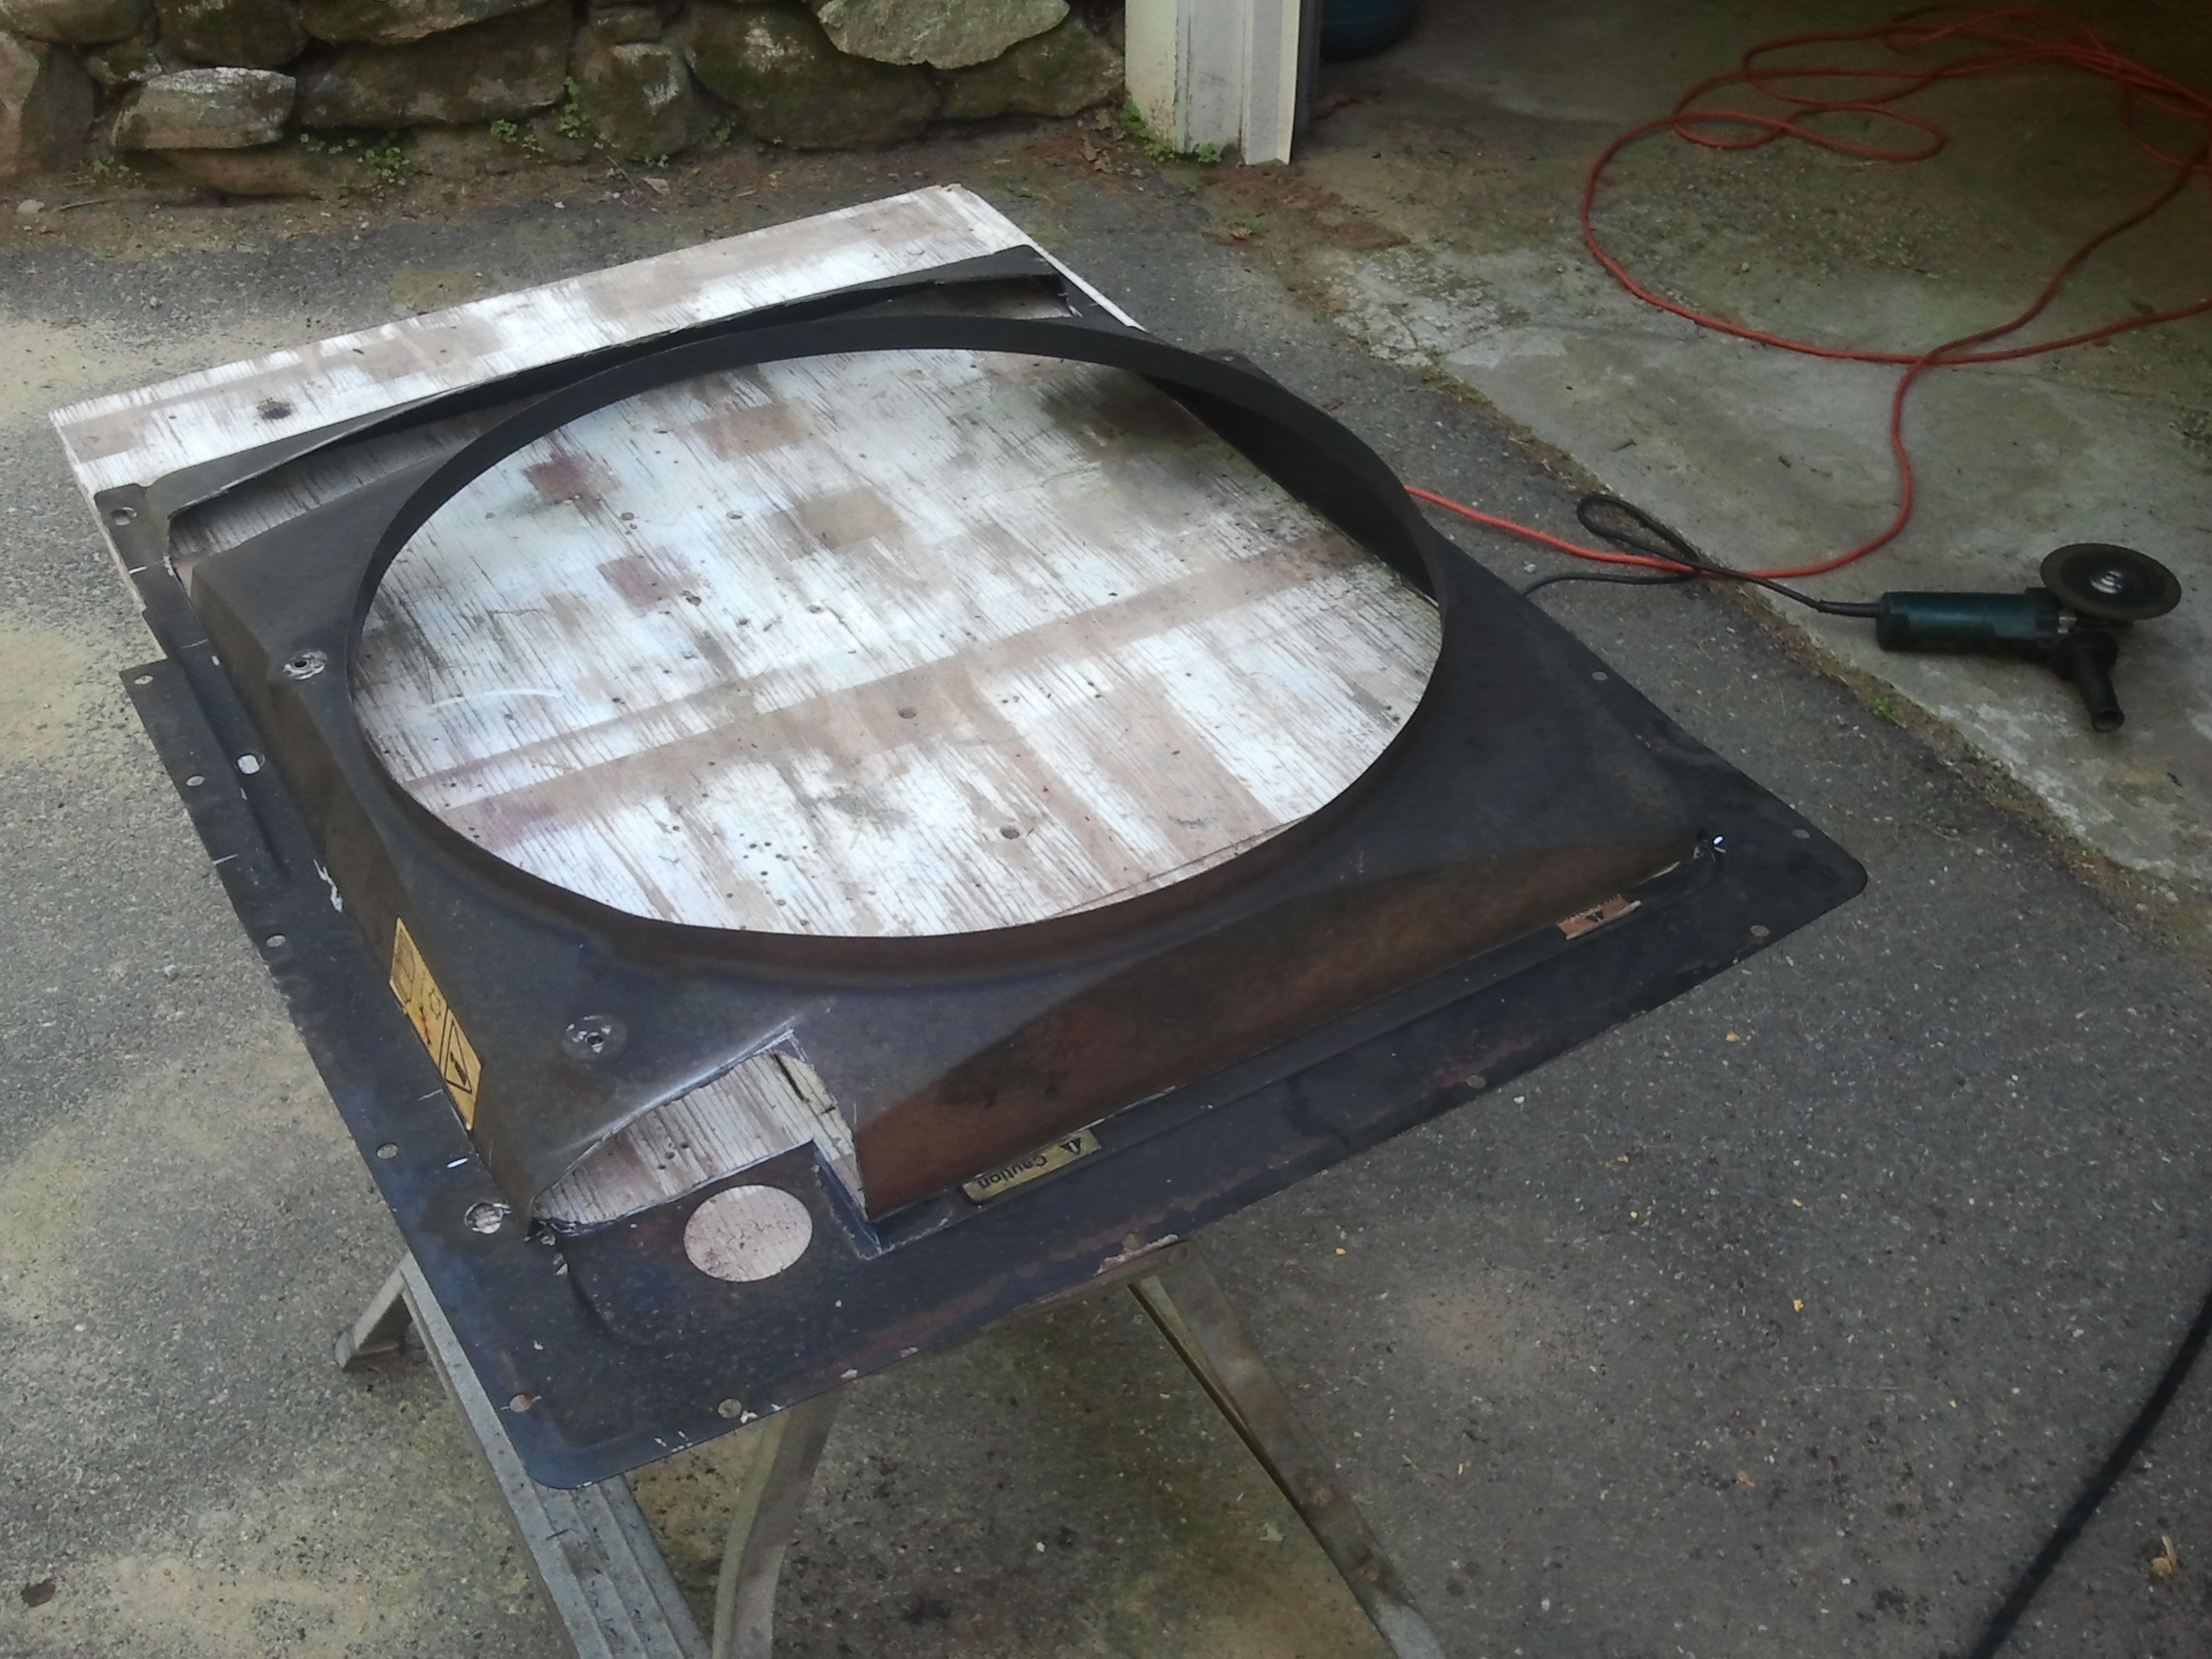 The inner shroud was then repositioned and tacked into place. Filler pieces were added around the radiator inlet and at the bottom of the inner shroud.
 The inner shroud and fillers were then completely welded in place. ¾” was trimmed from the upper gasket flange, and ¾” filler pieces were added on each side at the bottom of the gasket flange before the shroud was repainted with flat black paint and reinstalled on the radiator.